Wednesday, February 1, 2017

Hive 2 February Tutorial

Hello everyone!  Cheryl here from Hive 2.  Kate and I are playing Queen Bee Switcheroo so I get to take my turn this month. Yay for me!!

I had planned to ask for a particular block, one that I’ve been obsessing over for quite some time. But while pouring over my stash, I just wasn’t feeling it. Maybe next time. J 


How about a Granny Square Block instead? Granny Squares are great scrap busters, and I happen to LOVE scrappy quilts. So win, win!! Both Sew Fresh Quilts and Blue Elephant Stitches have written great tutorials for granny squares if you want to check those out. There are also tons of inspiration for them on Pinterest and Google images too.


For this block, you’ll need four coordinating fabrics, all cut into 2 ½” squares:
         Background fabric - 12 squares
         Outer ring fabric - 8 squares
         Middle ring fabric - 4 squares
         Center fabric - 1 square

For the background squares, please use a white on white fabric if possible. Solid white is ok, too if that’s what you have on hand. 

For the other three fabrics, choose bright, saturated fabrics in solids or small to medium scale prints. Contrast is key.  Feel free to fussy cut a novelty print for the center square if you want. Really, anything goes EXCEPT brown, beige, cream or licensed fabric please.

Lay out your squares like this:


First, stitch the pieces into rows. To help nest the seams, press all the seams in the row in the same direction. Press the next row’s seams in the opposite direction. (example: Rows 2, 4 & 6 to the right / Rows 3 & 5 to the left)


Next, sew rows 2-6 together nesting seams as you go. Press seams away from the middle.


Attach rows 1 and 5 last.  I found it helpful to fold the row 1 & 7 single pieces in half and finger press a crease in the middle.  Then fold the middle pieces of rows 2 & 6 in half to make a center crease as well. 
Line up the crease marks and stitch the last two single pieces on to the block. 
Press seams away from the center row. 

Please do not trim your blocks. I’ll take care of that when I receive all of them.


I can’t wait to see what you come up with!

Happy Quilting!
~Cheryl
@wvgirlintenn

Hive 8 - February Tutorial


Hello to all my hive mates!

My name is Rochelle, I live in Ocala Florida. Since I live in sunny Florida, it is hard to find time to stay inside to sew, most days I’d rather at the beach or on the boat.  I have been crafting since an early age, and have dedicated a more time to quilting over the last few years. I am so excited to be your Queen Bee this month, what a great birthday present to have all your blocks on the way! Please forgive my photo quality, I recently moved and my good camera is still packed away.

After much deliberation I decided on an arrow block, which I have been wanting to make for quite some time, just never getting around to it. 
 

I have based my instructions on this tutorial provided by Carla at Grace and Favor: http://carla-graceandfavour.blogspot.com/2014/05/arrows-how-to.html

For the fabric, I request that you do not use any batiks or solids (I’ll be forgiving if you must). For the arrowhead and shaft please use a dark gray, navy, black or dark brown (dark green could even work). Use any colors you’d like for the fletching (feathers), try to steer clear of dark fabrics here since we are using dark for the shaft. I’m not a huge fan of bright orange/yellow (you’ll notice I used a burnt orange and a mustard in my pull).  For the background and nock (the end of the arrow) please use low volume prints, you can use the same print for all background pieces or you can use all different prints (the original tutorial even pieced some of the background strips).

To give you an idea of the colors I’ll be using, here is my fabric pull:


The measurements Carla used in her tutorial allow the block to vary in size, to keep our blocks identical please follow my cutting measurements below:

3 strips 1 Inch x 20 inch (Feathers) – any color
2 strips 1 ½ Inch x 20 Inch (Feathers) –  any color
2 strips 3 Inch x 20 Inch (Background) – low volume
1 rectangle 4 ½ Inch x  2 ½ Inch (Arrowhead) – dark
2 squares 2 ½ Inch (Arrowhead) – low volume
1 strip 1 Inch x 19 Inch (Shaft) – dark
1 rectangle 1 Inch x 2 1/2 Inch (Nock) – low volume
2 strips 2 1/4 Inch x 11 3/4 Inch (Background) - low volume

Finished size 23" x 4 1/2"

* I did not add pressing to each step as I didn't think it to be necessary, but I do ask that you press all seams open.                                                                                          

I started by making the flying geese block for the arrowhead using the 4 ½ inch x 2 ½ inch rectangle and 2 ½ inch squares.

If you need further instruction on how to make a flying geese block I found a great tutorial by connecting threads (you’ll use the first method since you’re only making one): https://www.connectingthreads.com/tutorials/Flying_Geese-Make_em_fast-two_methods__D15.html

I then constructed my feathers by sewing all the colored strips together, you can put the sizes in any order you’d like which will give our blocks some variety. Add the two 3 inch strips of background on either side of the colored feather strips and you should have this:


Now we'll need to cut our feathers, place the 45 degree line on your ruler on the bottom of the strip set then match up the 1" line on the top right corner and cut:


Now rotate so that the cut you just made is on your left, use your ruler to measure and cut a 2 1/4" strip:


Now we will repeat these steps on the other side of the block.  Again, place the 45 degree line on your ruler on the bottom of the block then match up the 1" mark on the top left corner and cut:


 Rotate the block so your cut is now on the left and use your ruler to measure a 2 1/4" strip and cut:


If all your cuts were correct, the pieces should like this if put back together:


We'll need to square up the 2 1/4" strips, I measured 1 1/2" from the point to square them off.


Repeat on both sides.


You can start to see the arrow coming together! Now sew the nock to the shaft, and sew each feather set to the background piece.  Be careful that your feathers are facing out (you can tell I made that mistake originally and had to undo the block!)


Now attach both feather/background sets to the shaft:


If your background pieces are just a hair longer than the shaft, please trim to match the shaft then attach your flying geese unit and we're done! Don't worry about squaring up the block, I can get that done before I add sashing. 


Since this block creates a lot of waste, the original tutorial used the middle triangle for extra blocks. I would love to put those extra pieces to good use!  I adored Abigail's idea to have everyone sign a block so I'm asking if you would be generous enough to do the same on the large strip (low volume print) on the triangle that is left over. It will be fun to look back at who and where the block came from.  I could also use the left over corner pieces so they are not wasted but if you'd like to keep shipping costs low, don't stress about it!

Look how nice those extra triangles come together!


Thank you for letting me your February Queen and I hope you had fun!

Hive 1 Tutorial for February

Hi!  I'm Jennifer, this is my second year in the Stash Bee.  I'm looking forward to another great year.  I chose a paper-pieced block last year, but decided to go with something a bit easier this year.

For my block, I would like you to make a crosses and losses block in something on the blue or green spectrums, with a scrappy low volume background.  I was inspired by this quilt from Fresh Lemons Quilts, but would like a more limited color palate.  Her quilt is done in 8.5 inch blocks, but I'd like to go bigger.  We'll be making 16.5 inch (unfinished) versions like this:


For your colored fabrics, please choose a blue or green print or solid.  Anything on the blue, green, or blue-green spectrum is great. Teal, turquoise, aquamarine, they're all good.  If you gravitate towards lighter hues, just make sure the fabric stands out from your background choices.  Some fabrics I pulled:


For the background pieces, choose a scrappy assortment of low volume, or solids in white, cream, or light grey:


From these fabrics, you will need to cut as follows:

Blue or Green:
1  9" square
2  5" squares

Background:

1  9" square
2  5" squares
4  4.5" squares


Now we will make the half-square triangle sections.  (The method I like using best is below.  If you have a different way you like to make them, go for it!  The finished units should be 4.5" square and 8.5" square.)  Match the color squares with background squares of the same size, right-sides together.  Draw a diagonal line corner to corner.

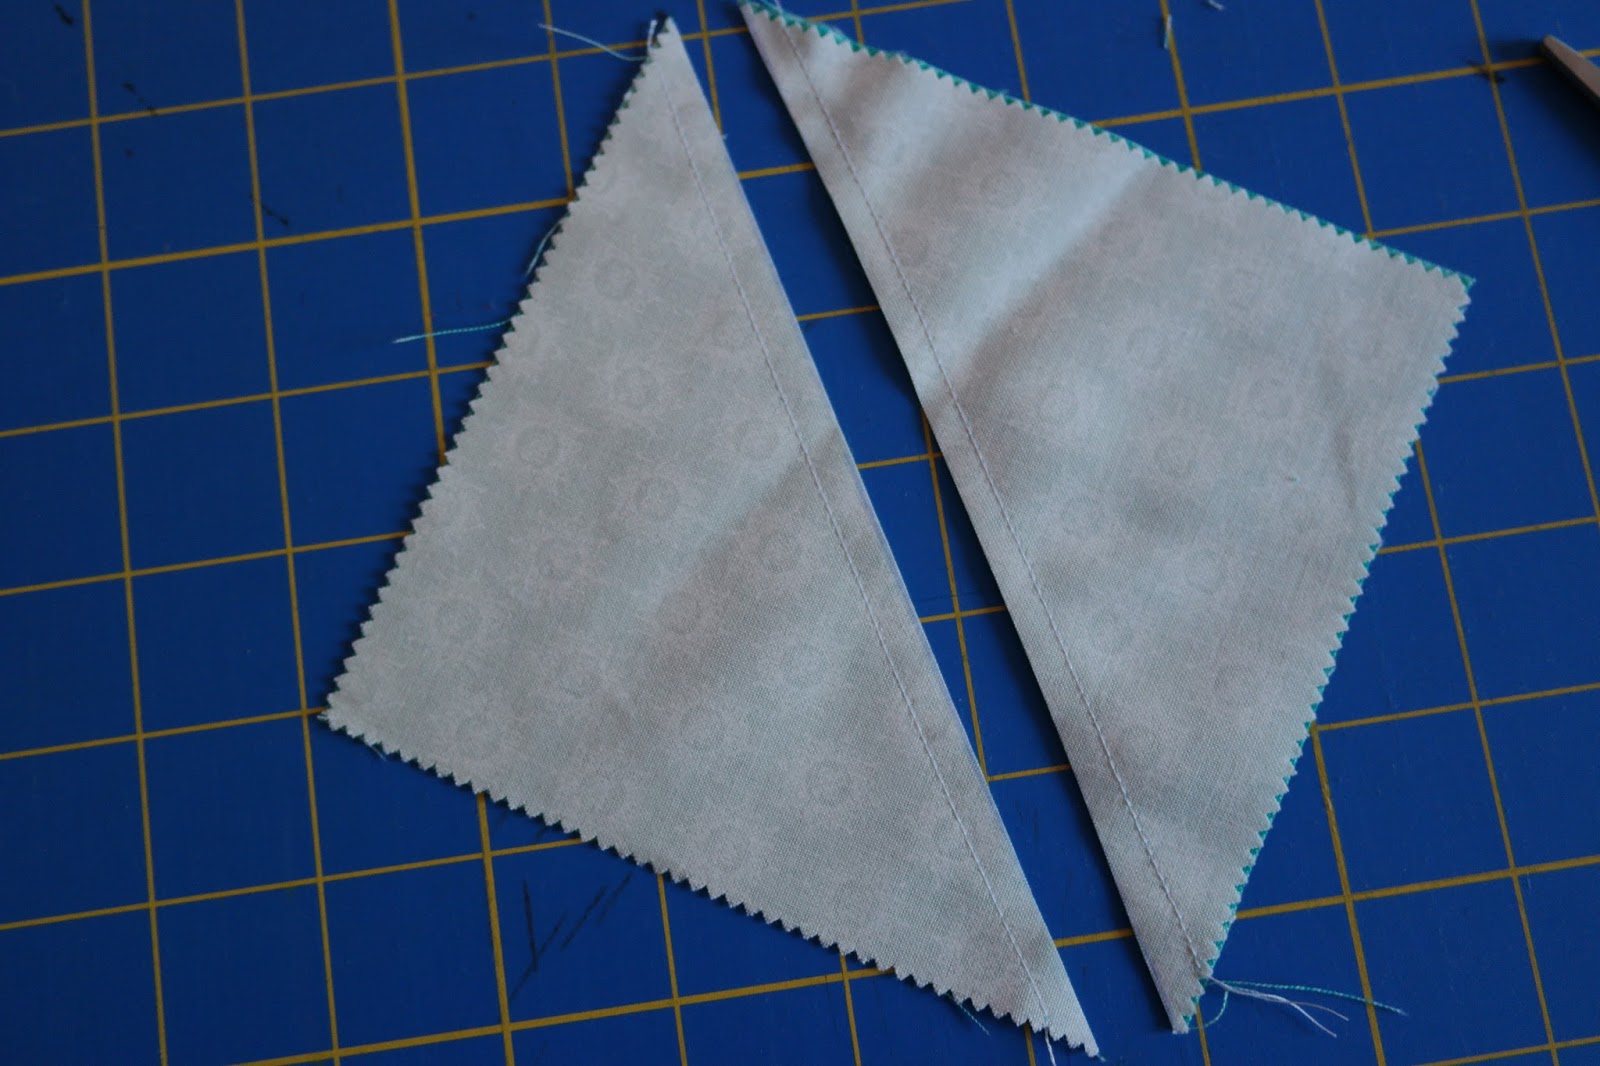
 Sew 1/4' on either side of the line, then cut on the line.  Press the seams open.  After pressing open, trim the smaller units to 4.5" square, and the larger units to 8.5" square.


Arrange the half-square triangles and low volume squares into quadrants as in the picture below.

 Sew the small four patches together, pressing seams open again.

Sew these four, and you're done!


The block should measure 16.5", but don't worry about trimming, or if it ends up a bit small.  I'll make it work!  Please let me know if you have any questions.  I can't wait to see the finished blocks.