
Hello Hive 1 Bees!
I am so happy I found this community. It's been lovely quilting with y'all so far. For this month, I wanted to pick a quilt block that would help me commemorate my first year in this stash bee. Therefore, I am requesting envelope blocks that will help represent the individuality of our hive.

Fabric
This part is easy! Choose whichever fabric speaks to you. Ideally, I would like you to choose two of your favorite fabrics for the envelope main fabric and the envelope liner fabric. For the background, please choose a complimentary solid color fabric.
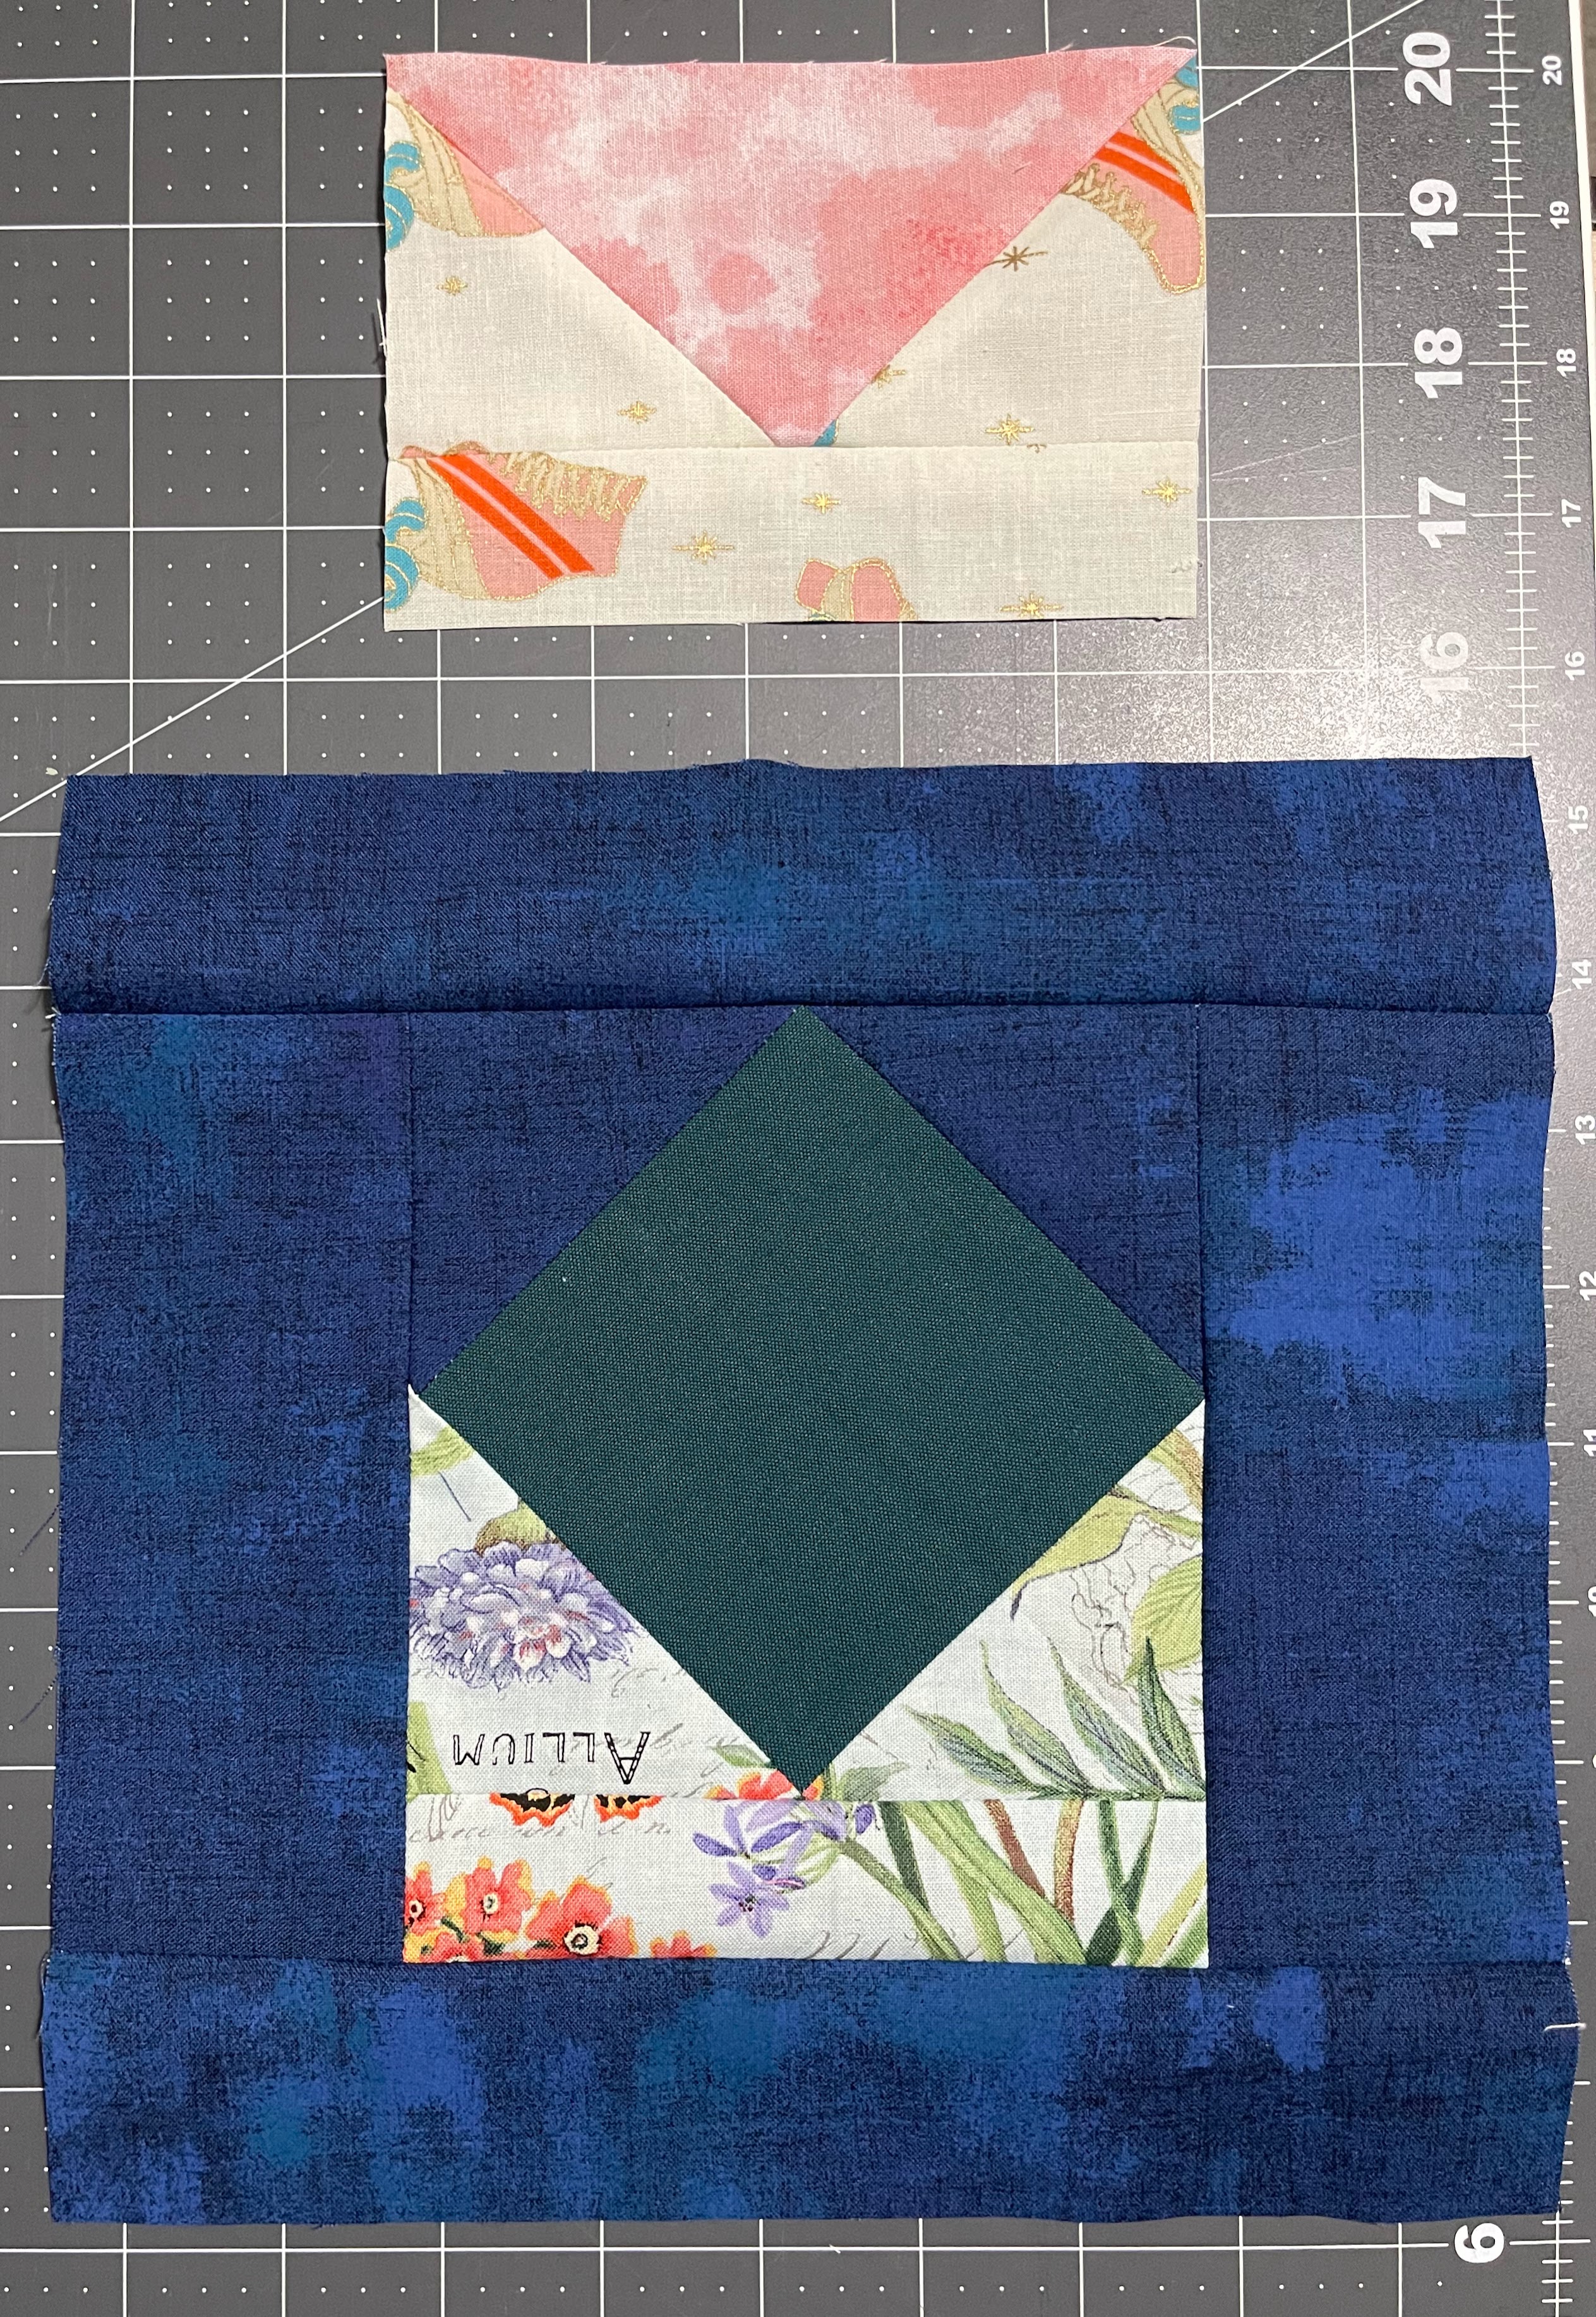
Tutorial: Open Envelope Block
The tutorial can be found on SpoonFlower's Blog and was originally created by Andrea Tsang Jackson of 3rd Story Workshop.
I've summarized the tutorial here using pictures from when I practiced it at home. For the quilt block, please use a 1/4" seam allowance. I have no preference for how you choose to press your seams.
Materials
Main envelope:
- 1x 3.5″ square, cut corner-to-corner to make (2) triangles
- 1x 1.5″ x 5.5″ rectangle
Envelope “liner” fabric:
- 1x 4″ square
Background fabric:
- 2x 2.5″ x 6.5″ rectangles
- 2x 2″ x 9.5″ rectangles
- 1x 3.5″ square, cut corner-to-corner to make (2) triangles


Assembling the Envelope Block
Mark the center of the long side of the triangles. Similarly, fold the envelope “liner” square in half in both directions to find the center of each edge.

Take one triangle of each fabric and center the long sides on opposite edges of the square. Join together. Trim overhang. Repeat with the other two triangles. Square up the block to 5.5″ x 5.5″.
Join the 1.5″ x 5.5″ (4 x 14 cm) rectangle of main envelope fabric to the bottom of the envelope. There’s your open envelope!


Adding the Background
Add the side borders: Join the 2.5″ x 6.5″ background rectangles to the right and left of the envelopes. Add the top and bottom borders: Join the 2″ x 9.5″ (5 x 24 cm) background rectangles to the top and bottom of the envelope block.


Extra Credit (OPTIONAL)
Hi there! You know what goes great with open envelopes? Tiny letters! Haha! If you have some extra time/fabric, I would love to receive a closed envelope block (they almost look like tiny letters to me). They are basically just a flying geese block with an extra strip of fabric. The closed envelope tutorial is a part of the same Spoonflower series (just to be clear I'm only looking for envelopes not the whole block from the link).

Materials
Main envelope fabric:
- 2x 3″ squares
- 1x 1.5″ x 5.5″ rectangle
Envelope “flap” fabric:
- 1x 3″ x 5.5″ rectangle
Assembling the block
Mark a diagonal line on the back of both 3″ (8 cm) squares of main envelope fabric. With the wrong sides together, place one of the 3″ (8 cm) squares on top of the “flap” fabric, aligning the edges. Sew along the marked line.
Trim off the corners 1/4″ away from the stitch line and press the seam toward the main envelope fabric. Repeat with the other 3″ (8 cm) square of main envelope fabric at the other end of the triangle. Note the orientation of the diagonal line.


Join the 1.5″ x 5.5″ rectangle of main envelope fabric to the flying geese block along the edge with the triangle point. There’s your envelope! It should measure 5.5″ x 4″. Repeat to create as many as you'd like.


Thank you all in advance for helping me! If you have any questions or concerns, just shoot me an email. Hope you have a fun time sewing :)
-Nik
No comments:
Post a Comment