
Hello hive,
I've been playing around with folding fabric to get fun shapes and so for this months block I'd love you all to try a fun variation on a cathedral block. I'm still not sure what the actually name of the block is (I've found it under a few different ones) but I'm going with twirly windows.
 |
| Finished block |
This block uses three fabrics: 1 dark, 1 medium/light, and one white. I'd love it if you could pick something that reads as solid from a distance - tone on tone, blenders, solids, small patterns. With regards to colors, cool jewel tones would be great. Here's a picture of some pairings I pulled from my stash. The patterned piece is what I'm hoping to use as a binding.
 |
| Color picks and binding option |
Please note that this pattern uses quite a bit of the white/off-white. Feel free to make the whites scrappy. If you go scrappy, I'd love it if you really mixed up their placement in the block, rather than having the same ones right next to each other.
Cutting:
4 [8.5*8.5"] squares of the dark fabric
4 [8.5*8.5"] squares of the medium/light fabric
12 [8.5*8.5"] squares of whites - scrappy totally good
 |
| Cut squares |
Folding/Pressing
A lot of this block is actually folding. Fold each of the white and dark squares in half along the diagonal, creating a triangle. Press. At the end of this step you should have 4 [8.5*8.5"] squares in medium, 12 [8.5*8.5] triangles in white, and 4 [8.5*8.5] triangles in the dark fabric.
 |
| Folded fabrics |
Assembly
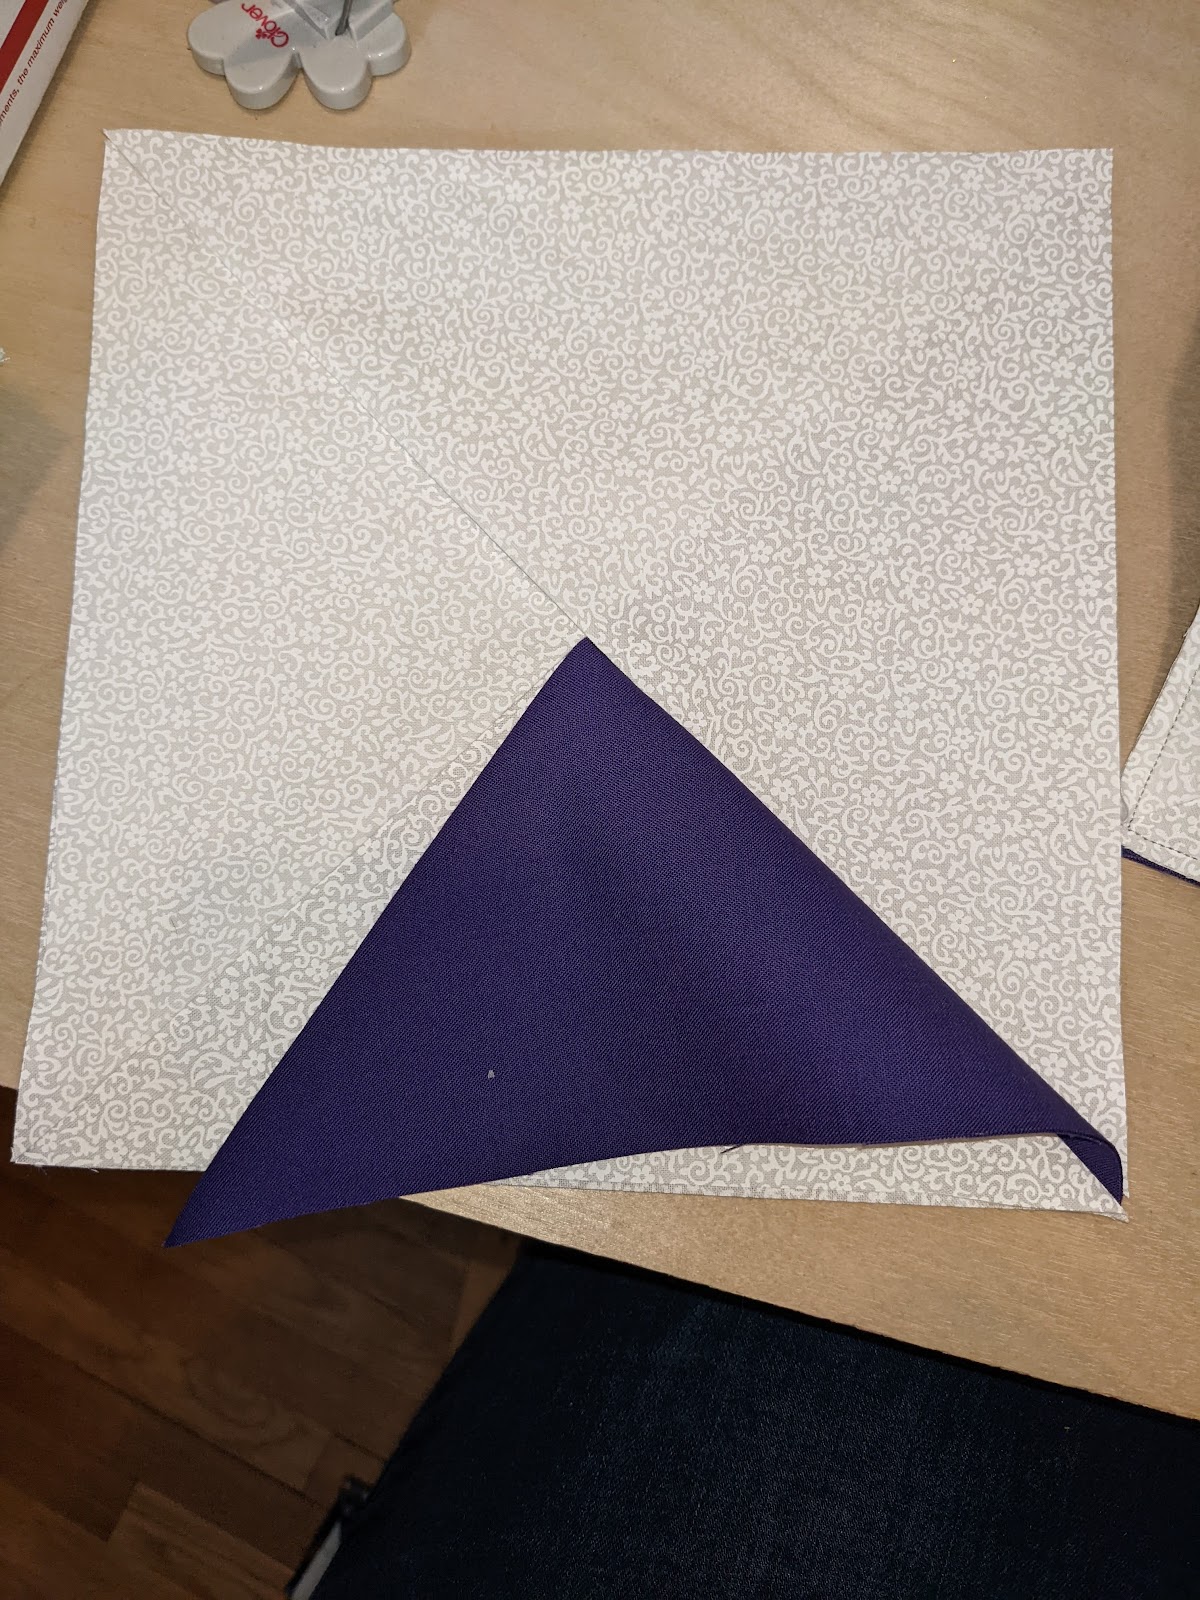
This is the fun part. We will be making 4 quadrants. For each quadrant you will need 1 medium tone square, 1 dark tone triangle, and 3 white tone triangles
Start with 1 of the medium tone squares. Place 1 of the dark tone triangles on top of it, lining up in the bottom right corner (shown below). (No sewing yet)

Add two white triangles, moving clockwise around the block (lower left corner, then upper left corner). Each triangle should be laid on top of the one previously placed.
 |
| Addition of 1st white triangle |
 |
| Addition of 2nd white triangle |
 |
| Dark triangle folded back to allow the addition of the 3rd white one in in the upper right corner |
Adjust as necessary to ensure you are lined up with the medium square underneath. Pin all pieces in place and sew a 1/8" seam around all four edges of the block.
For those having difficulty visualizing this step. I found a great video tutorial of the technique here.
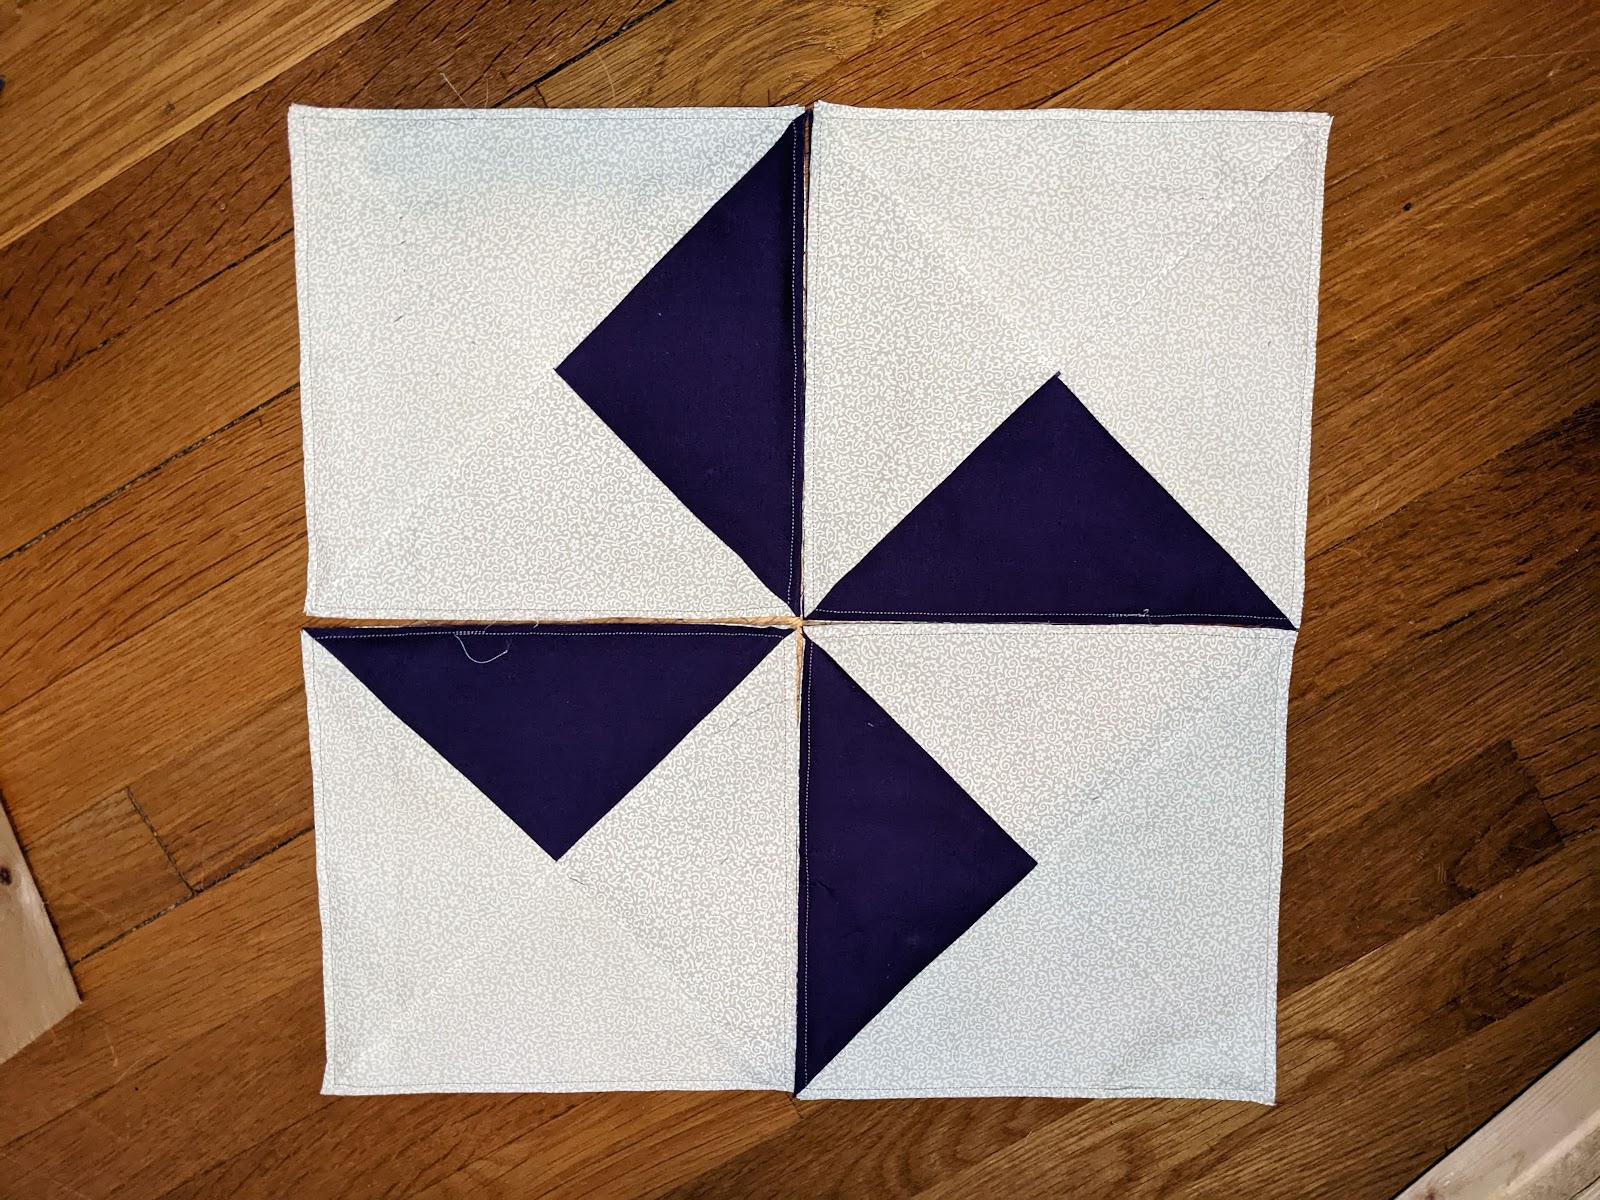
Repeat with remaining pieces of fabric, for a total of 4 quadrants.
 |
| 4 quadrants with 1/8 inch seams. |
Putting them together
Line the blocks up to create a pinwheel (shown below).
 |
| Final layout |
Sew the upper two squares together with a 1/4" seam allowance. Press towards the dark triangle.
Repeat with the bottom two squares.
Sew upper and lower half together (seams should nest), with a 1/4" seam allowance. (This gets a little bulky)
The finished block should measure 16.5*16.5".
 |
| Finished block |
You may be thinking, "this doesn't look like the block in the first picture". To achieve the window portion of the block each of the triangles will be folded back, creating a curve and exposing the medium tone block below. However, I'd like to do this after all the blocks are assembled to ensure I don't lose any points. To see what your final block will look like you can pin the fabrics back as I've done below.
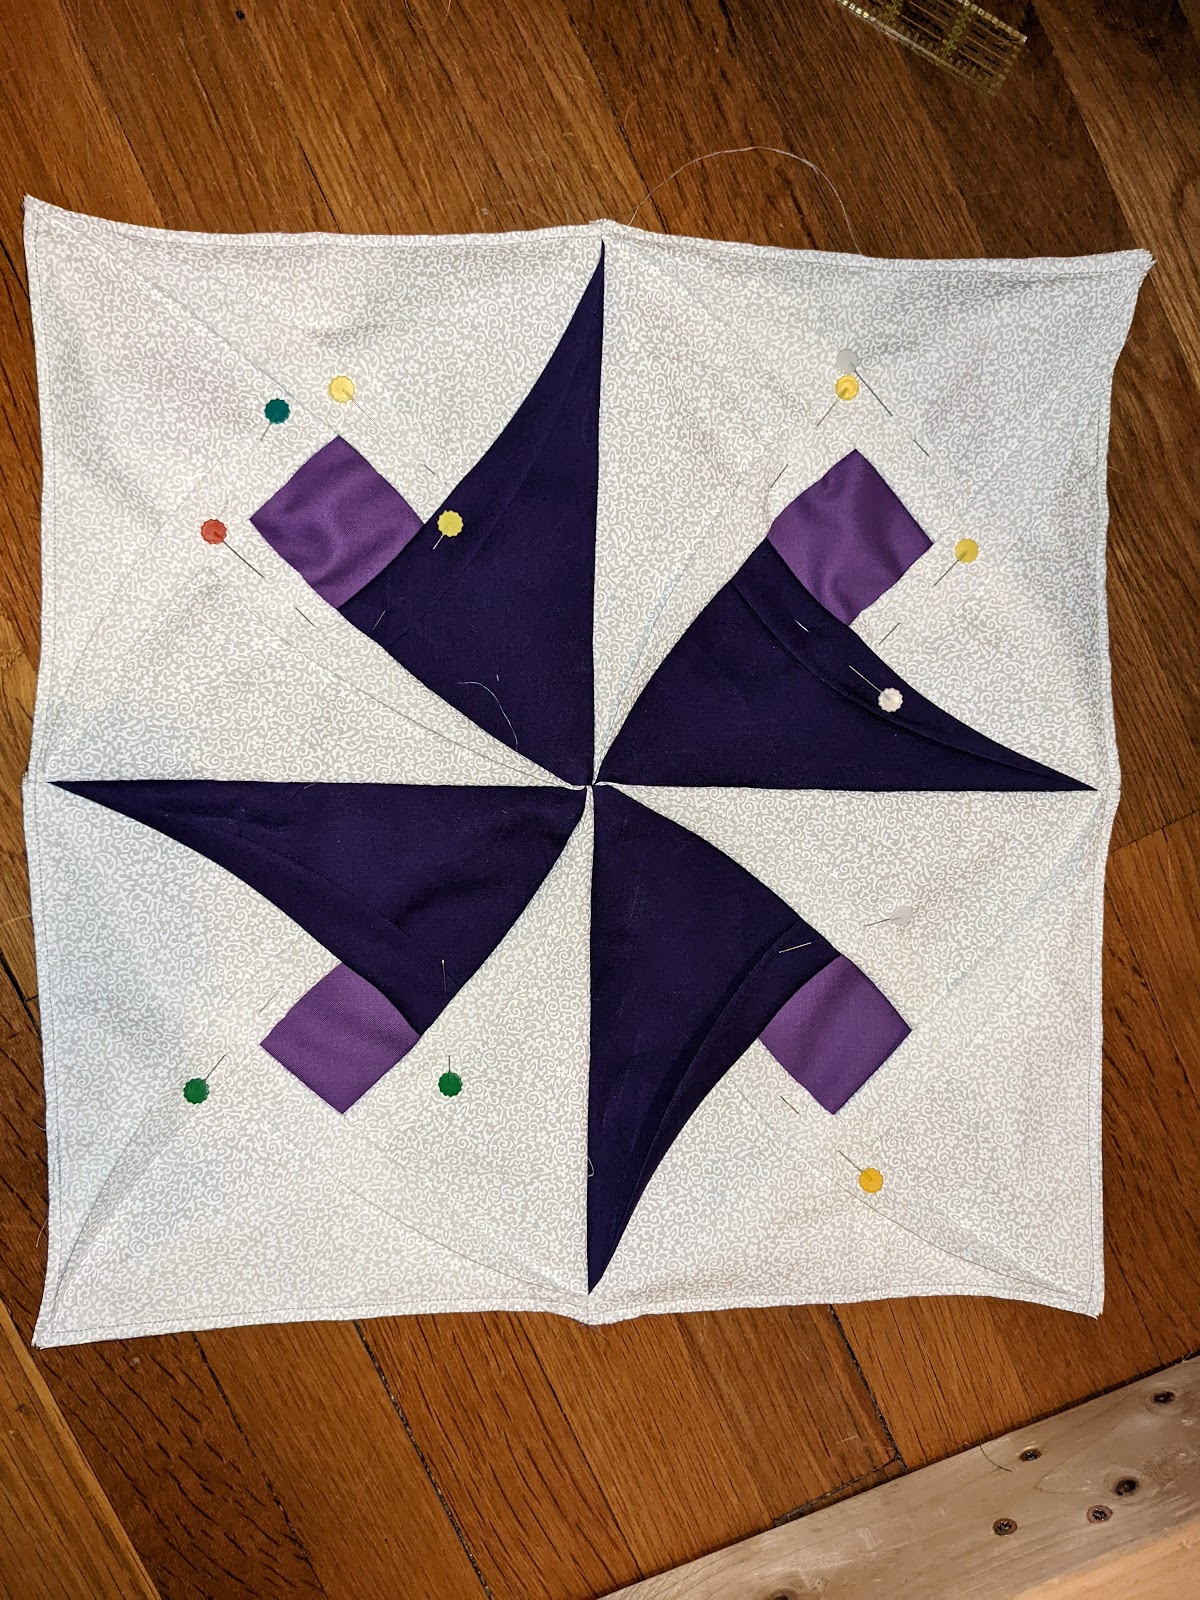 |
| Finished block, pinned open |
I hope you enjoyed trying this piece. I can't wait to see your windows!
No comments:
Post a Comment