
Hi everyone! I'm Heather Seminelli, but you can find me as Bobbins and Bullets on Flickr and instagram. I blog at bobbinsandbullets.blogspot.com. I think some people find the name scary, but my husband is in the Army and I used to be in the Army as well, so the name used to make more sense. I keep debating changing it, but can never decide what to change it to...
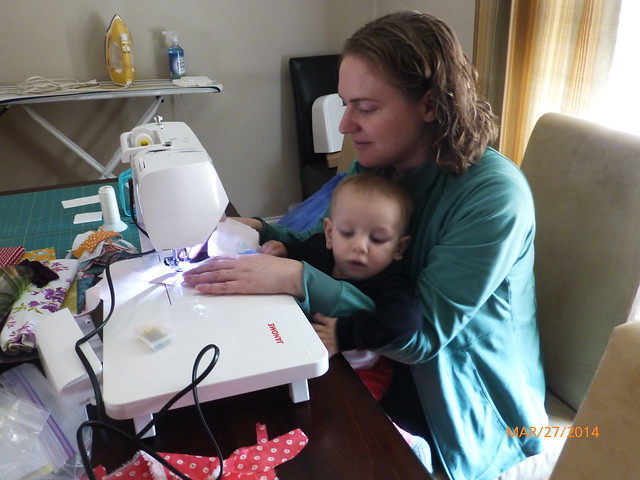
This is real life sewing in my household! My daughter is my sewing buddy, although her main talents so far include un-threading the machine and going through my scrap bin and thread storage. (Don't worry - I don't let her fingers near the machine when it is sewing!)
This is real life sewing in my household! My daughter is my sewing buddy, although her main talents so far include un-threading the machine and going through my scrap bin and thread storage. (Don't worry - I don't let her fingers near the machine when it is sewing!)
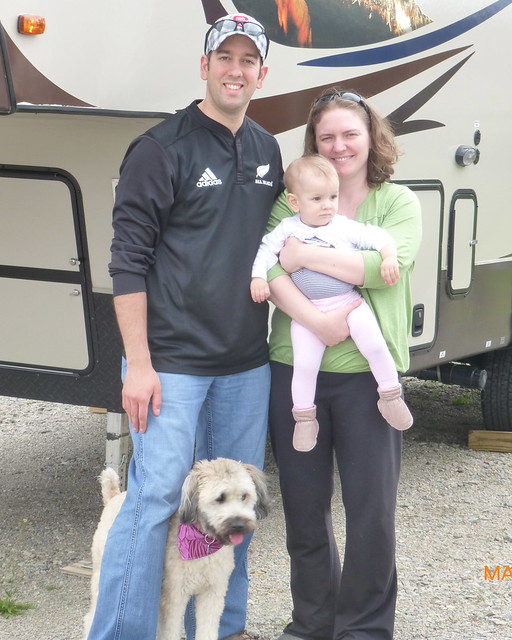
I currently live in North Carolina, south of Raleigh. I live with my husband, 14.5 month old daughter, and my dog (Tessa- the best Wheaton Terrier on earth).
As a child I went to the Sisters (OR) Quilt Show multiple times, but we lived nearby so it was just something to do. Even my parents didn't know how big of a deal that show is. I also went to Hawaii for my honeymoon in 2007 and had the great idea (born of not knowing any better) that I could totally do a hawaiian style quilt myself. That quilt block is still sitting un quilted. Ironically, I finished the harder needle turn appliqué portion but the echo quilting by hand got me. I need to put it on my machine and turn it into a pillow or something.
Fast forward a few years, and I decided I really wanted to learn how to quilt. I don't know exactly why I decided to do it, but I think seeing the quilt shows as a kid is as a good a reason as any. When we lived in the middle of nowhere in Missouri, I bought a sewing machine online without having ever used one before, and took some classes at the nearest quilt shop, which was about 1.5 hours away. I haven't stopped since!
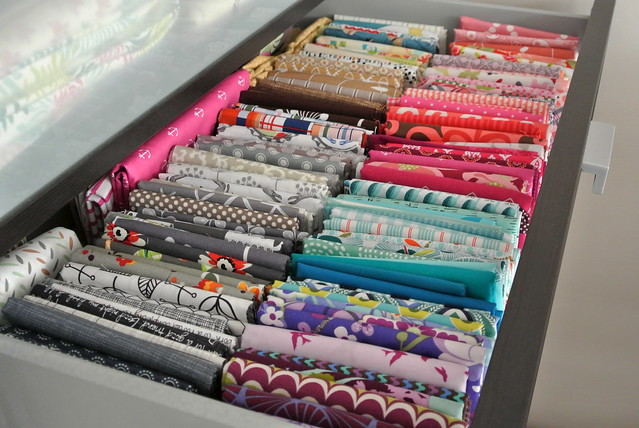
How do you organize your fabric stash?
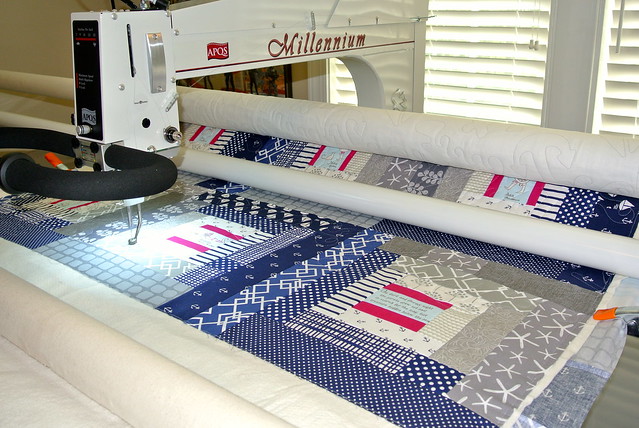
I usually buy in 1/2 yard increments. I fold them up, and store them in color order in dresser drawers. Larger cuts and flannel goes in the top drawer. I also have an Ikea Expedit that has more cubes that keep getting claimed by me. I keep precuts and some fabrics that are set aside for specific projects in those drawers. Fabric for clothes gets pre-washed and is stored in plastic containers under my long arm.
I usually buy in 1/2 yard increments. I fold them up, and store them in color order in dresser drawers. Larger cuts and flannel goes in the top drawer. I also have an Ikea Expedit that has more cubes that keep getting claimed by me. I keep precuts and some fabrics that are set aside for specific projects in those drawers. Fabric for clothes gets pre-washed and is stored in plastic containers under my long arm.
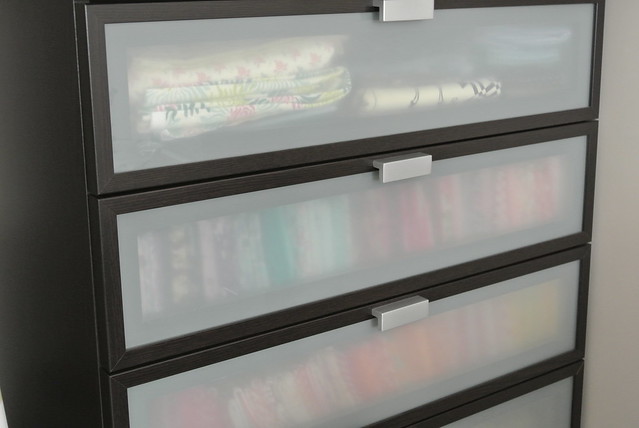
How I fold up the fabric inside the drawers:
Who is/are your favorite fabric designers?
Bonnie and Camille. I love almost everything they do. I also love Sarah Jane. She makes me want to do my daughter's room in her fabrics - every single time she comes out with a new line. After them, I just buy what I think is pretty. I also learned the lesson early on - buy quality fabric. The cheap stuff from a big box store is almost always cheap for a reason! I would rather buy a lower quantity of high quality fabric that put tons of time and energy into a project using substandard quality material that yellows, bleeds, or just doesn't wash well.
Bonnie and Camille. I love almost everything they do. I also love Sarah Jane. She makes me want to do my daughter's room in her fabrics - every single time she comes out with a new line. After them, I just buy what I think is pretty. I also learned the lesson early on - buy quality fabric. The cheap stuff from a big box store is almost always cheap for a reason! I would rather buy a lower quantity of high quality fabric that put tons of time and energy into a project using substandard quality material that yellows, bleeds, or just doesn't wash well.
What is one thing you have learned that you wish you knew when you first started quilting?
Label solid colors when you buy them. Nothing is worse than staring at three different whites trying to figure out what they are. I unfortunately just relearned that lesson when I started sewing knits. Label your interfacing too! I know I don't remember what type of interfacing I bought over a year ago for a project I decided not to make. Labeling when the fabric is new will save you so much time and frustration in the long run.
Label solid colors when you buy them. Nothing is worse than staring at three different whites trying to figure out what they are. I unfortunately just relearned that lesson when I started sewing knits. Label your interfacing too! I know I don't remember what type of interfacing I bought over a year ago for a project I decided not to make. Labeling when the fabric is new will save you so much time and frustration in the long run.
What is your favorite sewing/quilting tool and why should we all go out and buy it?
I am a huge fan of the little silk pins for pinning. When I first started, I used huge pins that I bought cheaply. (I had to learn the quality costs more for a reason lesson several times when I was starting out). I couldn't believe how much my points improving once I started using tiny pins.
I am a huge fan of the little silk pins for pinning. When I first started, I used huge pins that I bought cheaply. (I had to learn the quality costs more for a reason lesson several times when I was starting out). I couldn't believe how much my points improving once I started using tiny pins.
Who is your favorite fictional character and why? (Could be from a book, movie, TV show, etc.)
Currently, Gibbs from NCIS. I love that show way more than I should!
Currently, Gibbs from NCIS. I love that show way more than I should!
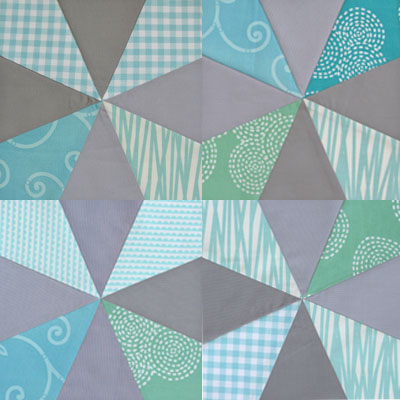
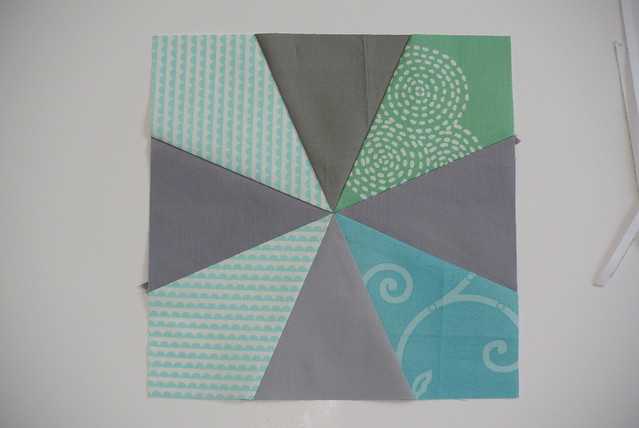
And now on to the block! This is the Square Dance block, or Sacramento block when 4 are combined together as shown below.
So… I am now asking for at least 1 of these. It's really easier to cut for two at a time, but I will be happy with whatever you are willing to provide. It's a pretty quick block. I made 5 of these in about an hour last weekend. And for the rest of this tutorial, I will be referring to what I originally considered a "subunit" as the block. If you do make more than one, please don't sew them together. It will make it easier for me to mix them if they are separate (especially since I'm not sure how many I will get).
Colors: I am making this block with solid grey and aqua colors. I would prefer a grey in the light to medium shade range, but I can take darker if it's all you have. I used a variety of grey hues in my sample blocks so that they will blend with the variety of grey solids from all of you. For the aqua part, please use any patterned fabric in the aqua/turquoise/mint green region. Depending on the tone, it could even go into light blue. The color range I'm using is shown in the block above. I would prefer at least 3 different fabrics in each block. If you have 4 colors, even better.
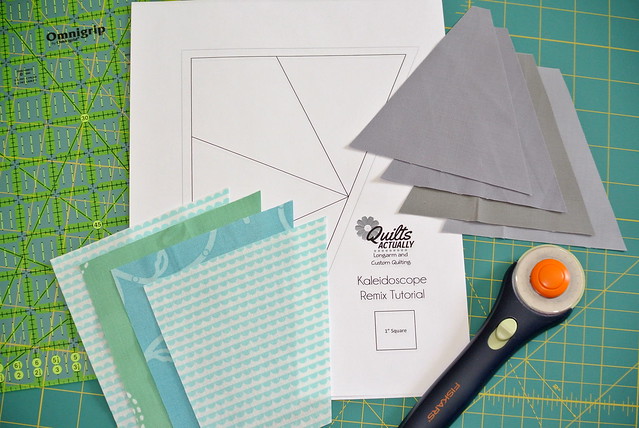
In order to not clog up everyone's blog feed, I have a separate tutorial if you are new to paper piecing, or want to see how I do it. The paper piecing tutorial is available here.
The paper piecing pattern to make this block is available on Craftsy. I have it listed for free, and will leave it free for the month of May so that anyone wanting to make this block can download it.
Cutting Instructions: These instructions are to make the paper piecing go faster, and make cutting the fabric from yardage easier. If you have a different method, or are using scraps, feel free to cut as desired.
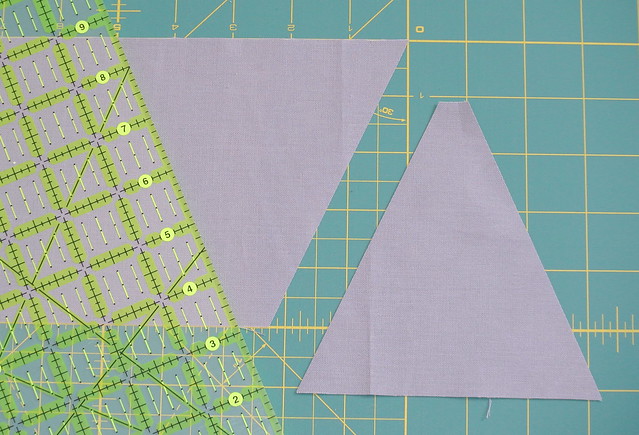
Grey:
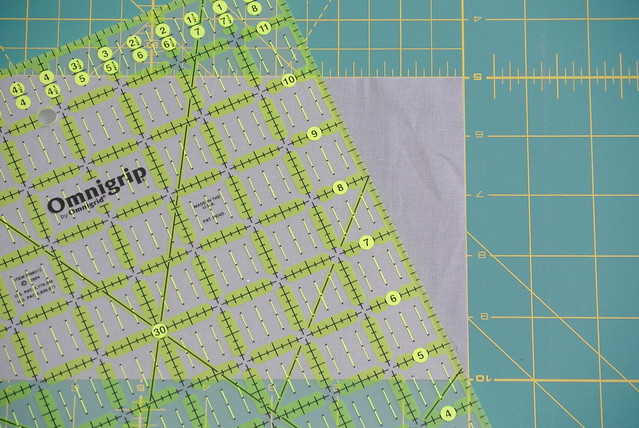
For 1 block, cut a grey piece 13.25 inches by 5 inches. This has no waste, so if you like extra fabric cut it longer than 13.25 inches.
Align the corner of your ruler with the bottom corner of the grey fabric. The top edge of the ruler needs to be 2.25 inches in from the top right corner.
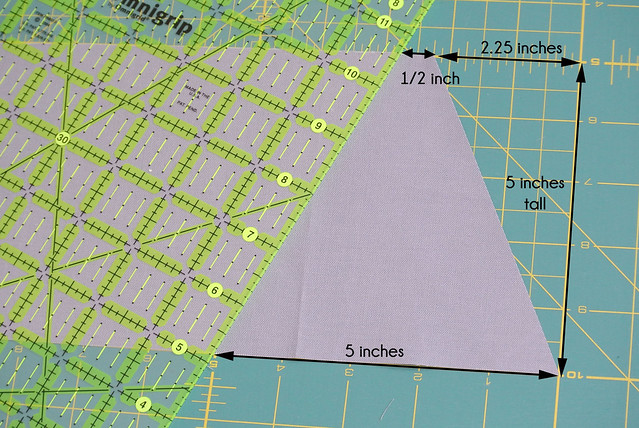
The second cut will be as shown below. The top edge of the ruler needs to be 1/2 inch from the top right cut edge. The bottom of the ruler needs to be 5 inches from the bottom right cut edge.
Continue cutting using this method for as many grey triangles as you want to cut. The measurements remain the same, but alternate between the top and bottom edge as the long edge.
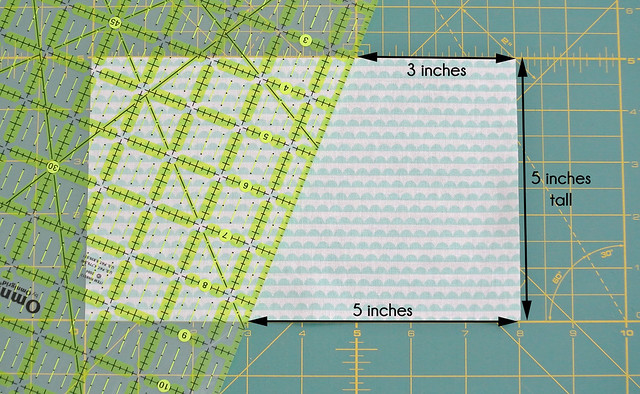
Aqua:
For the aqua pieces, you can get two pieces from each 5 inch by 8 inch rectangle. Line the ruler up three inches from the top right edge and 5 inches from the bottom right edge.
Then cut...
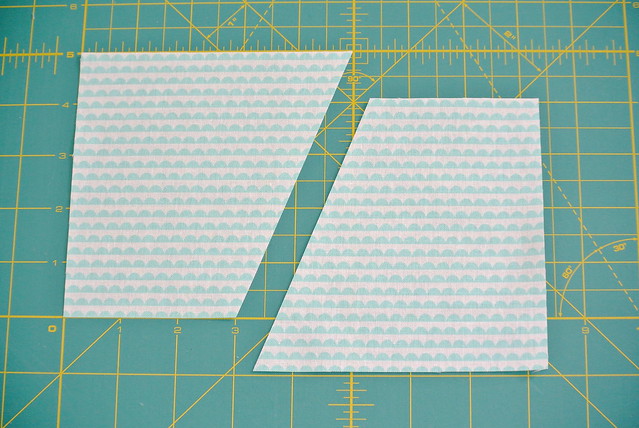
When you finish cutting, for one block, you will have 4 grey triangles and 4 aqua trapezoids. Ha! I just noticed this picture has the wrong block name on the pattern! It took me awhile to research the more correct name, so originally I was calling it the Kaleidoscope remix because it is similar in style to that block.
On to the paper piecing! If you are familiar with paper piecing, go ahead and get started sewing using your favorite method. If you are not familiar with paper piecing, I have a very detailed tutorial for this block available here.
Your completed block will look like this:
Thanks for following my post this far down! If you have any questions about this block, please let me know, and I'll be happy to help out :)
-Heather
4 comments:
another skillbuilder for me :-) I think this will be the second time I have to PP, I can see why so many quilters PP but I'm always a little intimidated. On the other hand; the tutorial is a great help!!!! Thanks for that :-)
Do you want each block to only have one grey in it, or is scrappy (solid) grey desirable?
We are traveling now, but you are my top priority when I get home. Sorry to be so late in the month getting to this. I had two projects I had to finish before we started this trip.
I'm sending three subunits. I have tried gettig that fourth one right and I just keep getting worse and worse! Sorry Heather!
Post a Comment