Hello from the rainy Northwest. Winter has come to Vashon, WA, and that makes me want a little more color in my world.
This is my first block exchange, and I've really been enjoying making the blocks we've worked on this year. I look forward to seeing what each of you has done with the blocks you've received. Another thing I have loved about the process has been getting to know my own stash again and finding bits of fabric I had completely forgotten about!
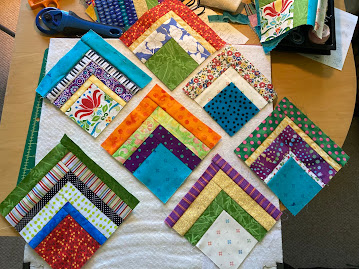
I went back and forth over which block to request, and finally decided on a 1/4 Log Cabin block. The design is based on the classic log cabin block, starting with a square and building out around it - but you only add 'logs' on two sides of your original square, so that first square ends up being in one corner of the finished block.
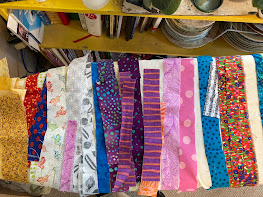
Since I didn't know what to expect, I decided to do a really scrappy block, and it's been such a fun process I thought it would work well for this block exchange, and then I'll have more to add to this quilt!
No need to have every log in your cabin be one of those colors - I'm hoping each block will have a bit of one of those colors in it somewhere, but it's more important that the colors in your block blend with or complement those basic colors. The overall look of the squares can be quite scrappy, with the unifying theme between the blocks being that bit of blue aqua/lime/grass/salmon pink range.
Here are some of the squares I've sewn so far - you can see they're all over the place with color:
Please make TWO 6.5" blocks for me.
Kim Brackett has a good tutorial on making the 1/4 Log Cabin block at her Magnolia Bay Quilts blog here: 1/4 Log Cabin Tutorial. She explains the "squaring up" process really well too, with annotated photos (which I couldn't quite figure out how to do) so that part might be extra helpful in a way I am not provide below (sigh).
The biggest difference between her tutorial and the blocks I am requesting is that all the blocks should start with a 3.5" square.
Your log strips that border the two sides of the 3.5" square can be any width strip between 1" - 2.5", your choice.
Start by cutting a 3.5" square of fabric, and choose a different color for the first log strip you will add.
Build the square by adding a 3.5" long strip on the top side of the block. Press open the log you just attached, toward the outside. Measure the new length of of the right side and cut your next strip piece (the same width and fabric as your previous piece) long enough to extend along the full length of the right side of your block.
Add this new strip on the right side of the block. I find the simplest way to do this is to precut my strips the width of the fabric, and then just lay the strip across the side I need to cover and cut the needed length (plus a 1/4" or so, just in case...) and then square it off after each log is added.
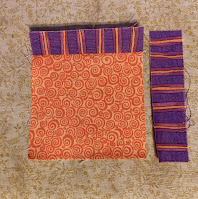
Sew that log on, press open toward the outside of the block, and trim any edges that extend beyond the block edge. I neglected to take a photo of this process for the first striped row, so here are photos for the next row on the same block where you can see the places that need trimming. You can also refer to Kim Brackett's tutorial for good photos on trimming your block too!
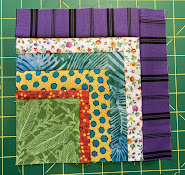
Continue in this manner, adding one strip on the "top", pressing open toward the piece you just sewed on, trimming any extra fabric, adding another strip of the same color on the "right" side of the block, pressing open and trimming until your square is at least 6.5". And then your block is done!
Here are a few more photos of my blocks so far.


.JPEG)


No comments:
Post a Comment