
Hi everyone! This is my second year participating in the Bee Swap! Last year's books are still waiting to be assembled, I have a retreat coming up and plan on working on them there. Turns out I still am much faster at buying fabric and patterns than cutting or sewing or quilting them! 😅
I am a bit swamped with planned projects and my list of UFO's is growing exponentially. I really struggled finding a block that would be fun yet "challenging without being too complicated" and I found one last night while browsing YouTube at midnight (go figure)
Karen Eckmeier's Layered Leaves: Free-Form Curves
This looks like a lot of fun, she also has a video for Free-form Roses that I might try out sometime this year. Top stitch piecing is a new technique for me but I love how organic the process looks.
I would like 2 leaves, like how Karen demonstrates in the video. Turns out I don't have as much green as I thought I did, but here is my pull of varying greens from dark olive to light green.

Fabric/Supplies:
- 2 8" squares: 1 light green and 1 dark green, choose one that reads as a solid/textured green, use any type of fabric except novelty

- Thread in any color, it will be visible but I have no preference if it matches, contrasts etc. with your fabric. I am using a dark gold for the sake of demonstrating so you can see it but you can use anything.
Instructions:
Stack the 8" squares together right sides up. You can mark with a pencil/chalk or mentally mark 1.5" on the square stack, in opposite corners

With your rotary cutter, make a curved cut from one corner to the other, connecting the 1.5" marks you made, move that large curved piece to the side.

On the remaining fabric, we need to make the other side of the leaf. You can mark with a pencil/chalk or mentally mark 1.5" on the square stack, in opposite corners. With your rotary cutter, make a curved cut from one corner to the other, connecting the 1.5" marks you made. This makes the small curved piece.

Karen has a technique to do this in the video or you can cut your own shape. I didn't like my shape so I tried her technique and it looks WAY
better.

On the large and small curved pieces, we need to fold over the concave edge and iron it down. Flip the fabric right side down and very carefully, iron the edge while folding it over about 1/4". I found it best to work with the pieces oriented like this because I am right handed, so I held the iron with my left and worked toward the right. Be careful if you are using steam, I got myself a few times!
We are creating the seam allowance so some wiggle room, + or - 1/4", on the folded edge is ok.

Arrange the fabrics so the light curved pieces will be sewn with the dark leaf and the dark curved pieces will be sewn with the light leaf. Because I made a weird shape, I am making 4 but you only have to make 2 😊

Take the small curved piece and place it over one edge of the leaf, it needs to overlap by about 1/4".
*Pro tip: you can fold the leaf oval in half - tip to tip to find the center, press between your fingers to make a crease. Repeat this for the background on the concave pressed side so you can align the 2 creases to find the center-ish.
You can pin it down or hold it in place, there should be some excess hanging off the section where the point of the leaf and thin part of the curve meet.


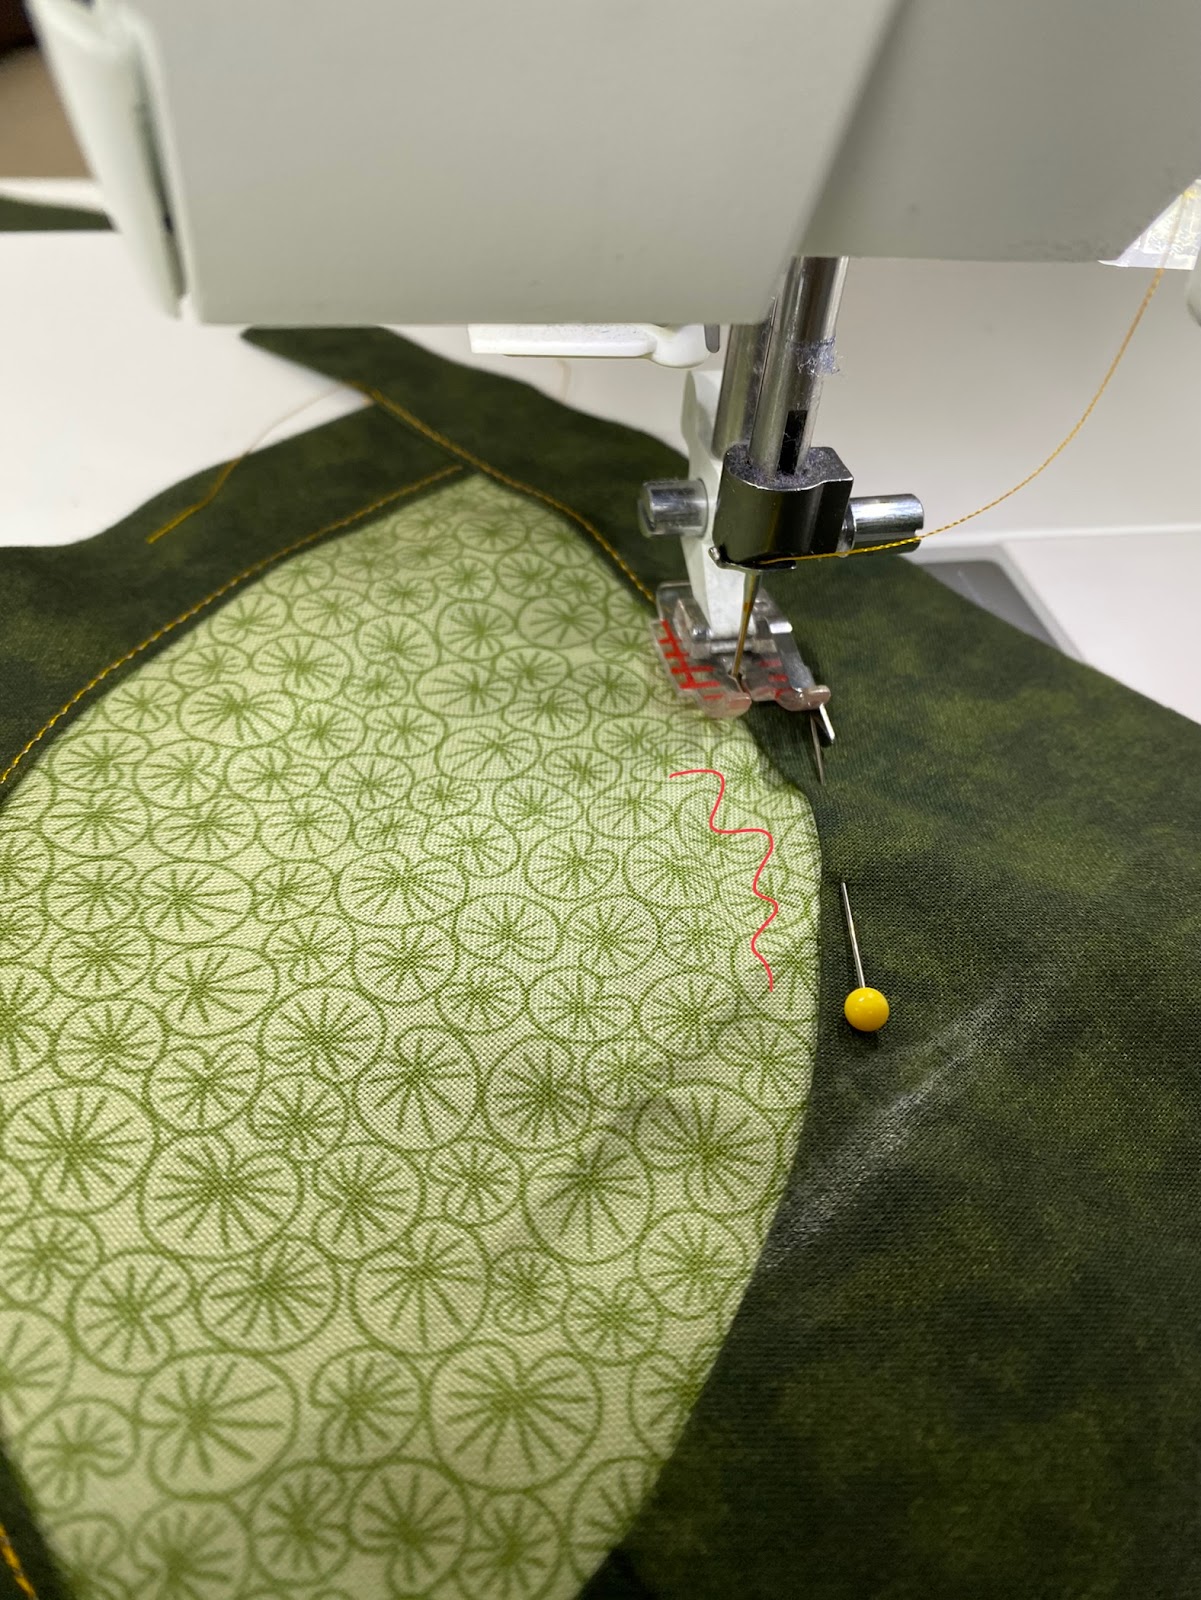
Now, we top stitch the small curved piece to the leaf, sew within that 1/4" overlap and folded edge so everything gets caught and stitched down. Do this for both leaves.


Take the large curved piece and place it over the other edge of the leaf, it needs to overlap by about 1/4". Don't pull the fabric into place, rather let the fabric down in the general area. You can pin it down or hold it in place, there should be some excess hanging off the section where the point of the leaf and thin part of the curve meet.


Now, we top stitch the large curved piece to the leaf, sew within that 1/4" overlap and folded edge, pivoting as needed so everything gets caught and stitched down. Do this for both leaves.
As you are pivoting, take out the pins and the fabric will want to flatten more if you had some ripples/warping. Just let the fabric go at this point, it knows where it wants to go!

Also, at this point the fabric is guiding you so if the overlap is more than 1/4", that is perfectly fine. My ends on each leaf ended up being about 1/2" instead of 1/4" but it laid flatter.

Don't worry about trimming off the excess or squaring up, I will do that part when they arrive. My leaves ended up around 6.5” inches.
Tada!!


Thank you so much for helping me some fun leaves! I hope you find this is a fun technique like I did, I was a little concerned it wouldn't work out but they look great!!
~Adrienne
No comments:
Post a Comment