
Happy New Year!
I am so excited to begin this year with some fun and whimsical quilt blocks. I work with a non-profit, no-kill cat shelter called Candy's Cats in the Orlando area and twice a year we have a silent auction to help raise funds for quality vet care and foster supplies. I help the organization in a variety of ways - computer and adoption paperwork, cleaning out cages, sewing cat bedding, and even fostering a few cats (when I can convince my husband and not rile up my own 3 furballs). Here is the most recent cat we fostered, named Boots, who finally found his furr-ever home just in time for Christmas.

It's sweet faces like his that made me decide to ask for your help in making cat blocks that I will make into a quilt for our next silent auction. Elizabeth Hartman designed the Cat Mini Quilt and she created a variety of cat face blocks. I am going to walk you through Cat Block #20: Max but you can choose any of the adorable cat blocks found here, here, here, and here. Or, if you're feeling really creative, here is the link to the basic cat block and you can make up your own.
The blocks are fairly small, 4.5" x 5.5", so I am requesting that you make 4 blocks. I'm also requesting that you don't sew them together so that I can mix them up according to colors.
Seams
Just a quick note about seams. All seams should be sewn with a 1/4-inch seam allowance. This is to ensure that all blocks measure correctly. One person's scant 1/4-inch will not measure the same as someone else's, so please measure/test your allowance for accuracy. Stitch length should be fairly small - I prefer 2.0mm so that seams don't pop when I put the finished top on my long arm. Feel free to press your seams however you prefer.
Fabric Requests
Cat Faces -- Any color of your choosing, including black, brown, and dark gray. Please keep your cat to one color family, so if you make a red cat all of the fabrics should have some amount of red in them. A green cat should have all mostly green fabrics, etc. Novelty fabrics are fine but no batiks. A mix of prints and solids really adds dimension so if you are able to use both, or different colored solids, that would be ideal. Each cat pattern indicates where the solid fabric should go, but have fun with it and place fabrics where you want them. If you don't have solids in your stash, opt for blenders if you have them.
Background Fabric -- white, as white as you have! It can be solid or a tone-on-tone blender. You can also mix and match your whites and blenders within your block. You'll see that I've done that in my example block below.
Cutting Instructions for Max Block
Background Fabric - white or white blender
(1) 2" x 4.5" rectangle for the ear unit
(2) 1.5" x 1.5" square for the chin unit
Cat Face Fabric Pieces
A - (1) 2" x 2" print fabric
B - (1) 2" x 2" print fabric (can be the same as A if you'd like)
C - (1) 2.5" x 4.5" solid looking fabric
D - (1) 2" x 4.5" print fabric (can be the same as A or B or completely different)

Sewing Instructions for Max Block
Make the Ear Unit
- Units A and B will become the ears. On the wrong side of the fabric, mark a diagonal line.
- Place your two ear squares (A and B) onto the white rectangle, with right sides together, like shown below.
- Sew on the lines, then cut off excess corner and press back. This unit should measure 2" x 4.5"

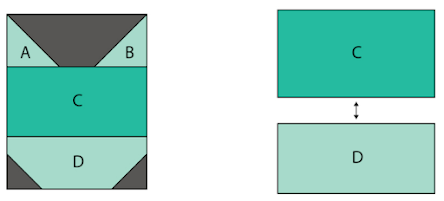
Make the Face/Chin Unit
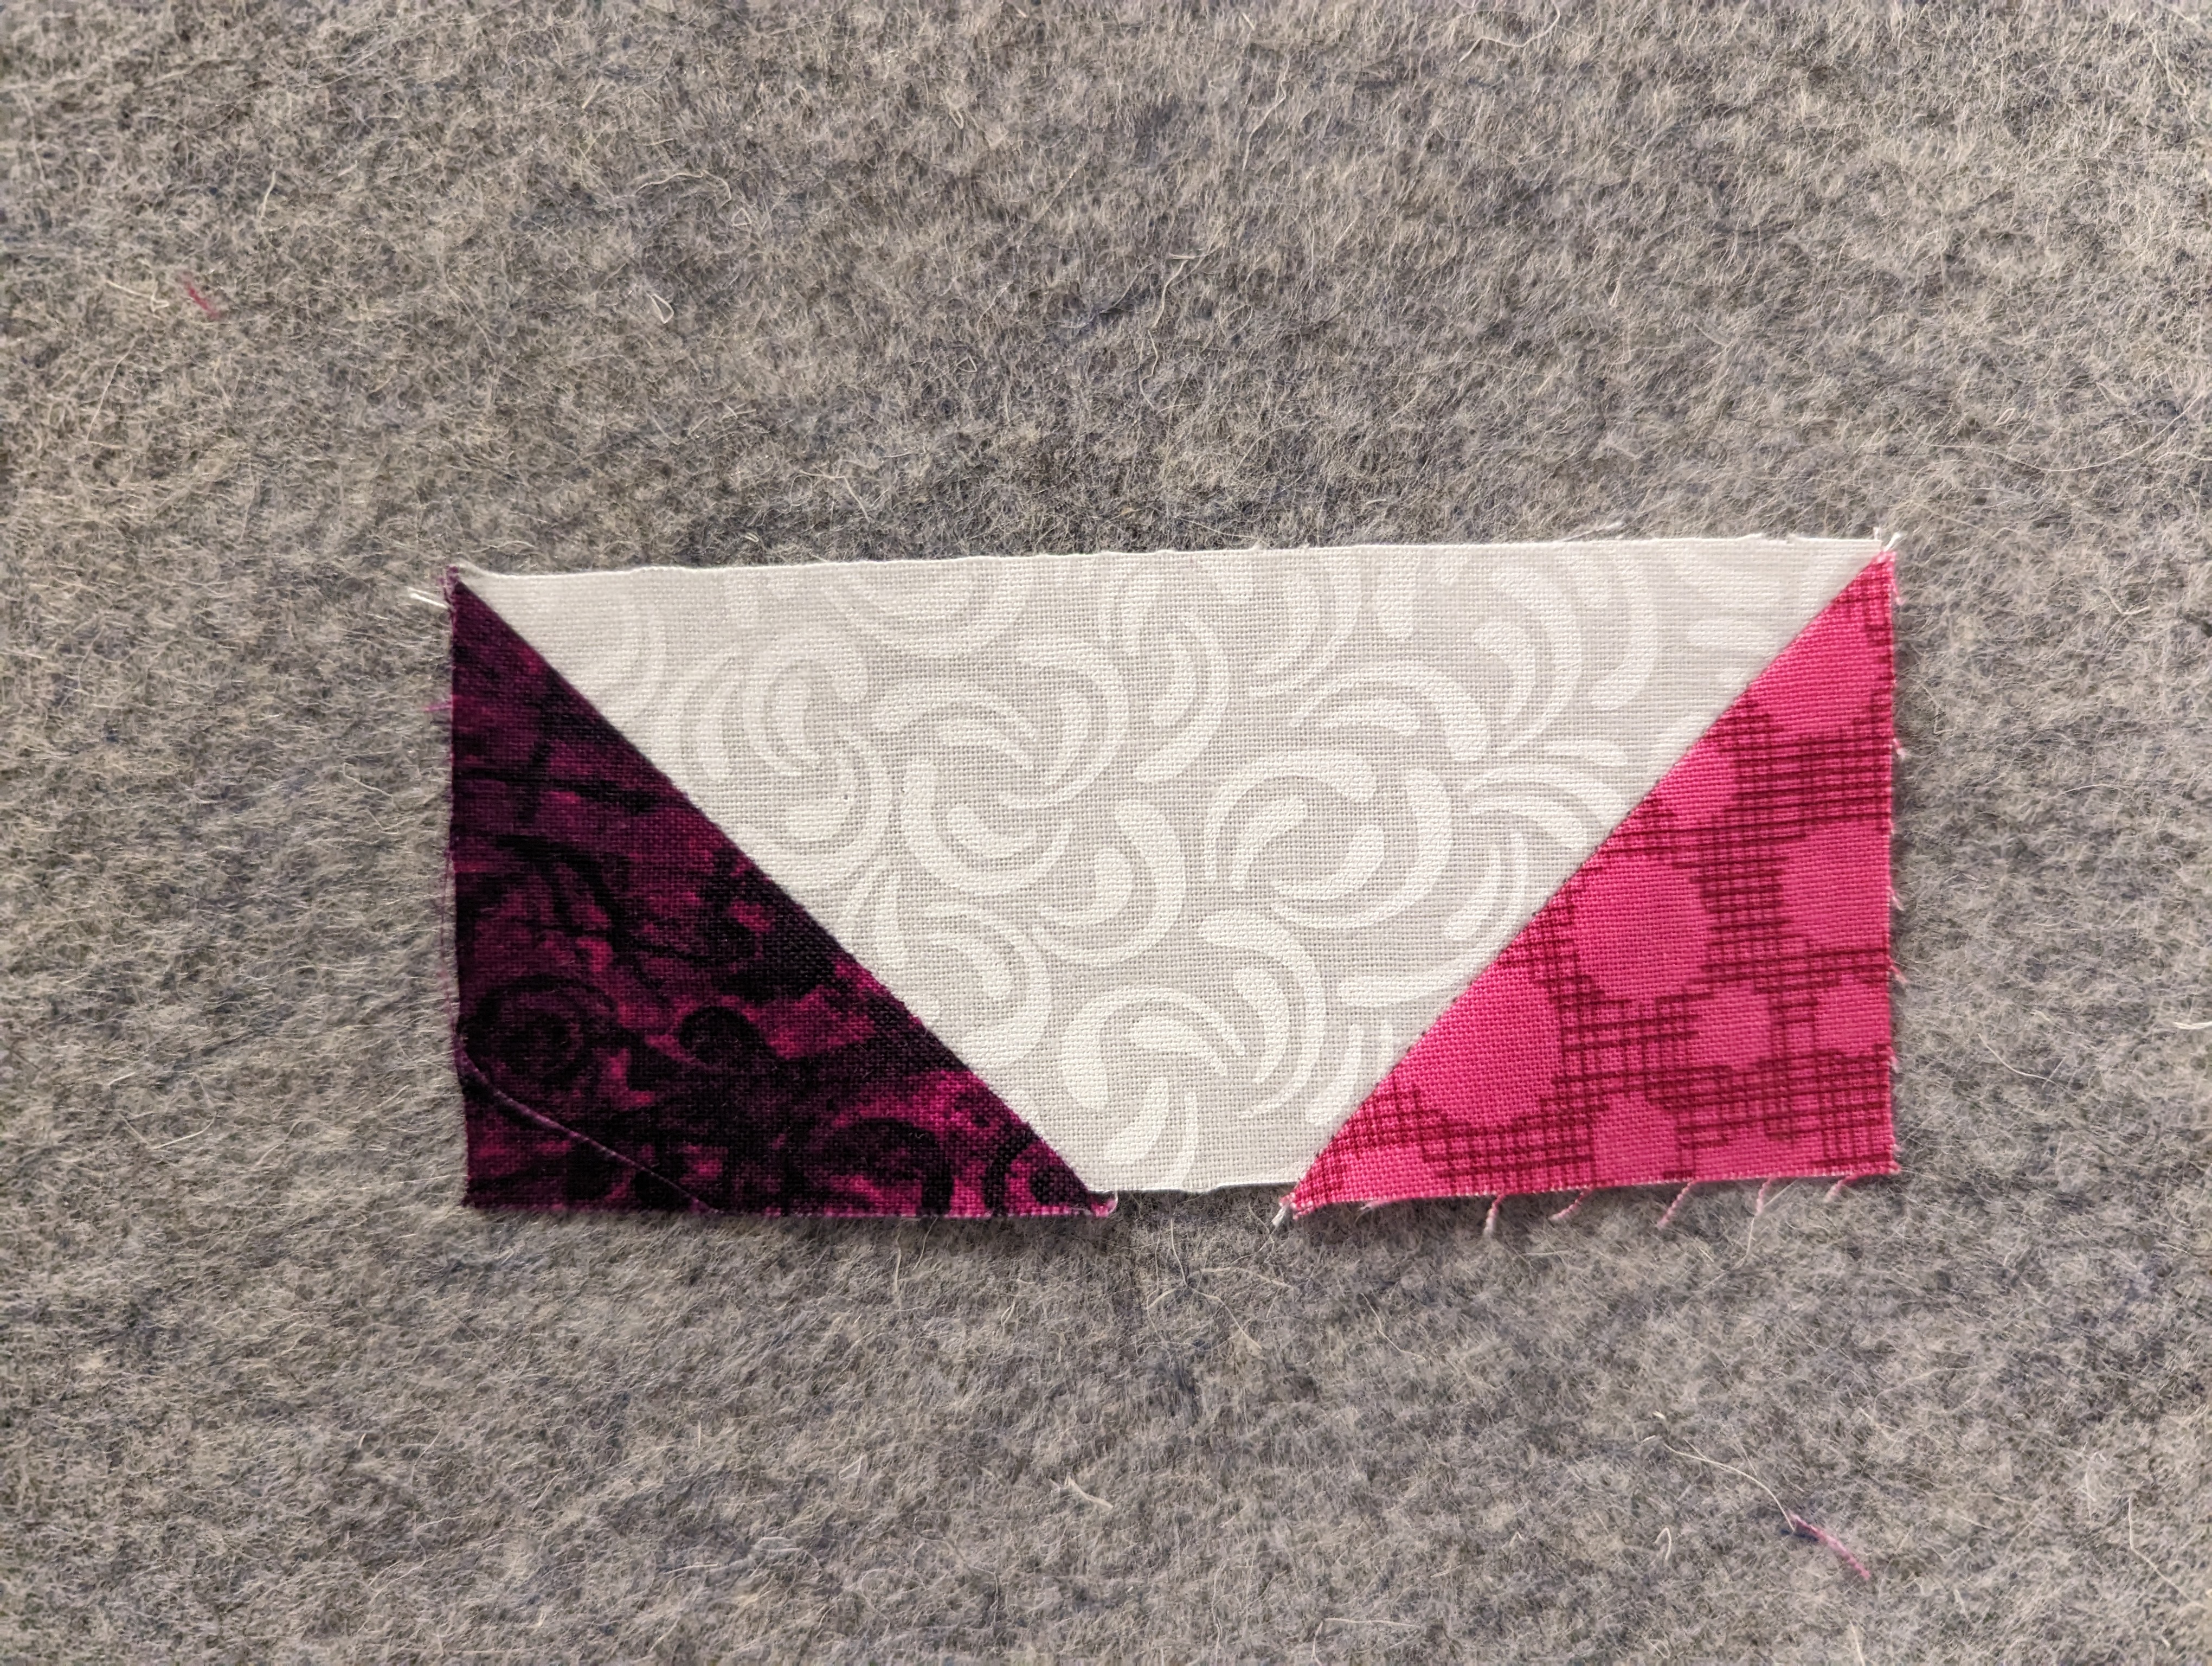
- Sew together units C and D and press open.
- On the wrong side of your white squares, draw a diagonal line.
- Place your white squares on the bottom of your C/D unit.
- Sew on the lines, then cut off excess corner and press back. This unit should measure 4" x 4.5"

Finish the Cat
- Sew together the A/B ear unit to the C/D face unit. Pay special attention that the ears are on the correct way, with the points at the top (I'm talking from experience here, folks!).
- Press open.
- Your final block measurement should be 4.5" x 5.5"

Final Notes
If you cut all of your fabric first and then sew them assembly-line style, they go super quick. Again, when it comes to fabric placement, anything goes. Elizabeth Hartman's patterns are just a starting point and you can pretty much do whatever suits your fancy. Wanna make a cat with only 2 colors? Go for it! Make the face 4.5" x 4" and then add different colored ears. Have some scraps already sewn together? Cut it up to the 4.5" x 4" size then add the ear unit. Done! It's totally up to you. Whatever you decide will be purrfect and I can't wait to add them to my growing cat pride.

Happy sewing!
~ Diana @ Red Delicious Life
No comments:
Post a Comment