Sunday, February 28, 2021

Hive 3 March 2021 tutorial - 2 fabric stripey hearts

Hi Hive 3! 

This month I have taken inspiration from all the February valentines quilts and decided on a framed 2 fabric stripey heart. 

Inspiration

When I was I looking around for a suitable block, I found this super cute ombre striped heart block tutorial from Julie at The Crafty Quilter https://thecraftyquilter.com/2018/01/ombre-heart-quilt-block-tutorial/  

The Block - 2 fabric stripey heart

Super cute right! But in the spirit of using fabric up (a la stashbee), I have sized this up to be able to use up left over layer cake or jelly roll pieces, as I seem to have many of these floating around, and decided that I wanted to keep it to 2 fabrics only. 


Fabric selection and pull

For this quilt I’m requesting colours that feel like “citrus gelato” i.e. soft versions of lime, lemon, orange and pink grapefruit. You’ll need to select 2 fabrics of the same colour for each block. 

It’s for a tween girl, so appropriate novelties are fine, just not overly holiday themed. Solids, florals, text, textures and numbers are all fine to use too. 

Background fabric can be white, off white, white-on-white, low volume etc.

Cutting

Colour 1

3 - 2” x 9.5” strips

Colour 2 

2 - 2” x 9.5” strips

2 - 2” x 5” strips 

Background 

2 - 5” x 5” squares

4 - 2” x 2” squares

2 - 2.5” x 9.5” strips

2 - 2.5” x 13.5” strips 


Assembly

Marking

Using your preferred method, on the back of each of the background squares, draw a diagonal line from one corner to the opposite corner. 
I like frixon pens as they disappear when ironed. 


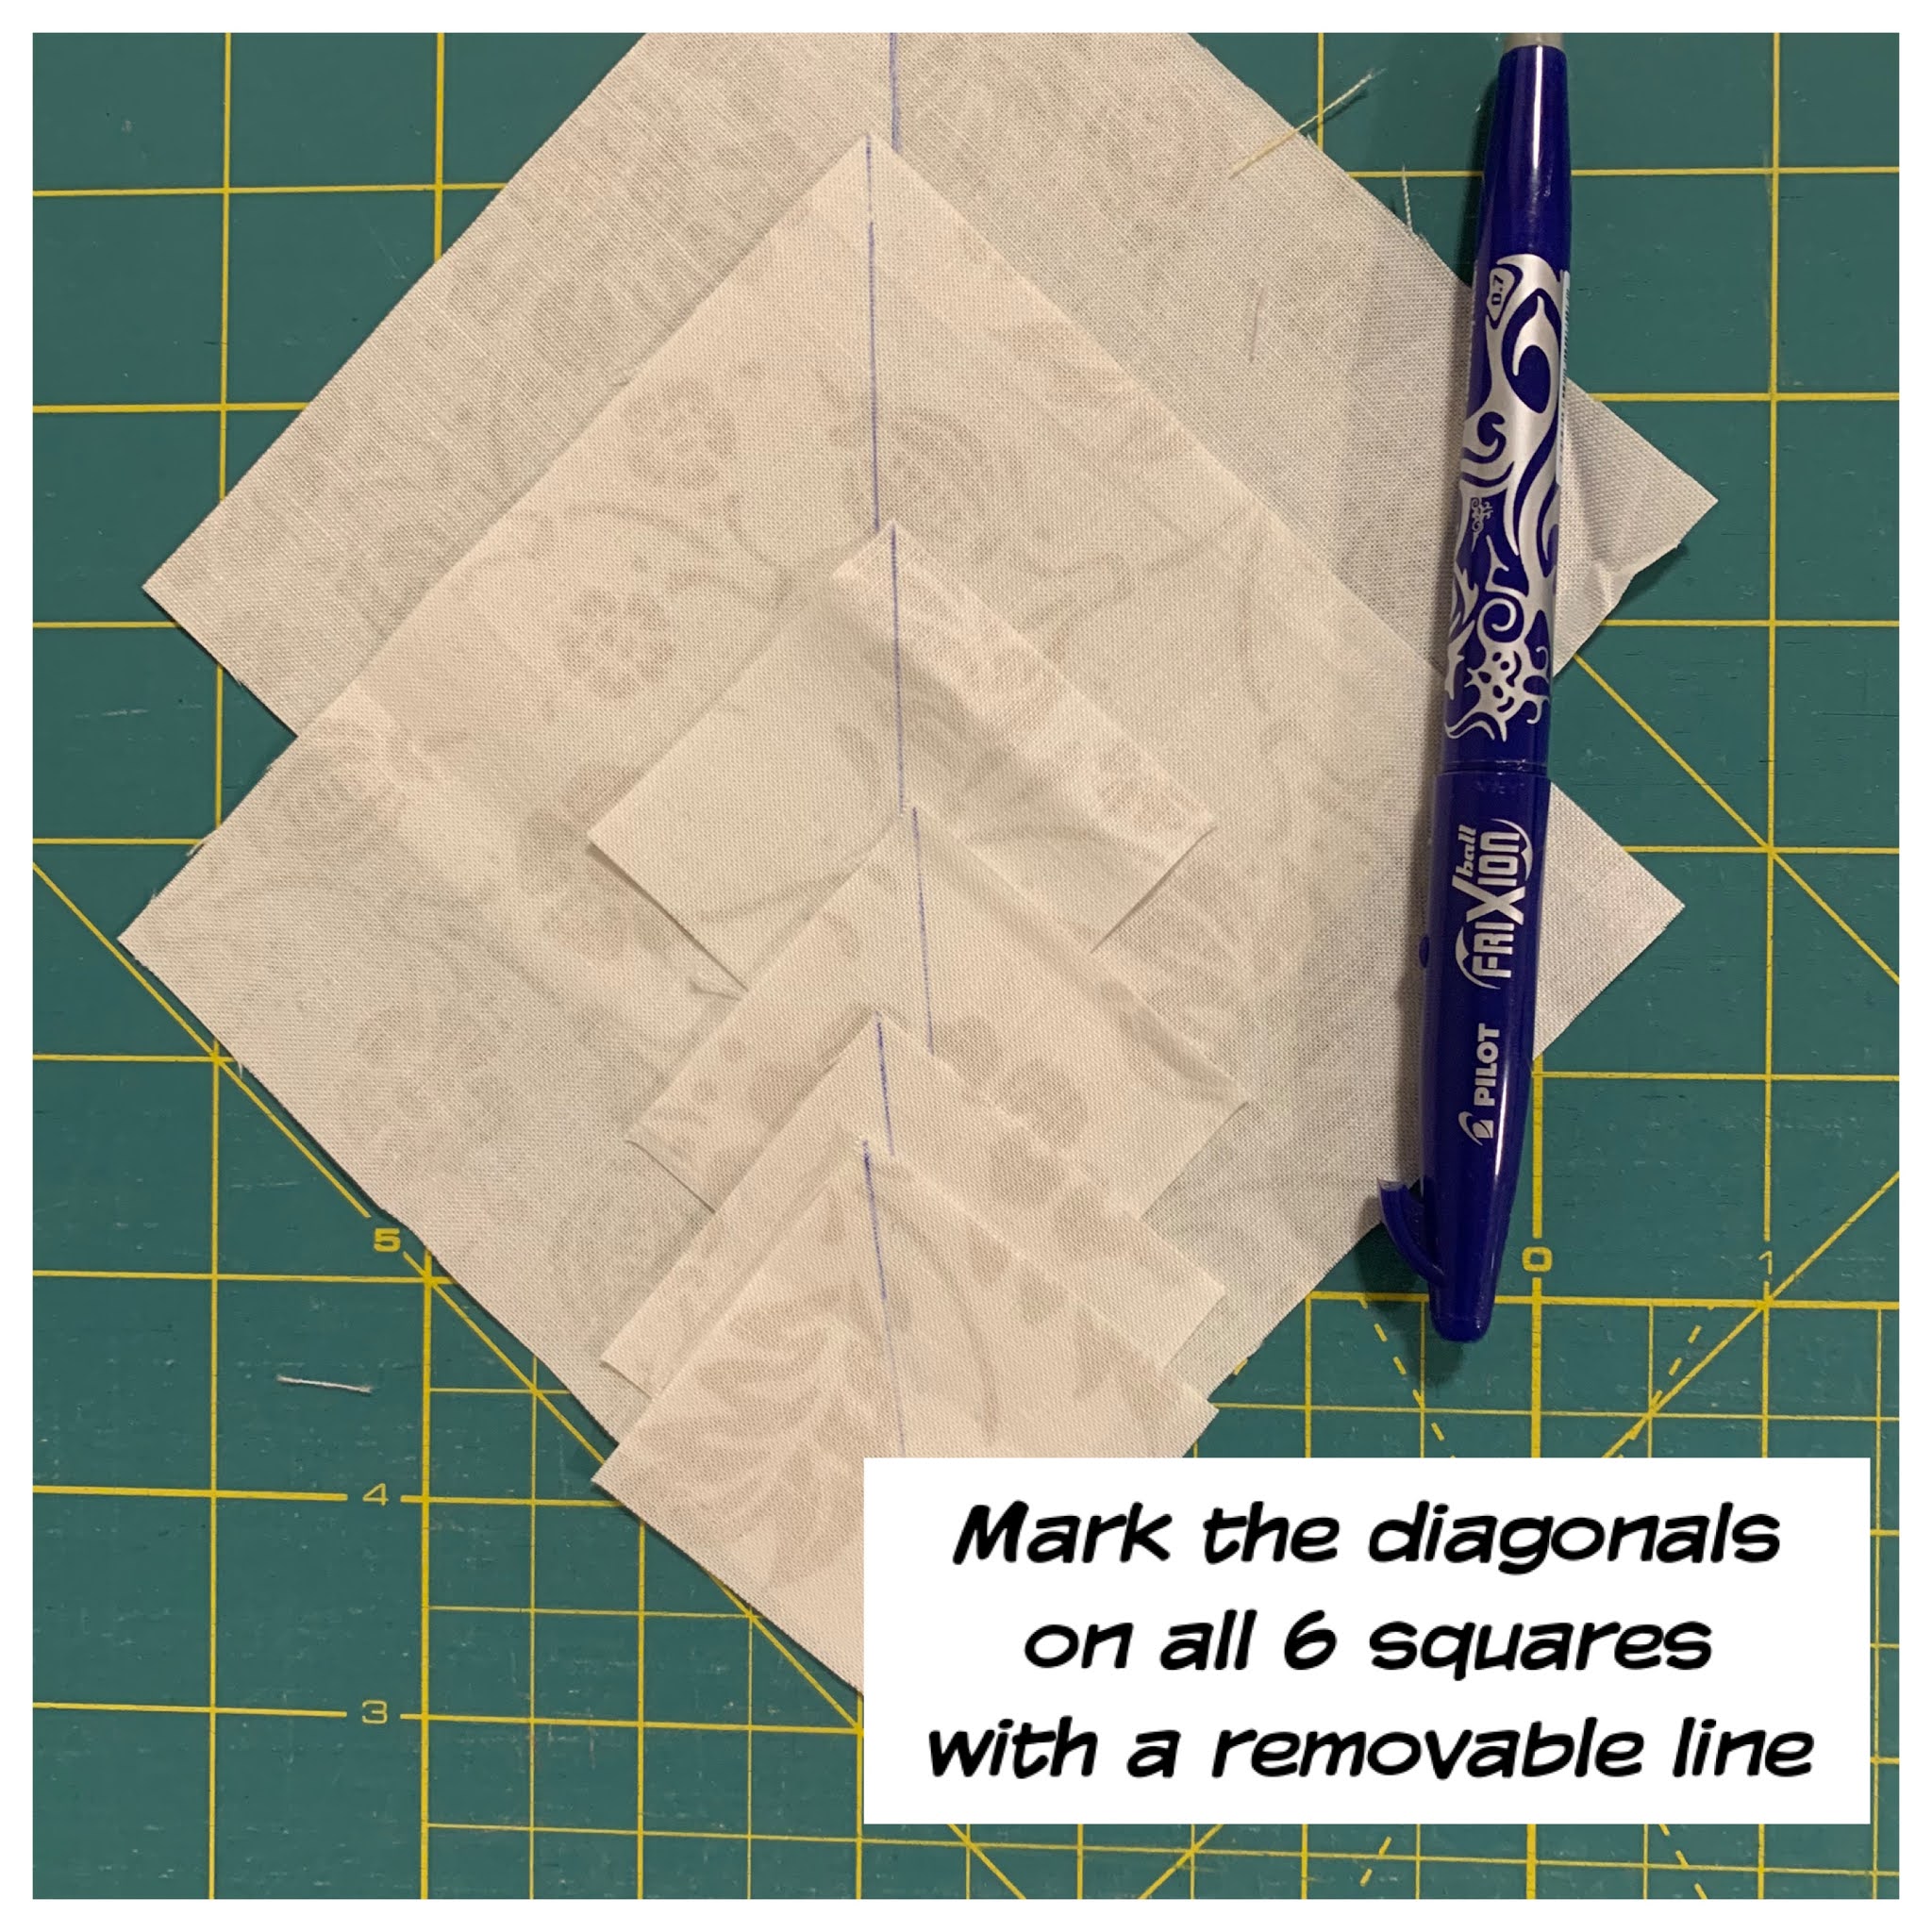
Inside top of the hearts

NB: I’m suggesting a different method here than I would naturally go for, as it reduces the need to match a corner later on. 

Place a small square on the inside of the shorter strips (see pic) and stitch on the diagonal line. Trim and press one towards the background and one towards the colour. This will allow you to nest the seams.

Sew these together to form a 2” x 9.5” strip.


Stripes

With the strip from above as your top, alternate each colour to form a stripey square. 

Press all the seams downwards.  

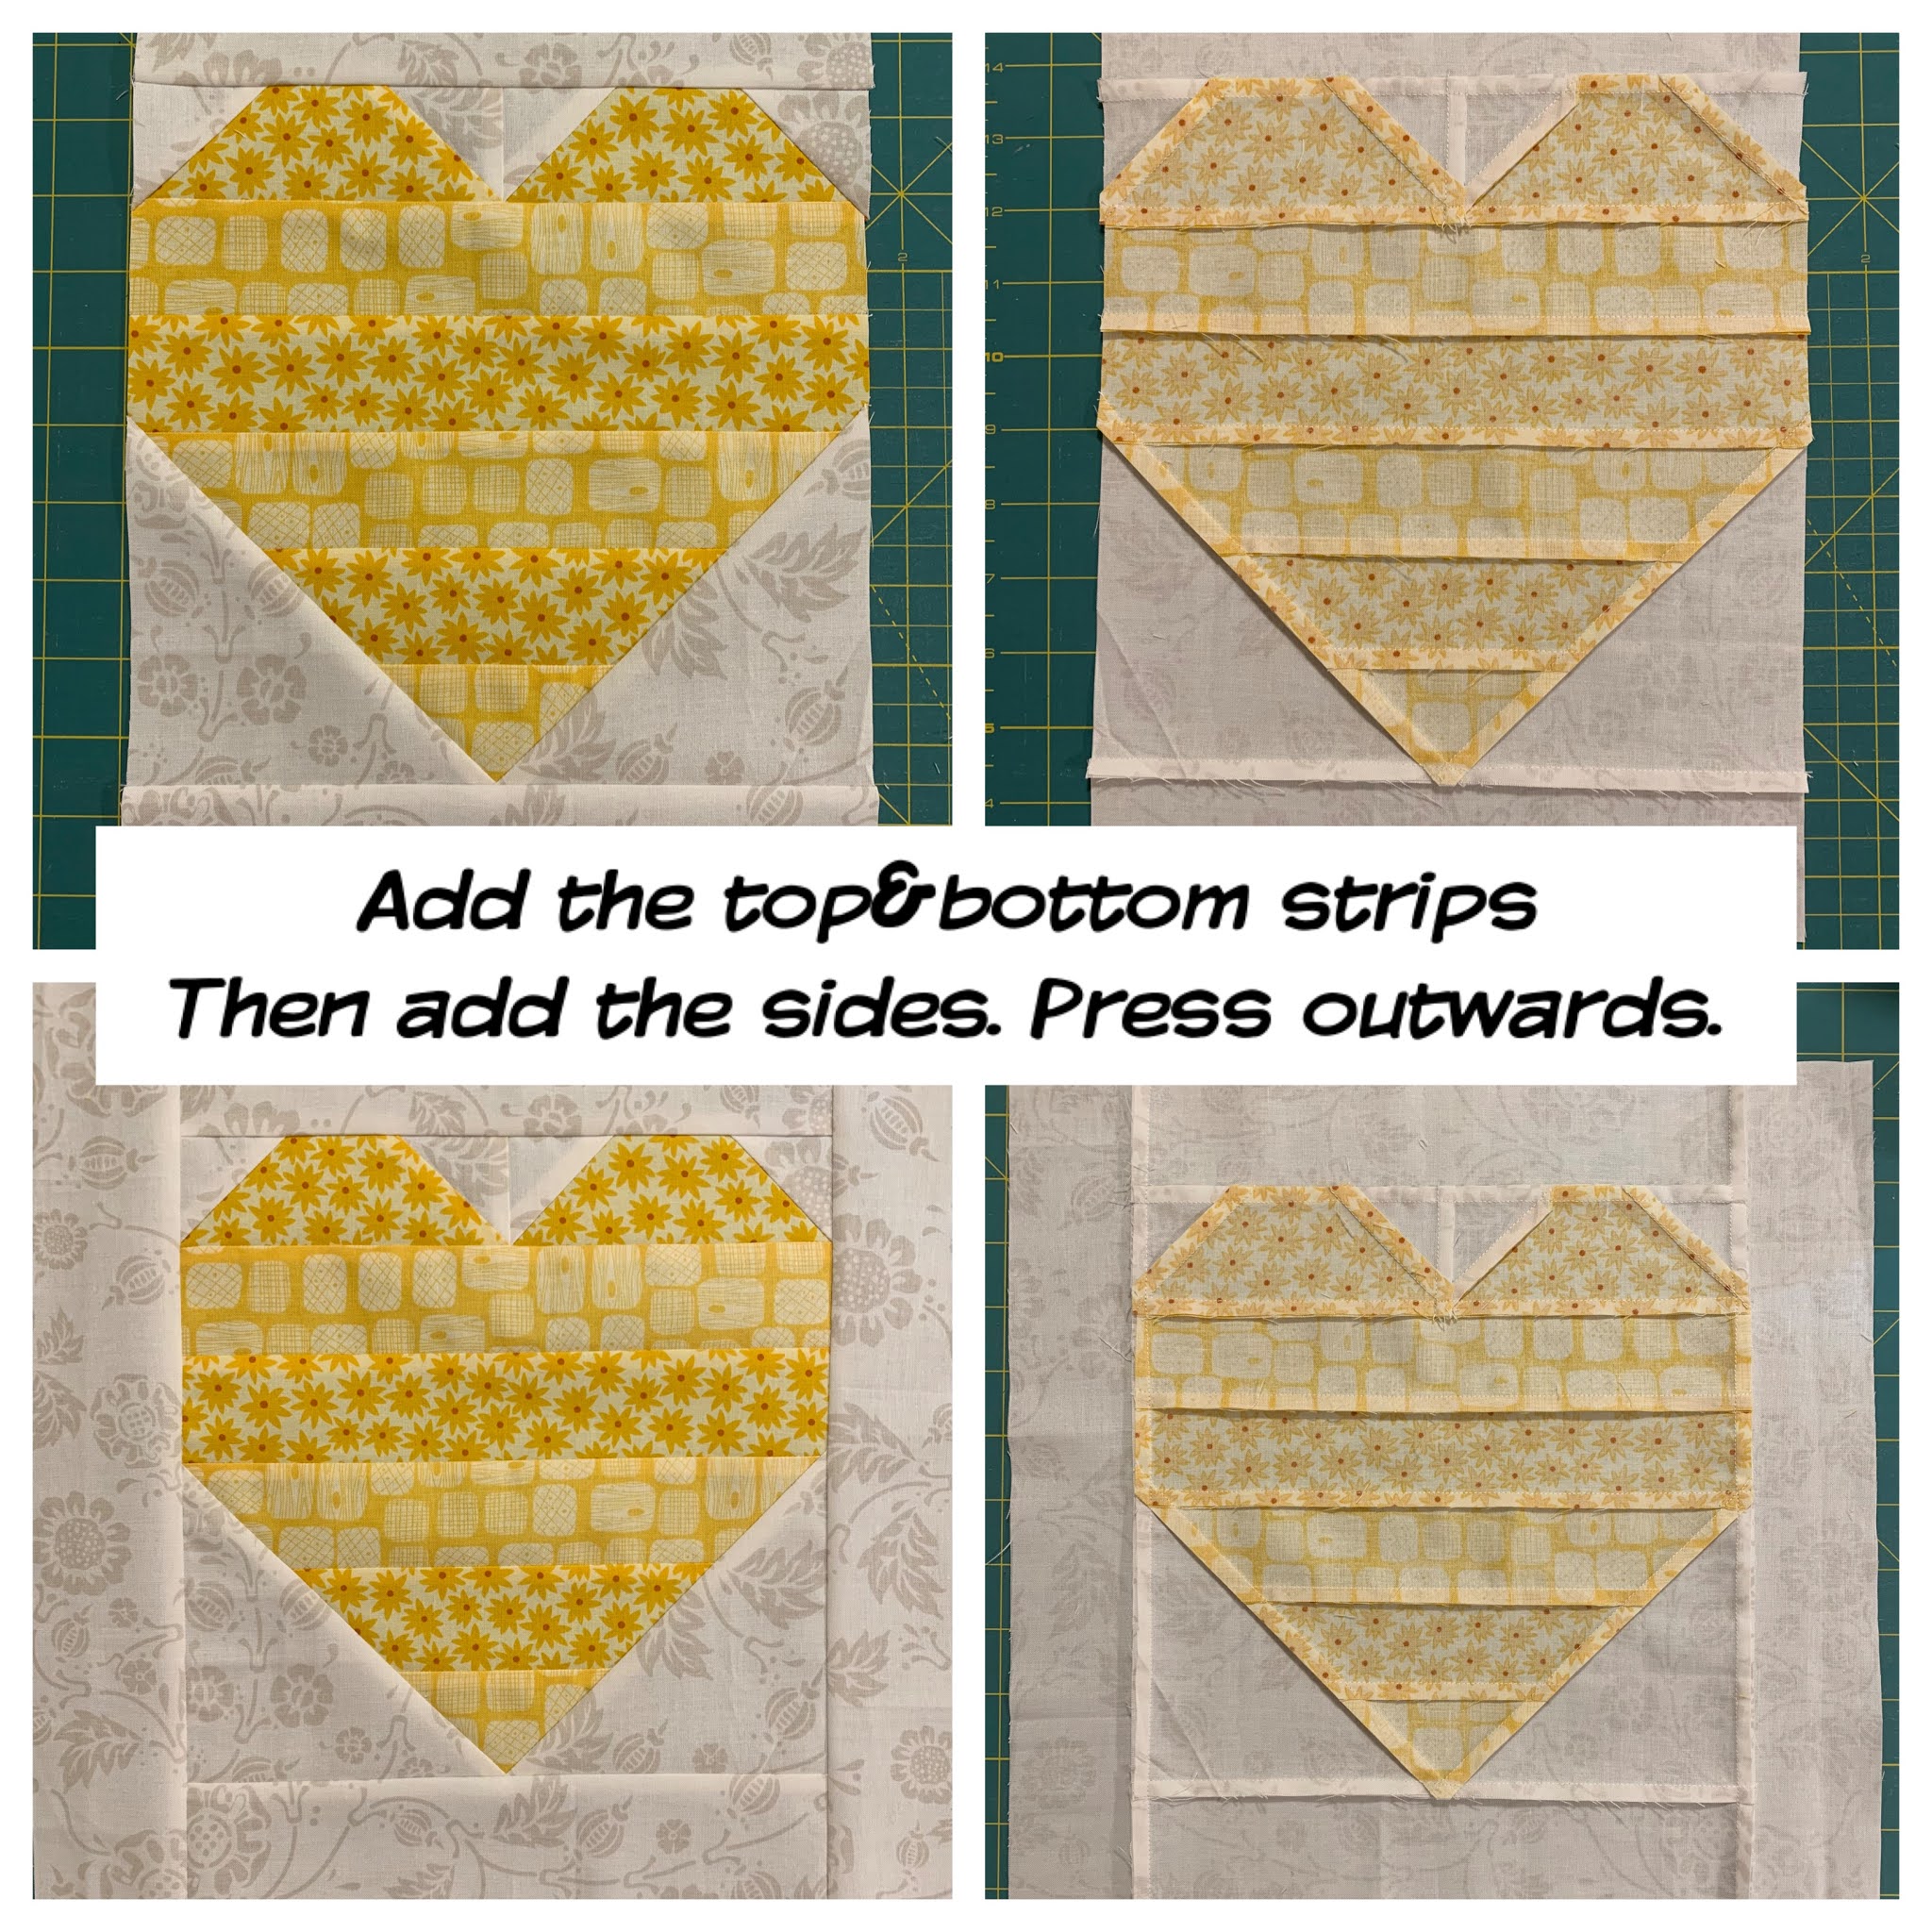
Add the outer heart pieces

Place the two smaller square on the outer top corners of the block and sew on the diagonal line. Trim and press towards the heart. 

Place the one of larger squares on a bottom corner and sew on the diagonal line. Trim and press away from the heart. Do the same on the other side. This should be the only “point” that you’ll need to worry about losing when you add the frame. 

Add the frame/border

Add the 2.5 x 9.5” strips to the top and bottom. Be mindful of not losing the bottom point. Press outwards. 

Then add the 2.5” x 13.5” strips to the sides. Press outwards. 


NB: do not fret if your block is slightly smaller than the 13.5” square, I will trim then all down to ensure consistency in sizing. I have found over time that rulers and 1/4 inch seams can be slightly different and have designed accordingly.


No comments: