Do you have fabric that you consider is impossible to match
to anything else? Or fabric that it’s
impossible to find a project for?
Welcome to my Impossible Churn Dash.
Choosing:
You could choose to use that impossible fabric in this block
.and add one other print fabric that meets these contrasting conditions or
choose any two prints that provide the contrasts suggested. Here is my pull.
1.
Size of
print: Large print or Medium print or
Small print. Choose two contrasting
sizes.
2.
Density or amount of background: Large print with large areas of background,
Large print with small area of background, etc.
Actually, the background helps determine into which color category the
fabric will fit.
3. Color: Complementary colors with expanded ranges. Basic complementary colors are Red and Green, Blue and Orange and Yellow and Purple. Expand the range be making it pink and lime, or Aqua and Rust or Lemon and Lavender, etc.
4. Multicolor prints: Prints that defy color labels could be paired with different size prints that use the same colors, or a print that has a minimal design from a complementary color. Like a multi-color print with a two-color print.
Cutting:
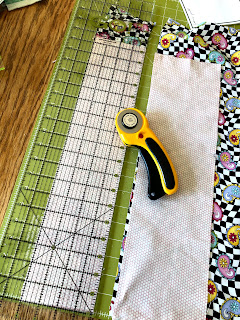
You only need a strip 4” by 20 or across a Fat Quarter width
of each of the two fabrics. Alternately
you can successfully use a layer cake square.
You might have some of those languishing in your scrap bin that were too
busy, ugly (???) or impossible to use.
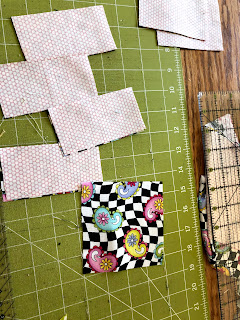
Strips: Pair the two strips up and Cut (2 sets of 2) 4” squares and then cut (4) 2” pairs of rectangles across the strip yielding (4) 2 x 4” rectangles.
Or if you are using a Layer Cake:
Cut a 4 inch strip and then cut in 2 squares and one 4 x 2 rectangle,
then cut another 4 inches and cut 1 square and 3 4x2 rectangles.
You may need one more 4’ square. You could cut it last when you decide what
you want for a center block. This could
be one of the 2 fabrics or you could find something from your stash to fussy
cut, but not a neutral or low volume.
Check Your Quarter Inch:
Remember to use Jackie’s reminder and check your quarter inch seams. Sew three 2.5” squares together, press, measure and you should get 6.5 inches. If not, check your cutting and then your seam allowances. If your piece is too big, widen your seam allowance, if it doesn’t add up to 6.5, make a smaller seam. My machine can move one -two notches over from center and this usually takes care of it.
Sewing:
Draw a diagonal line on the two pairs of 4’s squares and sew ¼” on either side of the line.
Cut on the drawn line and you have 4 Half Square Triangles (HST). Trim these HST to 3.5 inches. Use any square ruler with a diagonal line. I press seams to one side, but if you want to press open, I am happy with that. Press toward the darker.
Sew the rectangles in pairs along the long edge. Press toward the darker. These pieces should measure 3.5 inches x 4”
Lay out the HST and rectangle pairs in a nine-patch and determine which print should be on the outside or inside of your block. Note that this is an uneven nine patch because the center blocks are 4 inches. This is the time to add one other fabric for the center if you really want to, but it’s not necessary. These were my options before I decided which print went to the outside. I might make one in the opposite way just for variety.

Sew the pieces into rows and the rows into a block. The center row is pressed opposite from the
top and bottom rows for a good nesting of your seams.
Finishing:
Give it a good press and remove any stray threads (Because
they always show up in a picture). This will make a 9.5-inch block. However, you
don’t have to trim it, send it to me however it comes out. I might sash these and can always make
adjustments for any blocks that vary.
1.
Take a picture of the block.
2.
Post it on Instagram using #StashBeeHive3 or
#StashBee2021
3. Mail it by putting it in an envelope. You could easily fit this block inside a greeting card and mail it to me. That’s usually the cheapest postage.
If you have questions, or a dilemma or anything you need
clarified, let me know.
Susan


No comments:
Post a Comment