Friday, October 31, 2014

Hive 10 - November Block Tutorial

Hi everyone!  I have been looking forward to this since January, I can't wait to see how all of the blocks come together :)


What is your name?
My name is Lissa, short for Melissa.  My mom was really close to naming me Lisle (Sound of Music), but resisted the temptation.  Not that I would have minded :)  And she was adament that I was not a Mel or a Missy so she decided my nickname would be Lissa and it stuck!  You can find my sporadically updated blog at http://violintales.blogspot.com/ and I am also on Instagram as violinchick22.

Where do you live?
I currently live in Milwaukee, WI.  I am finishing my Masters degree in Music Performance on violin.  It was definitely not my first choice to come out here...I am still suffering from SMWS (severe mountain withdrawl symptoms).  I am a Colorado native and grew up in Golden and did not own enough warm sweaters, coats, socks, or snow boots to survive last winter (whats up with those polar vortexes?!?!).  I now have a heathy collection of all of these things :)
Tell us about your family (Spouse, kids, grandkids, pets, etc.)
Most of my family is back in CO, including my parents, brother, half of my grandparents and most of my aunts, uncles and cousins.  I miss them all, but I especially miss my dog.  He's adorable and really likes to walk all over the quilt blocks I put on the floor when laying out designs and is super spoiled in that his bean bag is covered in a handmade blanket :) Someday (when I am not moving every 9 months to a year) I will get my very own puppy, technically my dog is my mom's, but in the meantime I am seriously considering getting a fish.
Tell us about how you got interested in quilting.
My mom is a quilter.  She started a beautiful quilt for me when I was a baby that was finished around my 9th birthday.  I love it and for 9 years it lived on my bed.  She then made a double irish chain quilt, also for my bed, and when I went off to college I got a brand new quilt for my dorm room.  At this point, I was not interested in quilting.  I crafted with her (scrapbooks, beading, jewelry, knitting, crochet, cross-stitch), but no real sewing.  The summer before my junior year of college, I was looking at bedding for the furnished apartment I was renting in the fall and absolutely could not bring myself to buy a comforter after having a quilt on my bed for so long.  Being the fabulous mother she is, she offered to help me make one and turned me loose on her collection of books/patterns and fabric stash :) The rest is history.  That first quilt, started 6 years ago, was finally finished this summer!  I did complete several quilts before it and have loved doing this with my mom :)
How do you organize your fabric stash?
Let me start by mentioning that my fabric is currently living in three different places...I have the bulk of it with me in WI, but I still have some of it at my parents house (you know, so I have things to play with when I'm home visiting!) and some more is in storage in my grandma's basement along with most of my books, kitchen things and furniture that didn't fit in my car when I moved to WI.  Here I have my fabric sorted in boxes by color, project, or season.  My penchant for rainbow quilts has led to a love of saturated colors.
This was the first bed sized quilt I made all by myself!  I love that it's bright colors help keep the cold, gray winter days at bay :)
Christmas/Winter, blues and purples, greens and browns

Neutrals (including white, gray, black and cream), Warm colors (red, orange, yellow, and pink), bundles and coordinating fabric, multi-colored

Candy Corner quilt, scraps, projects in progress
These bins live in the linen closet, on my bookcase, or underneath my sewing table.

 
Who is/are your favorite fabric designers?
I don't have a good answer to this...I like bits from lots of designers, but I rarely like entire lines.  I tend to lean towards blenders and tone on tone prints rather than all over designs or prints.
What is one thing you have learned that you wish you knew when you first started quilting?
How short my attention span is.  Seriously, I would never have picked several of my projects with blocks containing 61 (yes, 61) individual pieces that need 20 blocks.  I still gravitate towards those blocks, but instead of creating an entire quilt of them, I make a mini or save them up for the worlds craziest sampler.  I get bored with making the same block over and over and over again, so it's good for me to pick smaller projects or larger blocks :)
What is your favorite sewing/quilting tool and why should we all go out and buy it?
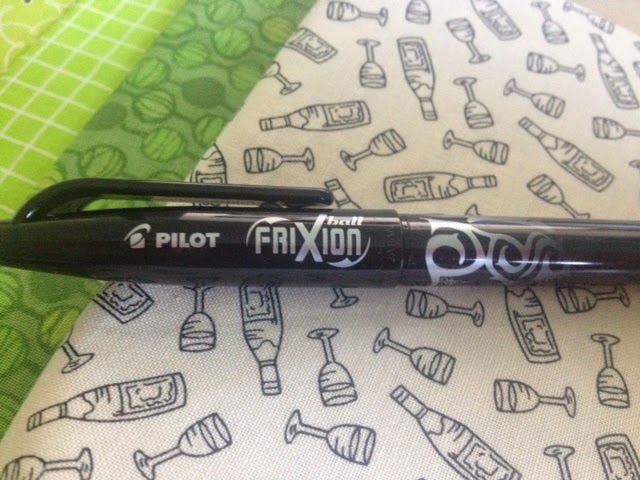
I absolutely love my Frixion pen and my 9.5" square up ruler.  I want Frixion pens for everything in life (they don't smudge and you can erase them which = no more pencils!) and I love my square up ruler so much I have started collecting them in all sizes.  Next on the list is the 12.5".
Who is your favorite fictional character and why? (Could be from a book, movie, TV show, etc.)
I have a long list of favorite fictional characters...I'll give you a few because I couldn't narrow it down!  Harry Potter (I've loved him since I read the first book when I was 11 and decided I would attend Howarts), Elizabeth Bennet (she grows so much and I love how she sees the world), Sherlock Holmes (the book character and the portrayal on BBC's show), and Gru (who doesn't love a super villian who is terrible at being a super villian).

TUTORIAL

This month I would like you to make me a 12.5" unfinished (12" finished) star block.  I'm going to try and give you as many suggestions and inspiration ideas as possible.  I would love to end up with a sampler type quilt of stars :)

The aesthetic I'm going for is modern-traditional.  I really love the look of traditional quilt blocks with a modern twist to them.  I made two blocks that are a good example of this:
The block on the left is a Stencil Star Block, designed by Lee Heinrich and featured in Quiltmaker's 100 Blocks vol. 9, and the star on the right is a Star in a Star Block from McCall's Quick Quilts Feb/March 2014 (The other blocks are bits and pieces I've been playing around with that I forgot to take off, please don't look at them for color guidance...)
For your fabric choices, I am looking for whites (bright white/true white/white on white), grays (lighter is better than super dark), shades of blue ("true" blue, think in the navy or royal blue spectrum and not teal or aqua), and shades of purple (think amethyst and not pinky purples) as tone on tone or very moderate patterned fabrics.  Please don't use fabrics that don't read as one color.  I like batiks, so feel free to use them.  I am planning on using this as a couch quilt in the long winters in WI and would love snowflake fabric if you have any in these colors :).  The star in a star block I made uses only snowflake fabric.


If you have a favorite star block, go ahead and whip it up!  I am not a fan of wonky stars or improv stars, so please stick to pieced or paper pieced stars.  If you really love an 8" finished star pattern (like some of the beautiful paper pieced patterns from Wombat Quilts), feel free to use them and add a border around the sides to make it a 12.5" unfinished block.
I will be sashing all of the blocks with this kind of pattern so feel free to use blue or purple as the background fabric and make the stars white or gray.
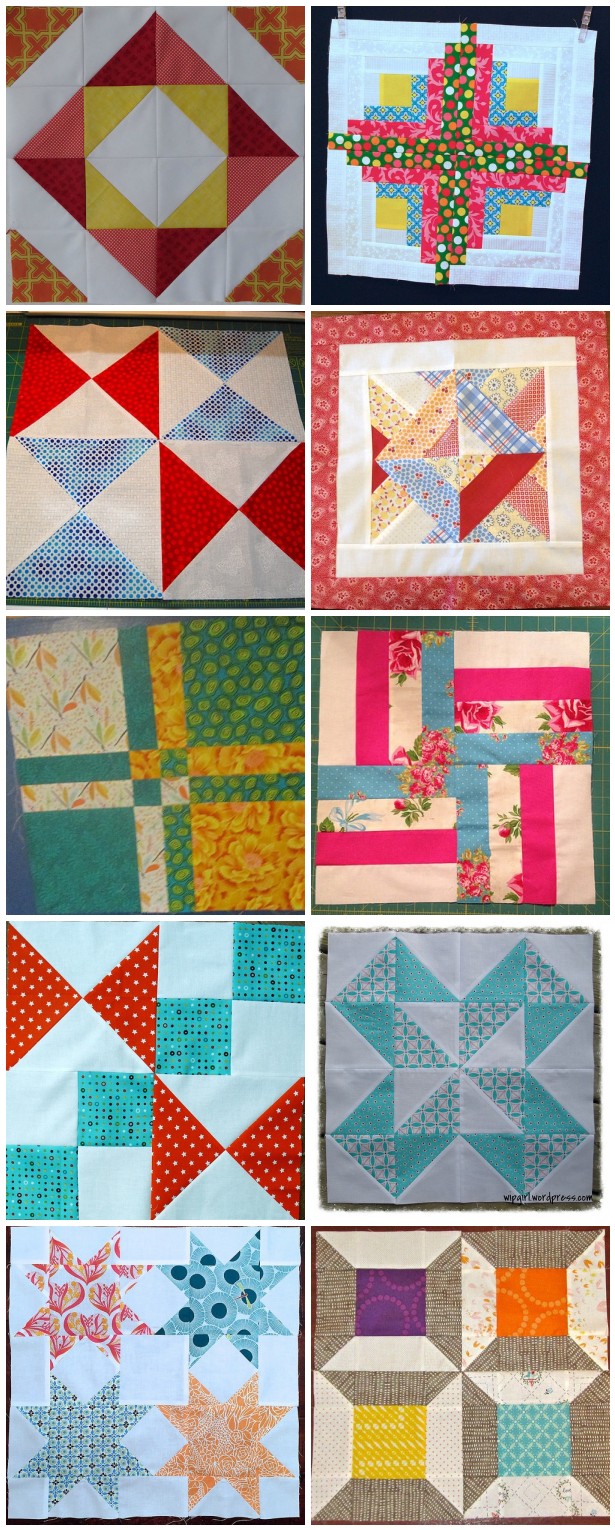
Here is a list of tutorials I have found for star blocks I like that measure 12.5" unfinished:

Hive 12 Tutorial

What is your name?  My name is Willa Downes.  This has been my first Stash Bee experience and Hive 12 has been fabulous!!!  Thank you all so much for great narratives, photos and tutorials!!!!    

Where do you live? 
I live in Fairfax, Virginia, a Washington D.C. suburb.
Tell us about your family (Spouse, kids, grandkids, pets, etc.)
I have an amazing husband of 43 years; we met as Peace Corps trainees on our way to the Fiji Islands to be teachers.  We courted on and off as Volunteers, went our separate ways at the end of service but got back together and married eighteen months later. We have two fantastic grown children.  Our son lives nearby and our daughter lives in a Boston suburb.  She has an amazing 3 ½ year old son, a newborn daughter and a fantastic husband!  We had pets when the kids were growing up; now we travel and enjoy feeding the many goldfinches that live in the trees around our house.  It is a real challenge to feed the birds in northern Virginia and not have the squirrels beat them to the food.  After many feeders, we finally have two that are really squirrel-proof.
Tell us about how you got interested in quilting.
I went to a quilt show with my sister-in-law and her cousin the winter before our daughter’s August wedding.  I saw a quilt there that seemed a perfect wedding present.  I told myself I shouldn’t get started quilting because it would be the opening of a dam!  All day I resisted getting the pattern and fabric.  However, I went back the next day and got both!  It’s now many quilts later and I have so much fabric which I have great plans for.  I retired from my beloved teaching career (preschool special ed, Head Start, and kindergarten through second grade) two summers ago to have time to sew and be a grandmother.  It is wonderful to have time to be “Nana” and to sew.

How do you organize your fabric stash?
   
Our FAMILY ROOM doubles as my QUILT STUDIO!


The first fabrics were stored in an upstairs bedroom closet.  Everything else was done downstairs.  I cut fabric on the dining room table, sewed on the kitchen table, and ironed in the family room.  This continued for about four years.  Then I realized I should use the family room as a quilting studio with the ability to return it to family room status when we have company.  My husband often reads in the living room and works on projects in the dining room table.  I didn’t want to make him into a “quilter’s widow”; I wanted our activities to be near enough together we could easily talk to each other which is why I didn’t decide on a bedroom for a studio.

Fabric is now stored in a desk (mostly yard pieces), a dresser (mostly fat quarters) that is the right height for cutting and an old chest (mostly multiple yard pieces).  Novelty fabrics are behind some doors on a bookcase.  I sew on an old kitchen table that looks out on our backyard which is woods.  What a treat it is to watch the seasons come and go as I sew!

When we have company, the sewing machine gets packed up, the ironing board put away, the cutting mats get stored, and the desk gets closed.  The Studio now looks like a Family Room!!

Who is/are your favorite fabric designers?
I shop for fabrics I like, not looking for designers.  The result is I often unknowingly choose Hoffman, Kaufman, Fasse.  I often find flowery fabrics and Asian fabrics irresistible.  I love bright colors.  This year I began been using solids and am also really enjoy them.
What is one thing you have learned that you wish you knew when you first started quilting?
I have come to realize that I have no desire to make anything larger than a lap quilt.  My largest quilt was 62 inches square.  I really like making baby quilts about 48 inches square.  This year I began making NICU quilts for the nearby hospital.  These can be as small as 24 inches square!  I also realize I really don’t want to struggle making points match/losing points; I like to do easy paper piecing.
What is your favorite sewing/quilting tool and why should we all go out and buy it?
My stitch ripper outer with its own light is really helpful.
Who is your favorite fictional character and why? (Could be from a book, movie, TV show, etc.)
Working with young children for so many years I believe in the adage, one learns all the important things in kindergarten.  Books I loved reading to the children include Along Comes Ping, Ferdinand, Mike Mulligan and the Steam Engine, The Little Red Hen, Abiyoyo, The Lorax, Bartholomew and the Ooblick, The Giving Tree, Charlotte’s Web, Ruby Bridges and any of the books about Harriet Tubman and George Washington Carver.

THE TUTORIAL

Hopefully this will be an easy block for everyone.  Please use colorful floral fabrics if you have them.  If you don’t bright colors will work too!  

Cut sixteen inch long strips, anywhere between 1 ½ inches wide to 2 ½ inches wide. 


Sew the lengths together with ¼ inch seams.  Sew together enough strips so you have a 16 inch square block.  Press all the seams going in the same direction.  You are finished!!!!
I will probably cut all the blocks into four large triangles and reassemble them;  though I may also just assemble them by alternating the direction of the strips.  I will decide when I get the blocks.

A quilt I made by cutting strips into triangles and reassembling them as squares (from a Craftsy Course, Strip Your Stash by Nancy Smith,)  


Two blocks sewn together by alternating direction of the strips.

Thanks in advance!!!  Have fun!!!


Sunday, October 26, 2014

Hive 5 finish for January 2014

AmysCreativeSide.com
Having just finished binding this quilt today, I thought I'd enter it in the Blogger's Quilt Festival in the scrappy category. Many of the blocks were made for me by members of Hive #5 of The Stash Bee. The design is the popular Japanese X and + block and I asked for warm colours for the points, black crosses, texty white backgrounds and turquoise ends.

I love all of the different fabrics. Many of which I'd not seen before. I particularly liked the New York cityscape which I understand can only be purchased at The City Quilter.


 And one of the fabrics I used was Sweetwater's Sew text fabric.


I used a new Border to Border quilt pattern called Vine by Anna Bright which I was very pleased with and I have used it on a recent client quilt too.


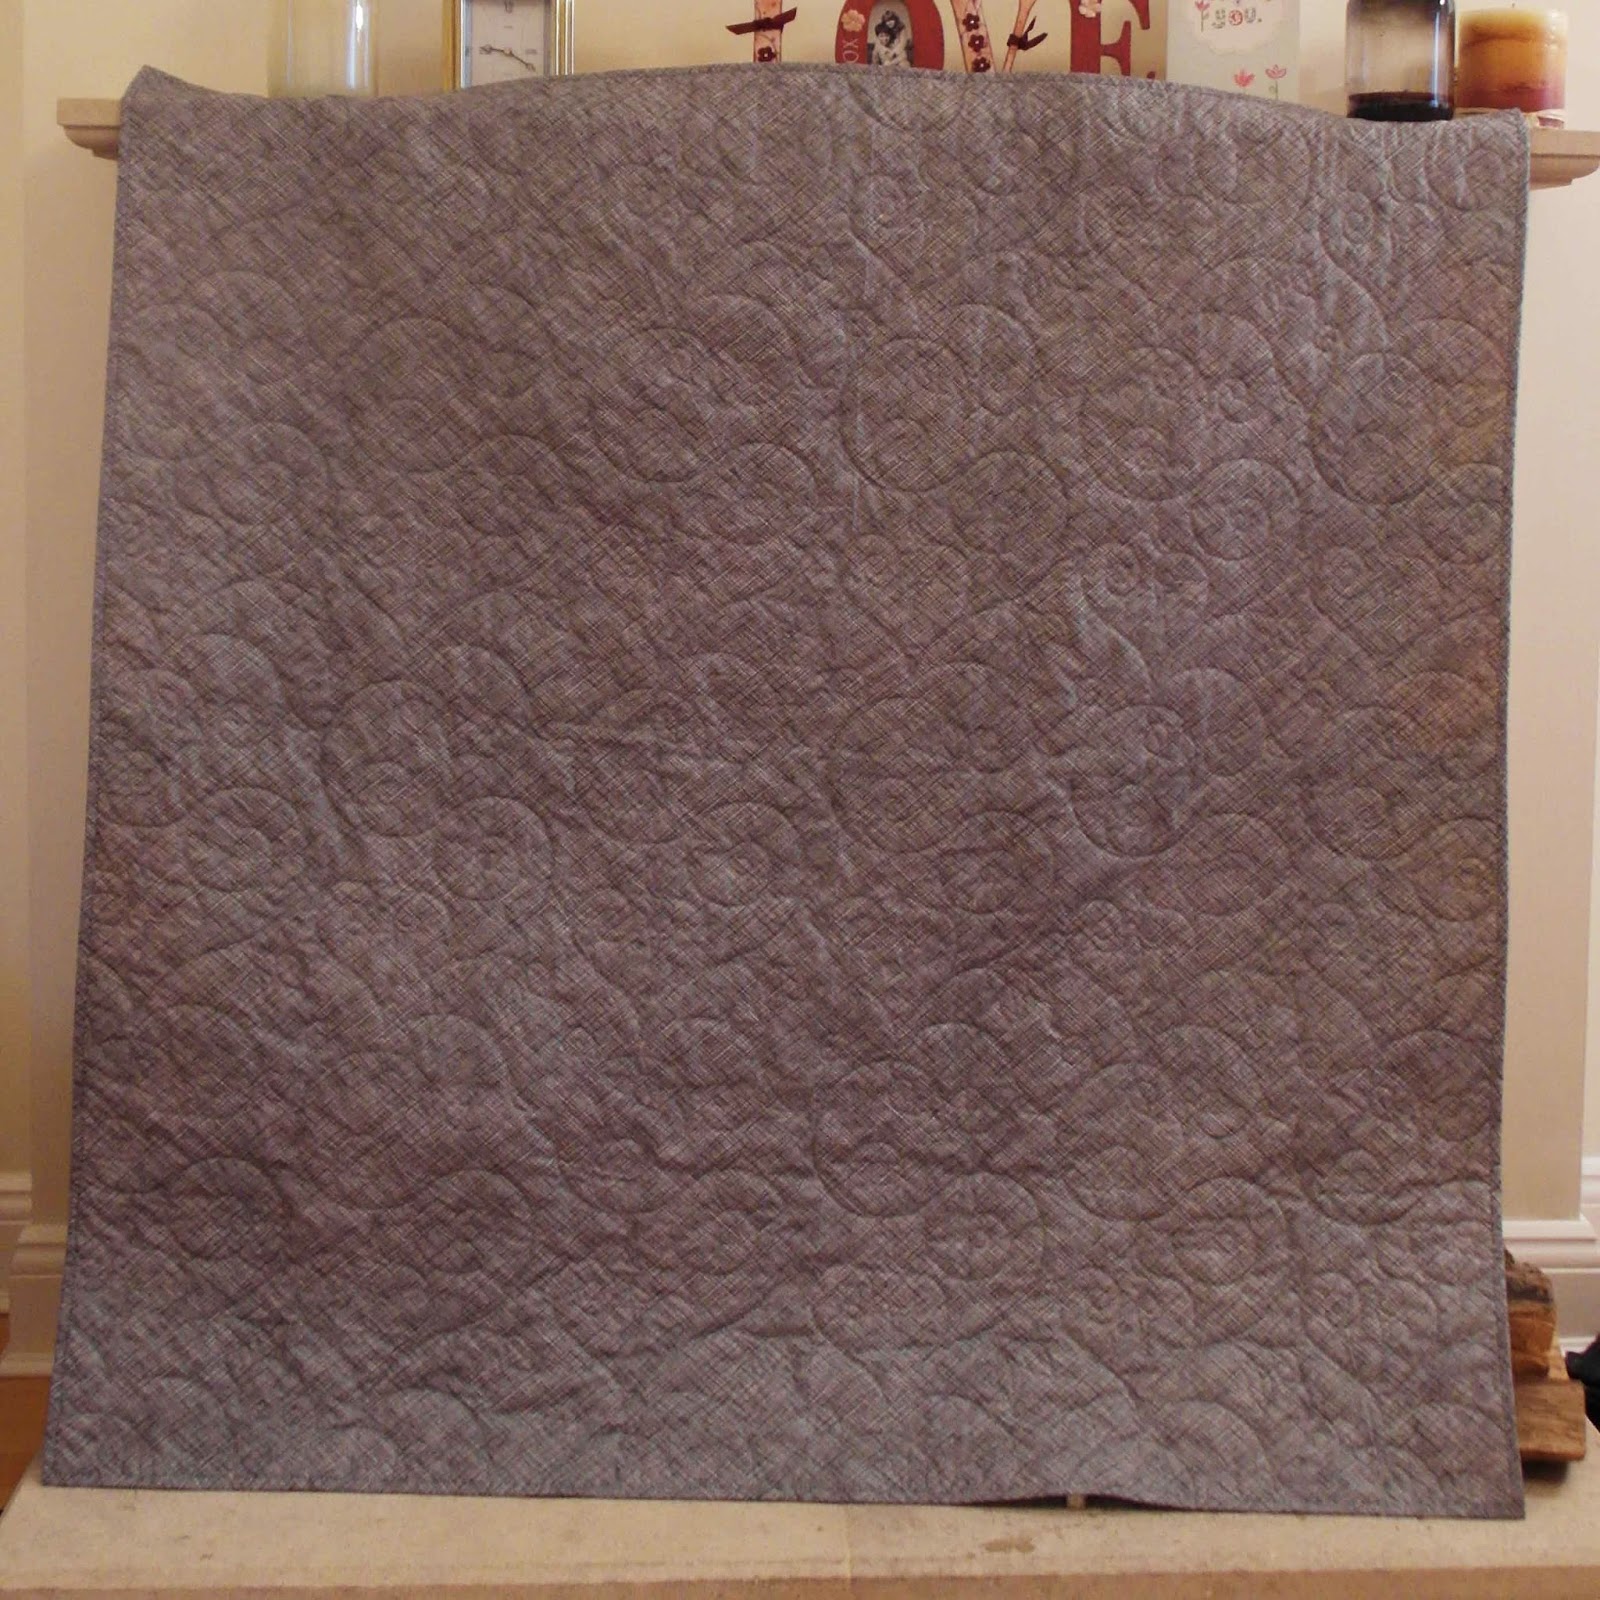
The backing is a Robert Kaufman wide screen print from Fat Quarter Shop bought in their recent promotion and I love it as the binding too. It really hides the joins on the sashing.

Thanks to all of the HIve 5 participants.

Wednesday, October 22, 2014

Friday, October 17, 2014

Hive 9 September Blocks

Thank you to the lovely ladies from hive 9 for their blocks!  Here are the blocks I've received so far:


Top left to right contributions: Karen, Jennifer (2), Renae, Beky (2), Karen, Lynn (2), and Shelby

It's going to be a fantastic quilt!

Wednesday, October 15, 2014

Hive 12 September Blocks

For September, Genevieve asked for "orphan" blocks to go along with these she's collected:


So here's what the lovely ladies of Hive 12 came up with:


Stash Bee 12

Wednesday, October 8, 2014

Hive #10 April Quilt Finish

I am so happy how the quilt turned out.  Everyone in my hive did a fantastic job of the rainbow quilt block.

 I decided to hand quilt with black perle thread.  I also wrote out each person's name below their quilt block.
I used a vintage sheet for the back from my childhood.

So glad it now resides on my daughter's bed.  She loves sleeping under it and asks all the time who made which block.

Nela

Tuesday, October 7, 2014

Hive 6 September Blocks

Hive 6 made blocks for Ashleigh in September.  She requested mini blocks framed in a thin strip of gray with a large solid border.  I love the color palette she chose and can't wait to see the finished quilt!


Stash Bee FYI: Pattern Use and Copyright Infringement.

It has come to my attention that some clarification is necessary about what is proper protocol when using a block or a tutorial designed by another quilter.


It is absolutely unacceptable to copy the pattern information from a for purchase only book, pattern, or magazine onto the Stash Bee blog to use as your block for your month as Queen Bee. In the past we had allowed people to use a block from one of these sources if the person had gotten permission from the author and/or publisher to do so, but a few bloggers have brought to our attention that people have not followed this protocol.Thus, to prevent any copyright issues, the rules will be updated to reflect that participants may not choose a block from any pattern, book, or magazine available for purchase only. This may seem like a severe change, but I think it is important that we respect the creative works of others and do not misuse them.


Additionally, it is also poor etiquette to copy exactly a block from a book, magazine, or for-purchase pattern without permission by figuring out the dimensions exactly for yourself. You'd still be making that pattern available for free with out the permission from the author/designer/publisher and infringing on their copyright. This is also wrong and is not acceptable. There have been instances of this in the recent past and these posts will be removed from the Stash Bee Blog.


It is acceptable to use a tutorial from another blog that is available for free. When using a free tutorial adapted from another blog, you MUST link to the original tutorial on the Stash Bee blog. You should not copy the tutorial in its entirety -- your bee mates should primarily use the original tutorial to direct their block making and your post should include any changes you would like made as well as any explanations of parts you think your hive mates may find difficult. You do not need to provide a step by step tutorial since one is already provided at the original tutorial source, but you should do your best to highlight any complicated parts of the block construction.


Traditional quilt blocks are blocks that no one person can truly claim ownership of and do not require any sort of permission for anyone to use. Designing a block yourself is another option, but please make sure that you've thoroughly tested the block and your cutting measurements are accurate.


If you have any questions please feel free to contact me (littlebunnyquilts @ gmail.com).

Thursday, October 2, 2014

Hive 2 - October Block Tutorial

What is your name?

Mandy Page. Find me on Instagram as @msbookleaf


Where do you live?

I live in Napa, California, home to beautiful vineyards, wineries, and the occasional earthquake that completely thrashes your sewing room. We’ve lived here for 22 years, and love it in spite of its fault. (Okay, bad joke.)


I’m currently self-employed, having worked in publishing, marketing and nonprofit fundraising in the past. But I have always wanted to have my own business. For years my dream was to open a bookstore, but I’ve since decided a fabric store would be so much better. I could satisfy my desire to buy All The Fabric and then sell it to fellow fabric fiends aficionados. My husband says, “write up a business plan!” I can't tell if he's kidding or not.


I am the bass player for a local rock and blues band called Moxie, which is great fun. I started taking bass lessons just 5 years ago at a music school that has a “Garage Band 101” workshop. (See, never too late to learn something new.) I also like cooking for friends, yoga and traveling.


Tell us about your family (Spouse, kids, grandkids, pets, etc.)

My husband, Howard, is an engineer who works on large construction sites (bridges, treatment plants, etc.) He's equal parts silly and serious, and supports all my creative endeavors. We celebrated our 25th anniversary last week, so I guess we must be doing something right!


We have two daughters we're very proud of. Savannah, 23, graduated from University of Arizona in May and lives in Tucson. Tessa, 20, is in her third year at UC Santa Barbara. She lives just a few blocks from the beach - don’t you feel sorry for her?


We have three cats, and were adopted two Christmases ago by a black bantam chicken, dubbed Arthur when we were still unsure whether she was a rooster or a hen. She lays eggs but also crows several mornings a week. Friends say Arthur has a gender identity crisis but I think she just marches to her own drummer.


Tell us about how you got interested in quilting.

Though I’ve sewn since I was 12, quilting to me was something that old grannies, or maybe artists, did. I admired the quilts in the window of the local quilt store, but never had much desire to make one.

In the summer of 2012, both our daughters were about to leave home for college. I remember how nice it was to have a blanket to take to the dorm study lounge or to watch TV under in my apartment. I thought I’d make them each a simple throw-size quilt for their new rooms. Then my husband was sent to a jobsite 8 hours away, so I decided to make one for him first.

I took a class at the local quilt store (since closed) and made Howard what he calls “the useful quilt.” As in, it’s not much to look at but it does the job. I learned a lot from that experience - both do’s and don’t’s - not just in terms of piecing and other techniques, but also how to choose and put together fabrics. My daughters’ and other subsequent quilts turned out much more pleasing to the eye.

Sav's Come What May quilt

One thing I didn’t expect is how emotionally fulfilling quilting is for me! I’m definitely not as happy on days when I can’t sit down to sew.

Tessa's Beachy Trip Around the World quilt

How do you organize your fabric stash? (Picture appreciated)

I have fat quarters sorted by color on an Ikea CD shelf. Larger cuts are in wire mesh drawers in the closet (yes, it’s purple, since this was my oldest’s room - someday I’ll repaint). Fabrics intended for specific projects are in the lower drawers, with “unassigned” fabric in the upper drawers. I have some fat quarter collections on top of our file cabinets, and some home dec fabrics stacked in one of the file drawers. Scraps are in an overflowing basket.

Pretend it's not messy, okay?

Who is/are your favorite fabric designers?

This is a toughie, since it’s ever-evolving! I like Lizzy House, Emma Jean Jansen, Violet Craft, Anna Maria Horner, Joel Dewberry, and Art Gallery Fabrics in general. I definitely find myself drawn to blenders, tone-on-tones, small prints now more than the splashy feature prints I first coveted.


What is one thing you have learned that you wish you knew when you first started quilting?

I wish I knew how much of a difference it makes to starch and press fabric prior to cutting and piecing. My seams are so much straighter and flatter now!


What is your favorite sewing/quilting tool and why should we all go out and buy it?


As you probably all know by now, (since I think I’ve sent most of you one along with your blocks), I love Frixion pens! They make the perfect fabric markers since the ink disappears from the cloth as soon as you iron it. They’re also great writing pens in general, and they really are erasable (on paper). I also love Clover Wonder Clips.


Who is your favorite fictional character and why? (Could be from a book, movie, TV show, etc.)

So many to choose from, but I'll go with Kinsey Milhone, from the Sue Grafton series (A is for ...). A junk-food loving private detective in a fictionalized version of Santa Barbara, she's tenacious and, to all appearances, tough.


BLOCK TUTORIAL

(I inadvertently published this before I was finished, so if you already saw it and it looks different now, that's why. Hopefully it's clearer.)

The block I’ve chosen is Shattered Chevrons, from a tutorial by Play Crafts. It plays off the current trend for feather and arrow blocks, but is easier to do. I considered red and green since we’re all in the middle of our Christmas sewing, right? (cough) Instead, I’ve decided on red, white and blue. (Even our Brit, Jessamie, can wave her flag at this one!) My inspiration is this particular shattered chevron block (but please check out Play Crafts for more versions!).


They don’t need to be patriotic fabrics or scream 4th of July. Florals, geometrics, stripes, dots, texts, tone-on-tone, solids, are all welcome to play. I just ask that they be bright, true colors for a fresh, summery look, rather than the antique-y dark red/burgundy, beige/tan variation, I’d like pure red, navy, royal and white/off-white. (However, I probably won’t mind too much if a bit of lighter blue or pink sneaks in there).

Here’s my fabric pull to give you an idea of what I have in mind (for some reason my reds look more orangey here, but they are true red):


And these are some blocks and quilts I grabbed from the internet (in some cases I couldn’t locate the original source, apologies to the creators!) for color inspiration:

Sources listed at the end of this post

I’m doing a different size block than Play Craft’s tutorial, so here we go. (But please feel free to refer to the original tutorial if my directions aren’t clear.)


You’ll need:

  • Multiple 15"-18” strips of fabric, ranging in width from 1.5” to 2.75”
  • 8 top/bottom strips, measuring 18" long by 4” (or more) wide.
  • The usual sewing tools, including a cutting mat or ruler with a 45-degree angle line. 
Check your scrap basket! You can use odd jelly roll pieces or extra binding strips, whatever you've got. I cut a strip off the 18" side of several fat quarters and half-yards for most of mine. I don't mind if you repeat fabrics, so feel free to use wider and narrower strips of the same fabric in different places. I would also like for each pieced strip to have a bit of white, even if all you have is a solid.

Because I've found that strips of fabric and bias edges (both of which we'll be dealing with) tend to stretch out of shape, I prefer to starch and press the fabric before I cut it, but I'll leave that up to you.


And here we go:

Lay out 5-7 strips stacked on top of one another, like so, with the 4” strips at the top and bottom and the narrower strips in between.


Your (unsewn) square should measure at least 15” wide x 18” tall. Alternate colors and widths in a pattern that's pleasing to you. Just make sure the wider 4" strips are at the top and bottom.


Next, take the strips and move them so that they are staggered along a 45-degree diagonal from the bottom left to the upper right. Use the lines on your mat and ruler to help you. (I aligned the top left corner of each strip with the 45-degree mark on my cutting mat.)


Sew the strips together as laid out. Use pins or a marking tool (Frixion pen!) to keep the strips from shifting.


Press all seams open.

Cut the uneven edges off the block on the LEFT side at a 45-degree angle. Then, following that same angle, cut two 2.5" strips from the block.


I found it helpful to rotate the cutting mat, rather than the fabric, to cut this part. That's why this photo is upside down, so as not to confuse you!


When you're finished, they should have two pieced 2.5" wide strips that look like this (above), with an "uphill" angle. 


Repeat with another set of strips, 4-inchers at the top and bottom, and narrower strips in the middle. Sew together fabric strips, press seams open, slice off the uneven left edge at a 45-degree angle, then cut two 2.5" strips.


And now you have two sets of two pieced strips, all going uphill. But wait, there's more!

Now you’ll do two more , but this time the 45-degree angle will be in the opposite direction (upper left to lower right ). Wide strips top and bottom, with the upper right corners of the fabric strips aligned on the "downhill" 45-degree line on your cutting mat. 


On my mat, this line intersects the 45-degree line I used previously. All mats are different, though, so make sure these strips are going the opposite direction.

Sew together strips, press open seams, slice off the uneven RIGHT edge at a 45-degree angle, then cut two 2.5" strips.


Now you have two more sets of two pieced strips, but these are downhill.


And here are all eight pieced strips, four uphill and four downhill.


It's like magic

When you flip one of the strips (so the top is now at the bottom), the uphill/downhill orientation remains the same, but it looks completely different. The two pairs of strips above are actually the same strip, just with one of them flipped.


Now, lay out the strips in alternating uphill/downhill orientation, like this. You can flip some of the strips the opposite way for variety. In this photo, I've flipped one of each of the four sets upside down, so no two strips are alike.

There's no need to line up the points (hurray). To make this chevron block look "shattered", it's actually better if the points don't meet at the seams (easier to sew as well), so go ahead and slide the strips up or down until they look good to you.


Once you've got them lined up the way you like them, sew the strips together in pairs, making four "peaks." Then sew the peaks together, making the full chevron design.


Be careful not to stretch the fabric as you stitch the strips together. It's really easy to pull these bias edges out of shape.


And that’s it! Your finished block should measure 16" to 16.5" across, and be at least 15" tall at the shortest point. 


All done! I haven't yet decided how (or whether) I will sash these blocks, so please leave your blocks un-trimmed, just as pictured!

If you don't have enough fabrics to do four different pieces, Play Crafts has suggestions for making two sets of four, rather than four sets of two, pieced strips. Just remember to adjust the measurements so that you end up with eight pieced strips total.

Please feel free to comment below or email me if you have questions.

Thank you all so much! I can't wait to see what you all do.

Mandy


Quilt Collage Sources:
1.  Unknown
2.  Gigi's Thimble
3.  Twinkle and Twine 
4.  Ali's Flickr stream
5.  All People Quilt (page not found)
6.  Crafty Blossom 
7.  Quilty Therapy 
8.  Quilted Joy 
9.  This Is Emily Kate