I love a simple snowball block, and this was no exception! I put the envelope in the mail this morning so it's already on its way. - Julia


I love a simple snowball block, and this was no exception! I put the envelope in the mail this morning so it's already on its way. - Julia
You Gnome I Love You
I decided for this year’s Stash Bee, I would like to do something Christmas themed and because of my stack of unquilted and in-progress quilts, maybe a smaller project that I will actually finish in a timely manner. I found this adorable gnome block and intend to make a table runner or runners for my mom for Christmas.
Pattern and detailed instructions can be found here: https://www.hellomellydesigns.com/you-gnome-i-love-you-block-tutorial/
The finished block will look like this:

Block Size
The block should finish around 10.5” x 11”
Fabrics
For the background, use a solid white or white on white print
For the red and green, please use a print that reads mostly green or mostly red, preferably not a licensed or novelty print, though something Christmasy would be acceptable
For the nose, I used pink as per the pattern, but feel free to use pink or any skin tone fabric you’d like, preferably solid or tone on tone.
Here is my pull:

Cutting
Red Fabric: (1) 4.5″ x 8.5″
Green Fabric: (2) 2″ x 5″, (2) 3″ x 3″, (2) 1.25″ x 1.25″
White Fabric: (2) 3″ x 5″, (2) 4.5″ x 4.5″, (2) 2″ x 2″, (4) 1.5” strips for border (9 and 11” or a bit longer to be safe)
Pink Fabric: (2) 1.25″ x 1.25″
Note: photo below shows my cut pieces, but is missing the border strips as I decided to add them when I was all finished.

Draw a line corner to corner on each of the squares as they will be used either for a flying geese block for the hat or snow ball corners for the rest of the pieces.
Lay the larger white squares on top of the Red rectangle as below and sew along the drawn line. Optional: This big piece causes quite a large waste piece when cutting the flying goose. Optionally draw a second line 1/2” from the diagonal line (as shown in my photos) and sew along it and cut between the lines for 2 bonus half square triangles…you can keep them for a fun project or I’d be happy to use them in mine if you feel so inclined to send them along.


Press open and repeat on the other side

Press Open

Set the hat aside and assemble the rest of the pieces as shown by snowballing the squares on by sewing across the diagonal lines as shown.


Press each snowball back

Sew the 4 bottom pieces and attach the hat piece to the finished body

Optional: If needed, give the block a bit of a trim to 8.5” x 9” Below is after I gave mine a little bit of a square up.

Add the 1.5” strips to each side. I did top and bottom first, and then the sides, but I am not picky about that.


Thank you all so much for helping me with this fun gift for my mom. I hope you have as much fun making this little guy as I did :)
<3 Amy
I have to thank you Chris, for the excuse to go buy some beautiful fall colored batik fabrics! My LQS didn't have a big selection, but I found a few I hope work for you.


Hi, Chris, these were fun!! I can see this being a good pattern to use with something like an I-Spy quilt. I can't wait to see the final result!! They'll be in the 📫 today or tomorrow!

Here is my block for Chris this month. Such a simple block but I have no doubt that once it's put together, that quilt is going to be stunning. And in fall colors (which are my favorite), it's sure to be a beauty.

~ Diana


I didn't get quite the results I was hoping for with my first block. The fabrics I chose were too tonally similar. So I hope I redeemed myself with the second block.
This was super fun and I am really excited to see the finished project. What a great idea (that I might have to steal for myself)!
With kindness,
Nicole
Hi Chris,
I had a wonderful time picking out these beautiful fall batiks. Hopefully you love them as much as I do.

Happy Sewing,
Nicole Buendía

Here you go, Chris. I love Batiks and just happened to have several in autumn colors.
Sweet and simple. I am also sending a few extra mini squares for you to use.

P.S. This is Deana
I’d like the plus to be one of the bright colors below:

It can be a solid or print, but should strongly represent the color chosen.
For the background, I would like all of the background squares to be from same all white or white based based neutral. The background shouldn’t be a distraction from the bright color used in the plus.
Cutting guide:
4 – 5in Squares of Neutral background
4 – 2 ¾ in Square of Neutral background
1 – 7 ¼ X 2 ¾ in rectangle of your selected color
2 – 2 ¾ in squares of your selected color
Ideally neutral backgrounds will all be the same fabric.


Hi Chris,
Luckily I treated myself to an autumn colour batik jelly roll earlier this year!
Hope you like the colours.
The blocks are on the way to you.
Happy sewing,
Rita
At the start of the year I promised myself to start finishing projects. This quilt is for my brother and my Stashbee mates from last year, helped me make Block As from the free quilt tutorial at Free Tutorial Plaid-ish This year I am requesting you to make Block C if you are looking at the pattern, which is not necessary to complete the block as my instructions here will be complete enough. Almost every version of this scrappy quilt is pretty, so it may be worth paying a visit to the actual pattern at Kitchentablequilting.com or googling for images of this quilt.
You will need dark, medium and light fabric. My color selections include dark greys for the darks, bright fabric for the medium and low volume fabric for the light. Here is a sample of my fabric pull:


Next, lay out your pieces as follows and sew into three rows. For the top and bottom rows, iron toward the outside and for the middle row iron toward the inside so that your seams nest when sewing the rows together.

Your finished block should measure 8.5” x 10.5 “.

Hope you enjoy making this block. It’s all about contrast, because as you see my medium is rather dark but not against the grey. Use what you have available as this quilt is very busy and forgiving.
Kim

Hello Hive Humans:
Being so busy in the middle of summer (vacations and plenty of outdoor beach activities) I chose a very simple and fast block to make - a Tiny Tile Quilt by Purl Soho for the Fall. I chose batiks because they make me happy!
I'd really love you all to embrace a Fall Spectrum of colors: oranges, reds, greens, yellows, golds, browns and the like. Please keep your choices to very small or solid'ish batiks. Maybe no blues, purples and blacks? If this sounds too picky, you are free to ignore me! Also, if you don't have batiks, please select some fabric in your stash that looks like it could be a batik.
Here are some of the batiks I’m working with:

The larger background squares should be quilting cotton in either solid off-white or solid light tan.
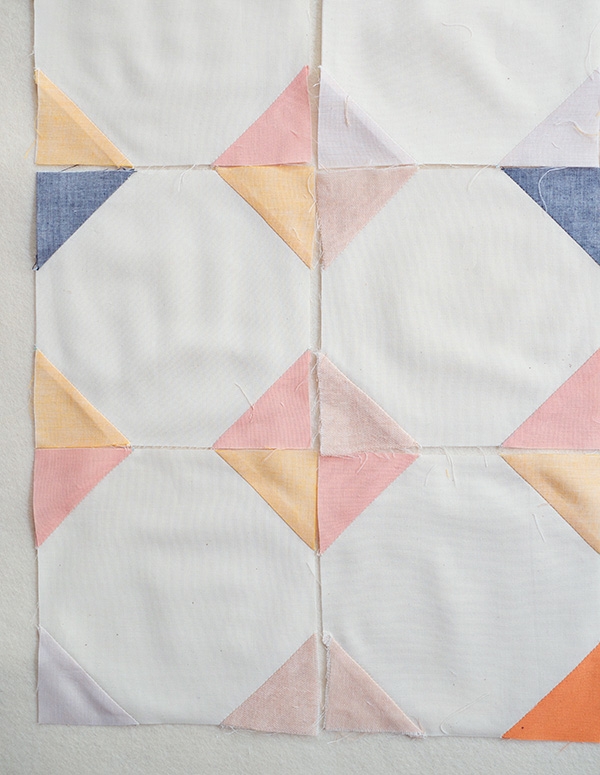
Each hive member will make 4 blocks but please don't stitch them together. I will lay them all out on my design board for placement.
Fabric Requirements:
16 2" squares of (random) batiks
4 5 1/2" squares of off-white or light tan solid (quilting cotton)
Here is the website with a tutorial if needed:
Tiny Tile Quilt - Purl SohoPurl Soho
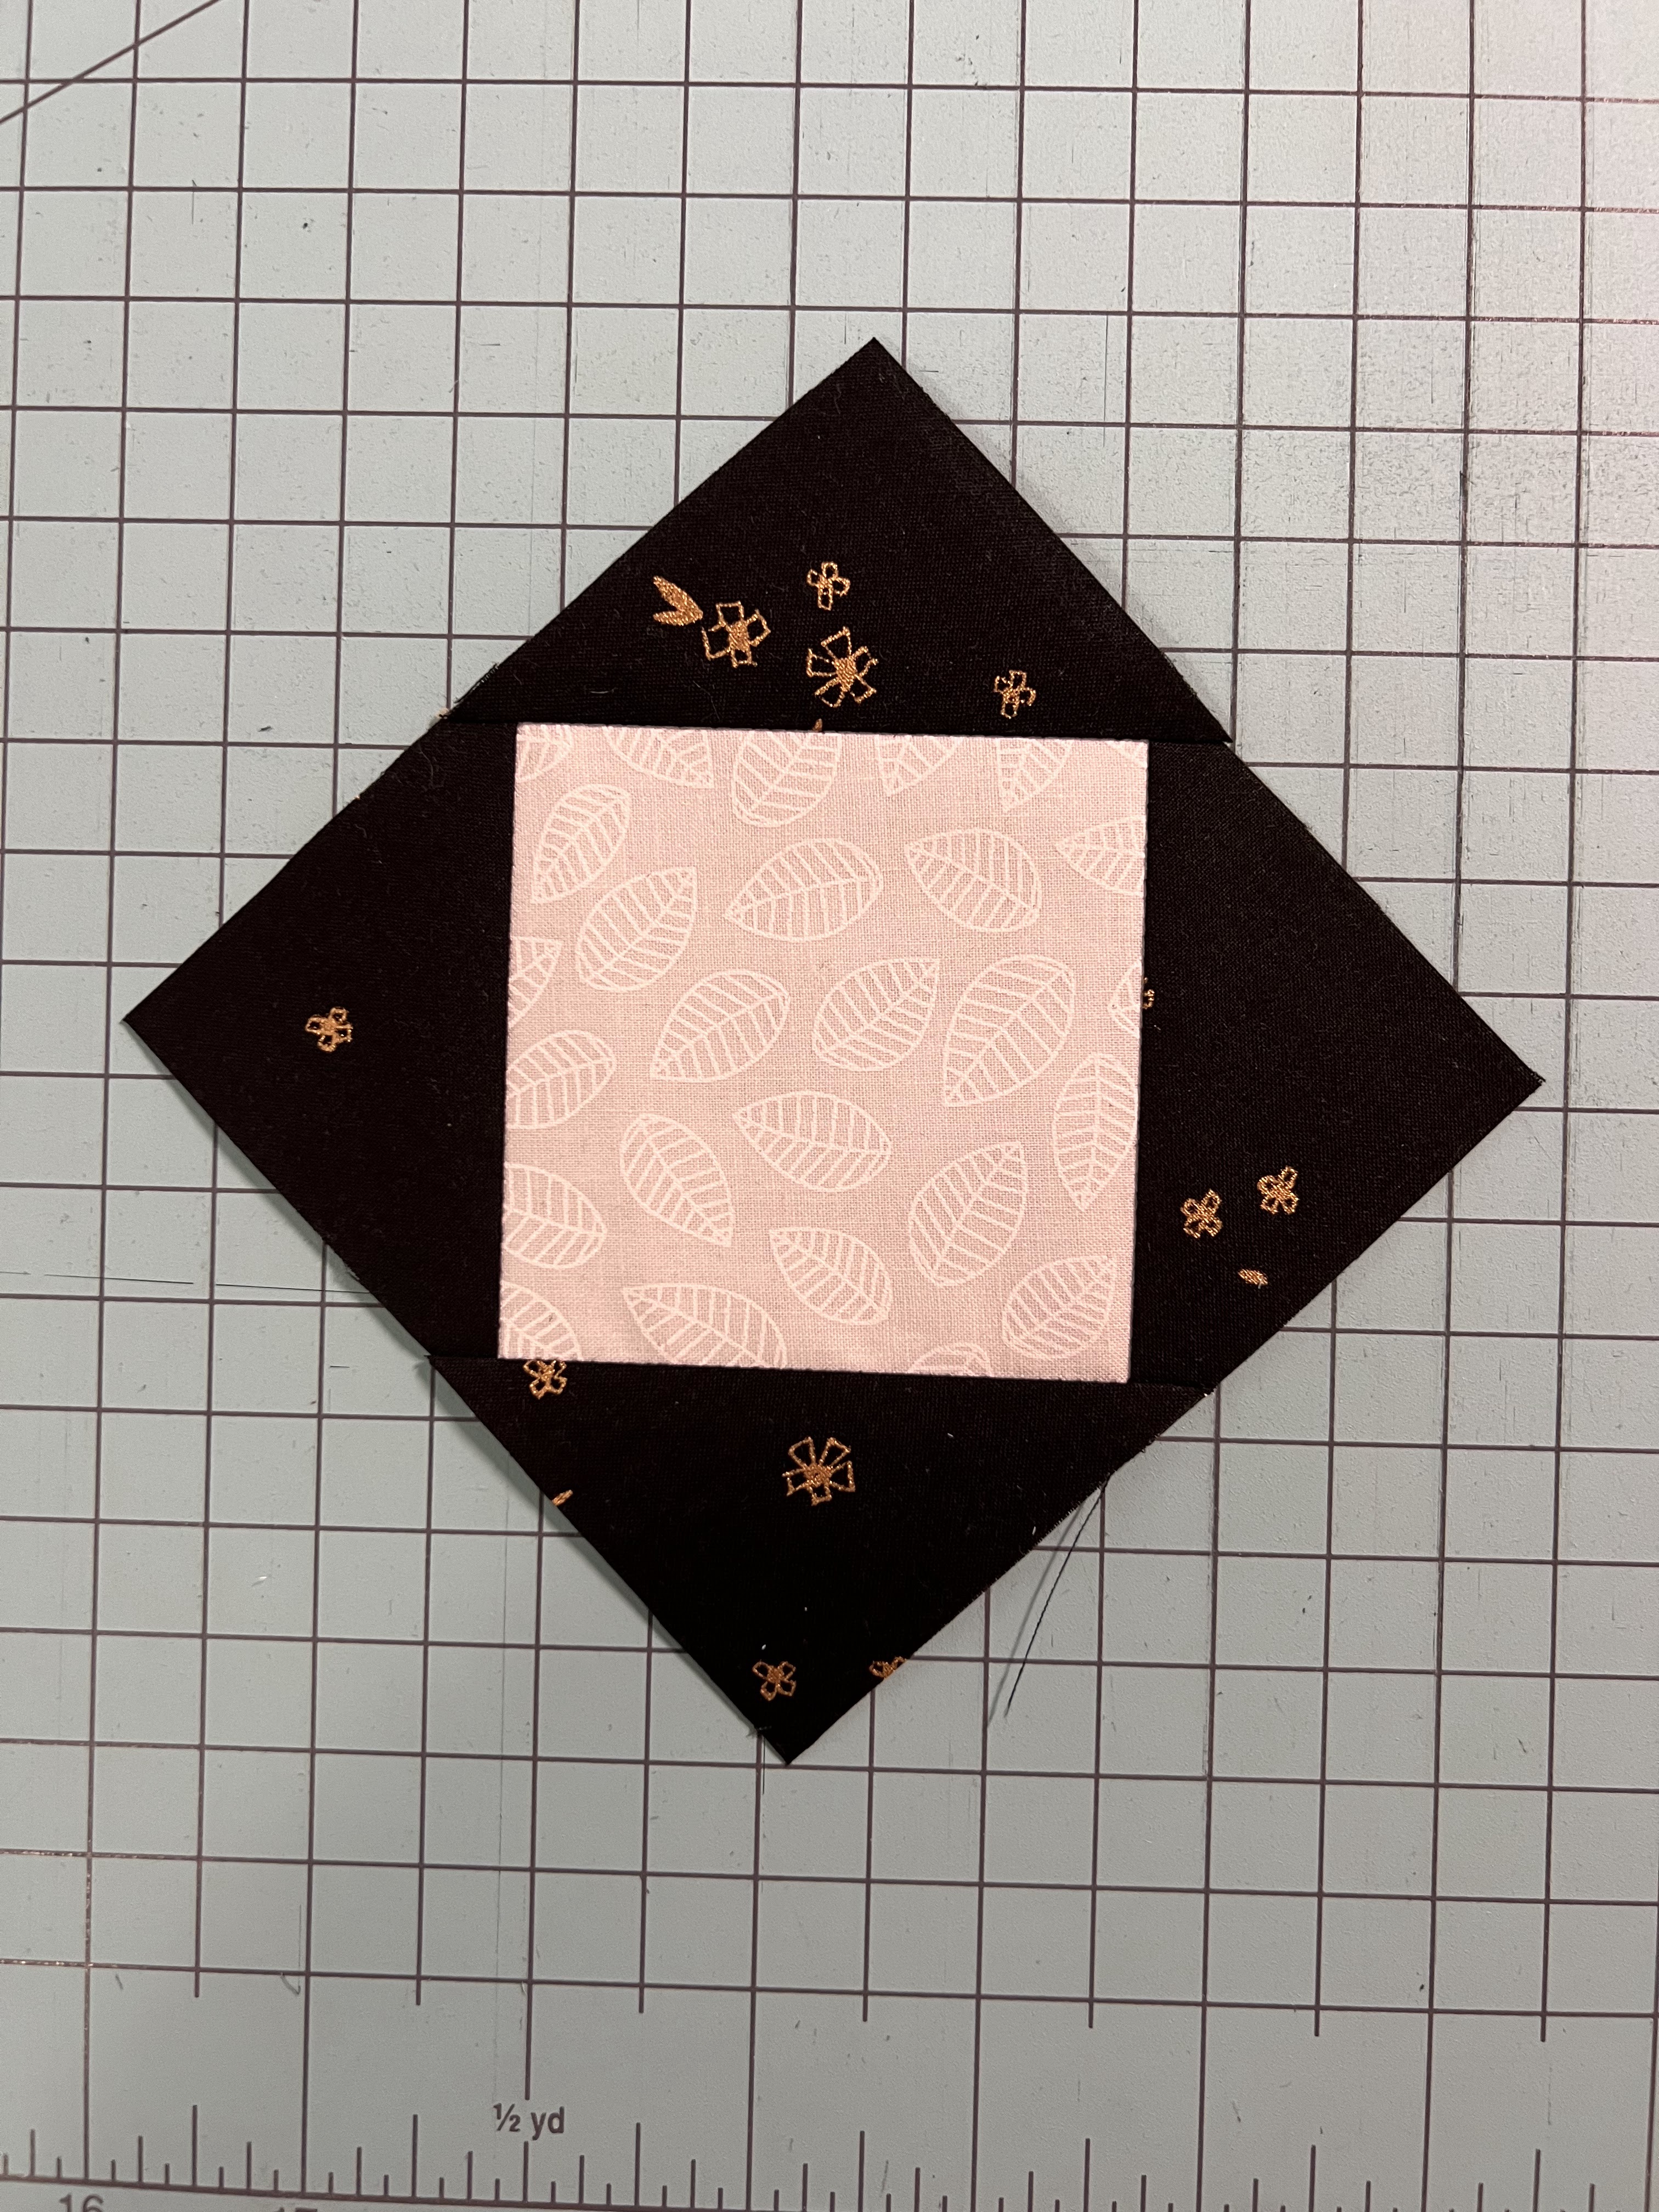
Start by cutting your 2" squares and place them in a bowl or bag to randomly pick 4 for each corner of your 5 1/2” background square.
Draw a diagonal line on the back (hmmm...which side of the batik is the back?!) of each 2" square and sew one to each corner of your background fabric.
Note: A wise Quilty Pal once directed me to sew just on the outside of your drawn line - toward the corner - so that when attached, it will perfectly align with the bottom half when you fold it over to check.

Trim away excess to 1/4" and press toward the corners.
And then... YOU. ARE. DONE.
Remember to make 4 blocks total.

I hope you all embrace the simplicity of this little project of mine. I am a confident beginner looking for quilt projects that will stay off my naughty shelf of UFO's! Although it may not be great a skill-building block for most of you, it means a lot to me as a beginner seeking community and the joy of quilting!
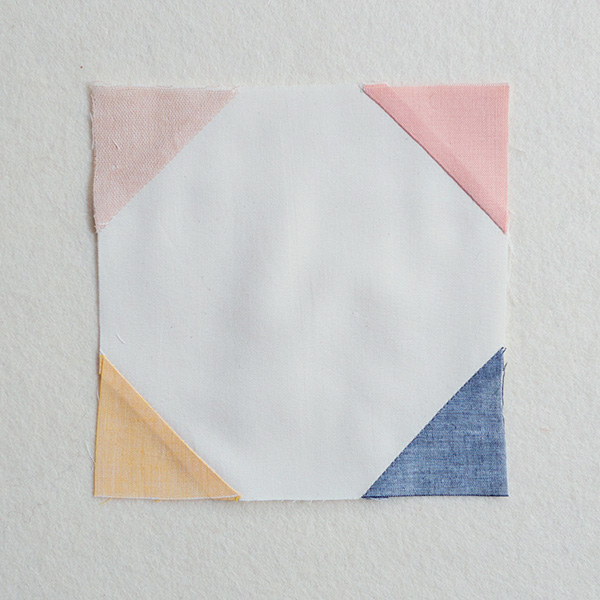
Here is a photo of the finished Tiny Tile Quilt by Purl Soho:

Happy quilting!
Chris
Hello everyone!
I decided to go with the Road to Grandma's block from Patchwork square. Here is the link to the original tutorial. I wasn't a fan of how sparse the directions are, so here's my version of a tutorial to include 4 at a time flying geese! (makes it go by way faster!)
If you don't want to read through my tutorial and go with the link, please make the 12" version, which should be 12 1/2" unfinished.
Here are the two blocks I've made so far:
Here's the fabric pulls I did, which I later changed around:


Please reach out to me if you have any questions. I hope you enjoy making this block as much as I did!
Thanks,
Liz
(here's my blocks in a bigger view)


