
May – Paula
Hive 4 Tutorial for May – Floral Half (Quarter) Log Cabin
Variation Block
#STASHBEEHIVE4
#STASHBEE2024
#Tutorial
Happy May! I hope your
flowers are blooming. I was inspired by spring when selecting this block.
Cutting 2 ½” strips/squares is my go-to for managing fabric scraps so the block
will be made using 2 ½” squares and rectangles. I was excited about this
pattern so as I was testing the instructions, I kept going and have enough
blocks, along with yours, to create a 96x96 quilt top. This is how I will layout four of the blocks

Material
(F) Florals – No color
constraints. Use as many fabrics with a floral pattern as you want. If you are using
the same fabric in multiple rounds, please spread them out so they are not
touching. I tried using the same fabric in the same round (you will see in the photos below) but I liked the variation more.
(W) White/Cream – Select
material with a sparse pattern, tone-on-tone, or solid. It should read white. I
did use one very light purple as the white and it looked fine and did not stand
out.
Tutorial
Cutting
White
1 2 ½” x 2 ½” square
Florals
1 2 ½” x 2 ½” square
2 2 ½” x 4 ½” rectangle
2 2 ½” x 6 ½” rectangle
2 2 ½” x 8 ½” rectangle
2 2 ½” x 10 ½” rectangle
2 2 ½” x 12 ½” rectangle
2 2 ½” x 14 ½” rectangle
1 2 ½” x 16 ½” rectangle
Cut Pieces

Construction
·
Use a ¼” seam
·
Press seams away from the
white square toward the current strip sewn.
·
The block is sewn on point
and not in a round as a traditional log cabin block. The “center block” will be
in the corner.
·
Finished block will
measure 16 ½”
 |
| Block Layout |
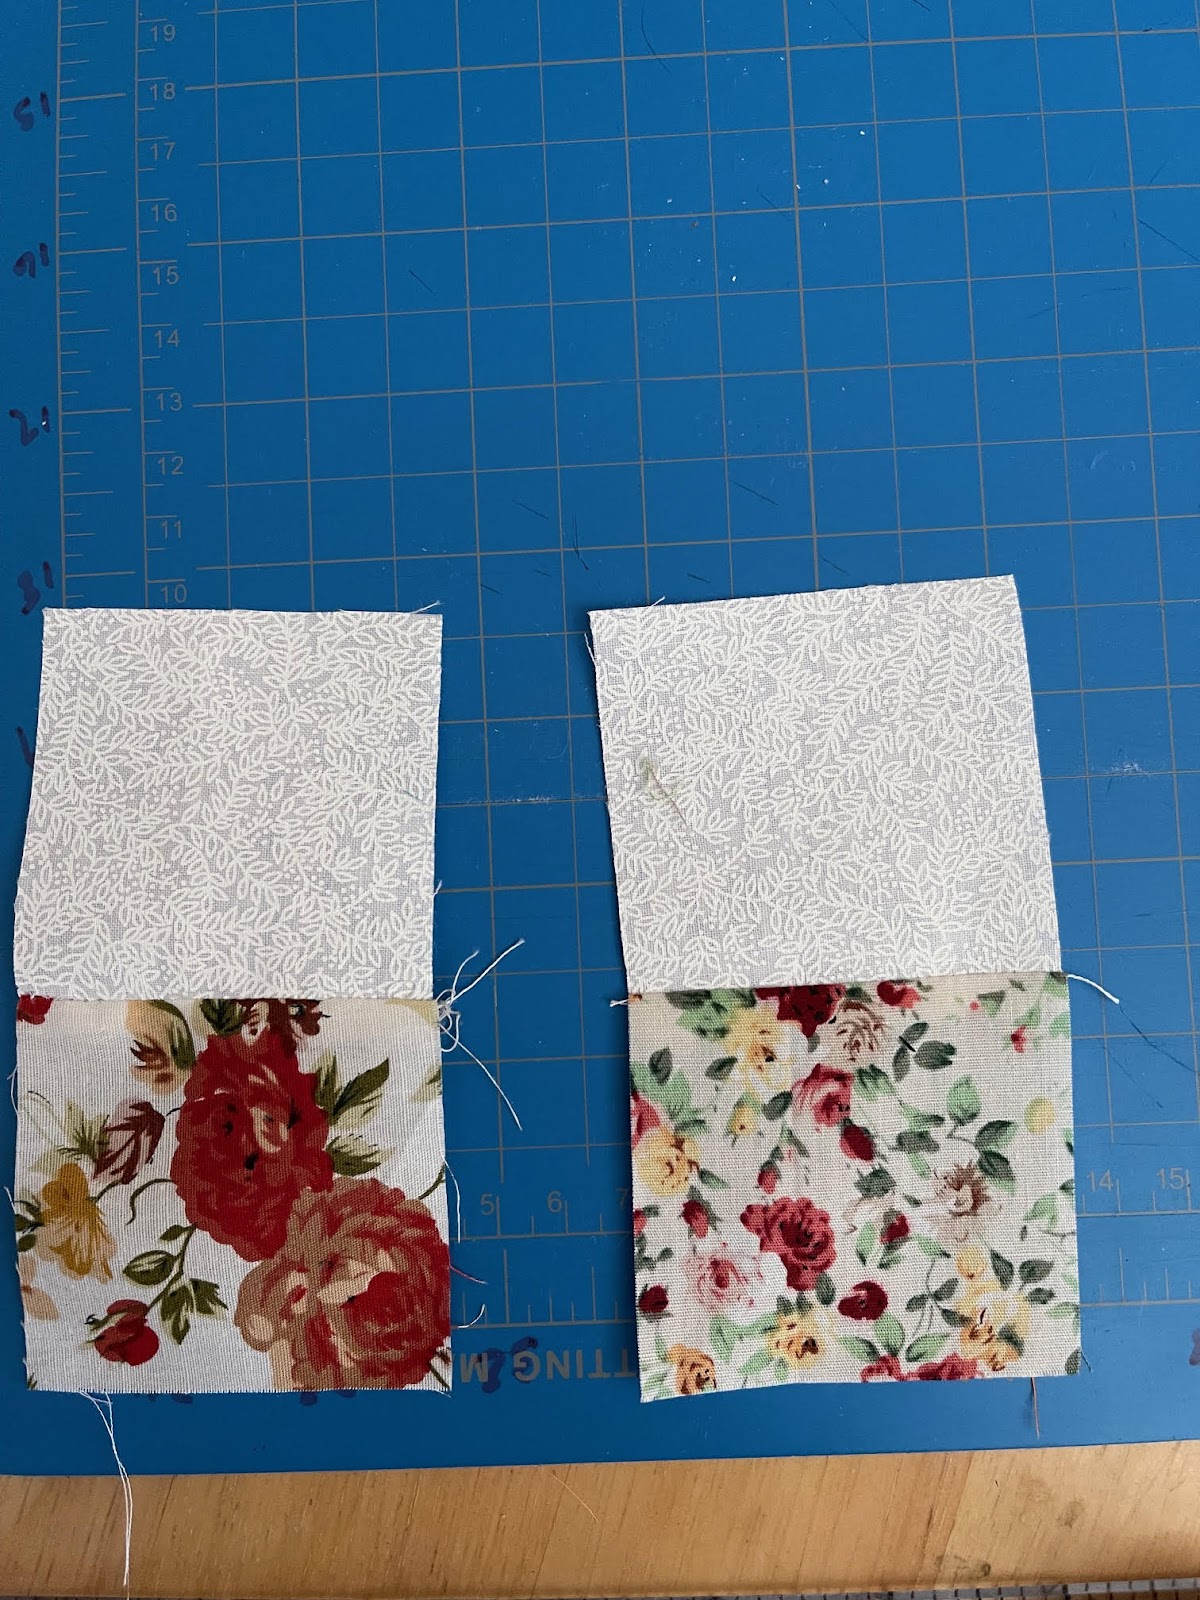
1.
With right sides facing,
sew the two 2-1/2” squares together with a ¼” seam. Press away from white square.
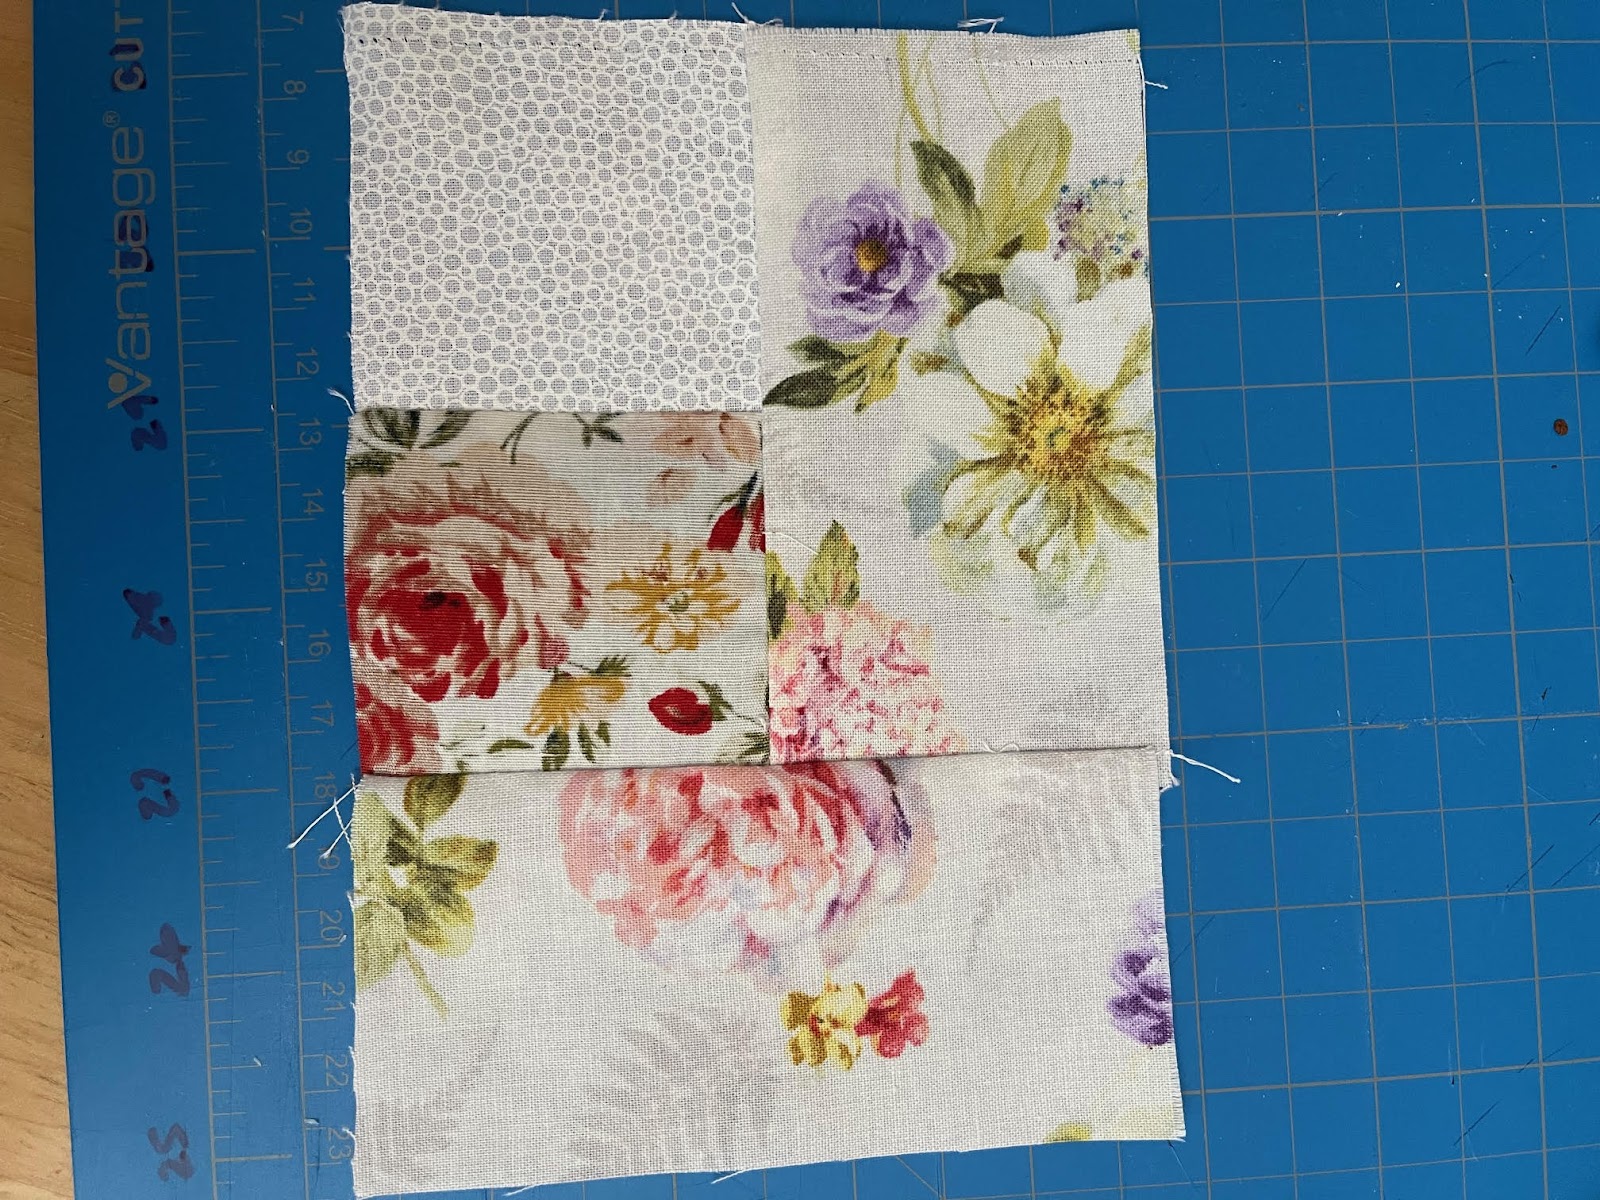
2.
Sew one 2 ½” x 4 ½”
rectangle to the bottom of Step 1 keeping the white in the corner.
3.
Sew one 2 ½” x 4 ½”
rectangle to the right of Step 2 keeping the white in the corner.
4.
Sew one 2 ½” x 6 ½”
rectangle to the bottom of Step 3 keeping the white in the corner.
5.
Sew one 2 ½” x 6 ½”
rectangle to the right of Step 4 keeping the white in the corner.
6.
Sew one 2 ½” x 8 ½”
rectangle to the bottom of Step 5 keeping the white in the corner.
7.
Sew one 2 ½” x 8 ½”
rectangle to the right of Step 6 keeping the white in the corner.
8.
Sew one 2 ½” x 10 ½”
rectangle to the bottom of Step 7 keeping the white in the corner.
9.
Sew one 2 ½” x 10 ½”
rectangle to the right of Step 8 keeping the white in the corner.
10. Sew one 2 ½” x 12 ½” rectangle to the bottom of Step 9
keeping the white in the corner.
11. Sew one 2 ½” x 12 ½” rectangle to the right of Step 10
keeping the white in the corner.
12. Sew one 2 ½” x 14 ½” rectangle to the bottom of Step 11
keeping the white in the corner.
13. Sew one 2 ½” x 14 ½” rectangle to the right of Step 12
keeping the white in the corner.
14. Sew one 2 ½” x 16 ½” rectangle to the bottom of Step 13 keeping the white in the corner.


No comments:
Post a Comment
Thank you for your comments!
Note: Only a member of this blog may post a comment.