Pages

Friday, May 31, 2024

Hive 4 - June Tutorial- Modern Log Cabin Block

 Everything old is new again! Yay!


Here is a perfect example... Log cabin quilt blocks.  There is practically nothing more traditional than this block.  It has really been around since forever.   And today when I was thinking about what kind of block I wanted my Hive 4 bee mates to make for me in June, I thought this would be spot on.

So, naturally I went looking online for something that would suit my modern-ish tastes and conform to our Stash Bee Rules.  Lucky me, I found Gracey Larson at Burlap and Blossom who offers a free pattern.

Here it is!

https://drive.google.com/file/d/1TJZwCllXbqj3ynQdHwdsBWoqrk6DYI4K/view

I love love love it.  It is sew very straightforward.  There are absolutely no angles, no surprises, and no tricky paper piecing. It. Is. Just. Cut. And. Sew!

You are welcome.

My wish list for June  

1. 12.5” unfinished block 

2.  White background.  I would prefer solid white if you have it in your stash…but, if not then white on white or very low volume is fine with me.  

2.  Please use bright modern fabrics for the logs.  Use either solids or prints that read as solids.  See my test block at the top of this post and the example in the tutorial for examples made with prints and a solid white background. 

3.  You can use the same colour more than once if you like, or make every log different. 

That’s it… easy peasy, lemon squeezy. If you have problems downloadin or finding the link please shoot me a message at Freckledfoxquiltery@gmail.com or on IG @freckledfoxquiltery. 


.  


Thursday, May 30, 2024

May Block-Hive 1 for Molli

 Well, better late than unfinished!  This is a fun block to make and the quilt will be fantastic once together. 

Thanks for picking this one, and your patience with me 😊

I’ll pop into the post office this week. 

Chris 


Sunday, May 26, 2024

Rainbow Stained Glass for Molli 🌈


Hi Molli! I really followed my "whims" on this one, using up some scraps, and it ended up being much more than 11" in one direction. Hope that's okay! I'll get it mailed out after this weekend.

Monday, May 20, 2024

Hive 1 Stained Glass for Molli

I didn’t realize until I got going on this how limited I am on gray fabrics. I hope this kind of variegated gray goes ok! (Can we pretend your leading is a little dusty/grimy just in some places?) I can’t wait to see it all; your massive stained glass is going to be amazing!


Sunday, May 19, 2024

Hive 1 Block for Molli

 This is such a quick and easy block to make but when you put them all together, they are going to have such a "wow" factor. I can't wait until you finish this project. It's going to be stunning.

~ Diana

Saturday, May 18, 2024

Hive 1: Stained Glass for Molli

 I've been wanting to try stained glass for  a while now, so thanks, Molli. Also, I am obsessed with rainbows. Thank you especially for giving me an excuse to buy the gorgeous rainbow floral I used. 


Monday, May 6, 2024

Rainbow Stained Glass blocks for Mollie


Hi Mollie,

This month turned out in two blocks 😀 One bigger than the other- but I leave everything as is for you to trim. This was a fun pattern to make, got my "stitch-as-you-go" wheels turning!

Take care,

Marie


Saturday, May 4, 2024

Hive1, May, Rainbow Block for Molli


 Hi Molli,

It was a joy making these, they went on their way to you today.

Happy sewing,

Rita

Friday, May 3, 2024

Hive 4- May Tutorial- Floral Half (Quarter) Log Cabin Variation Block for Paula

May – Paula

Hive 4 Tutorial for May – Floral Half (Quarter) Log Cabin Variation Block

#STASHBEEHIVE4

#STASHBEE2024

#Tutorial


Happy May! I hope your flowers are blooming. I was inspired by spring when selecting this block. Cutting 2 ½” strips/squares is my go-to for managing fabric scraps so the block will be made using 2 ½” squares and rectangles. I was excited about this pattern so as I was testing the instructions, I kept going and have enough blocks, along with yours, to create a 96x96 quilt top. 

This is how I will layout four of the blocks


Material


(F) Florals – No color constraints. Use as many fabrics with a floral pattern as you want. If you are using the same fabric in multiple rounds, please spread them out so they are not touching. I tried using the same fabric in the same round (you will see in the photos below) but I liked the variation more.


(W) White/Cream – Select material with a sparse pattern, tone-on-tone, or solid. It should read white. I did use one very light purple as the white and it looked fine and did not stand out.


Tutorial


Cutting


White

1 2 ½” x 2 ½” square


Florals

1 2 ½” x 2 ½” square

2 2 ½” x 4 ½” rectangle

2 2 ½” x 6 ½” rectangle

2 2 ½” x 8 ½” rectangle

2 2 ½” x 10 ½” rectangle

2 2 ½” x 12 ½” rectangle

2 2 ½” x 14 ½” rectangle

1 2 ½” x 16 ½” rectangle

Cut Pieces


Construction


·        Use a ¼” seam


·        Press seams away from the white square toward the current strip sewn.


·        The block is sewn on point and not in a round as a traditional log cabin block. The “center block” will be in the corner.


·        Finished block will measure 16 ½” 

Block Layout


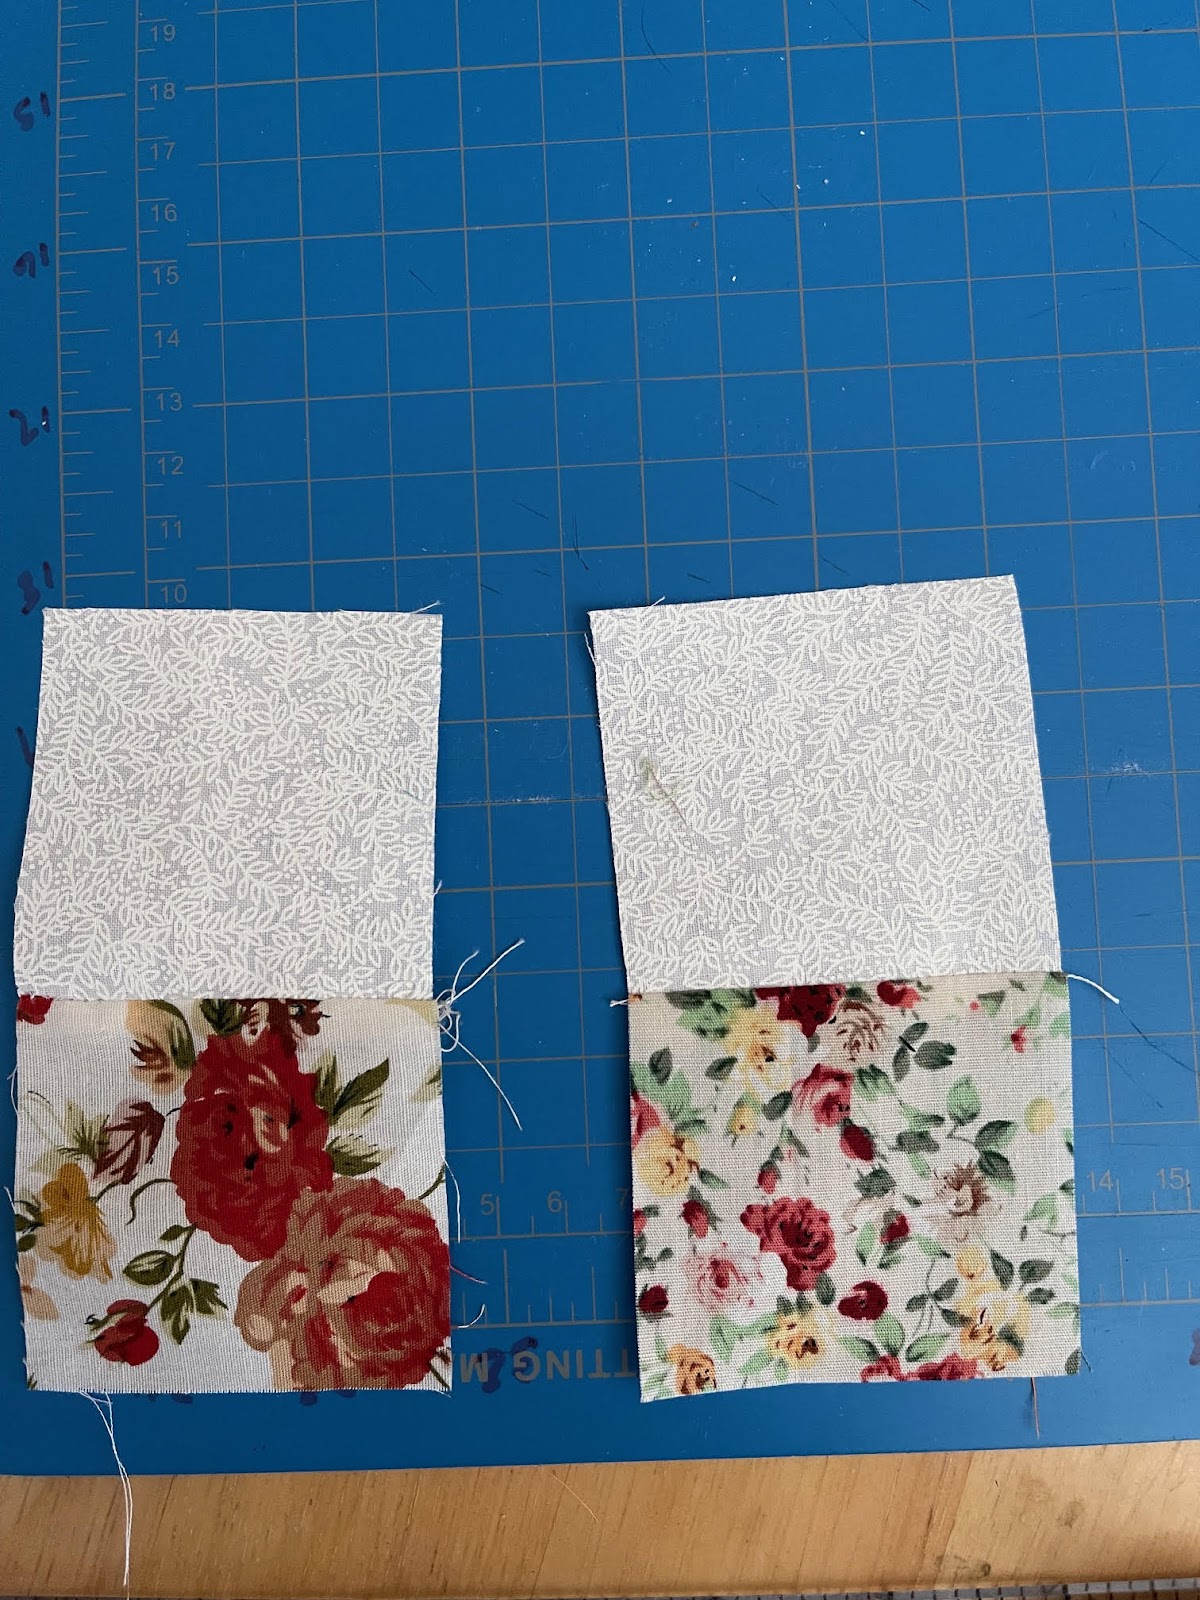
1.     With right sides facing, sew the two 2-1/2” squares together with a ¼” seam. Press away from white square.

2.     Sew one 2 ½” x 4 ½” rectangle to the bottom of Step 1 keeping the white in the corner.

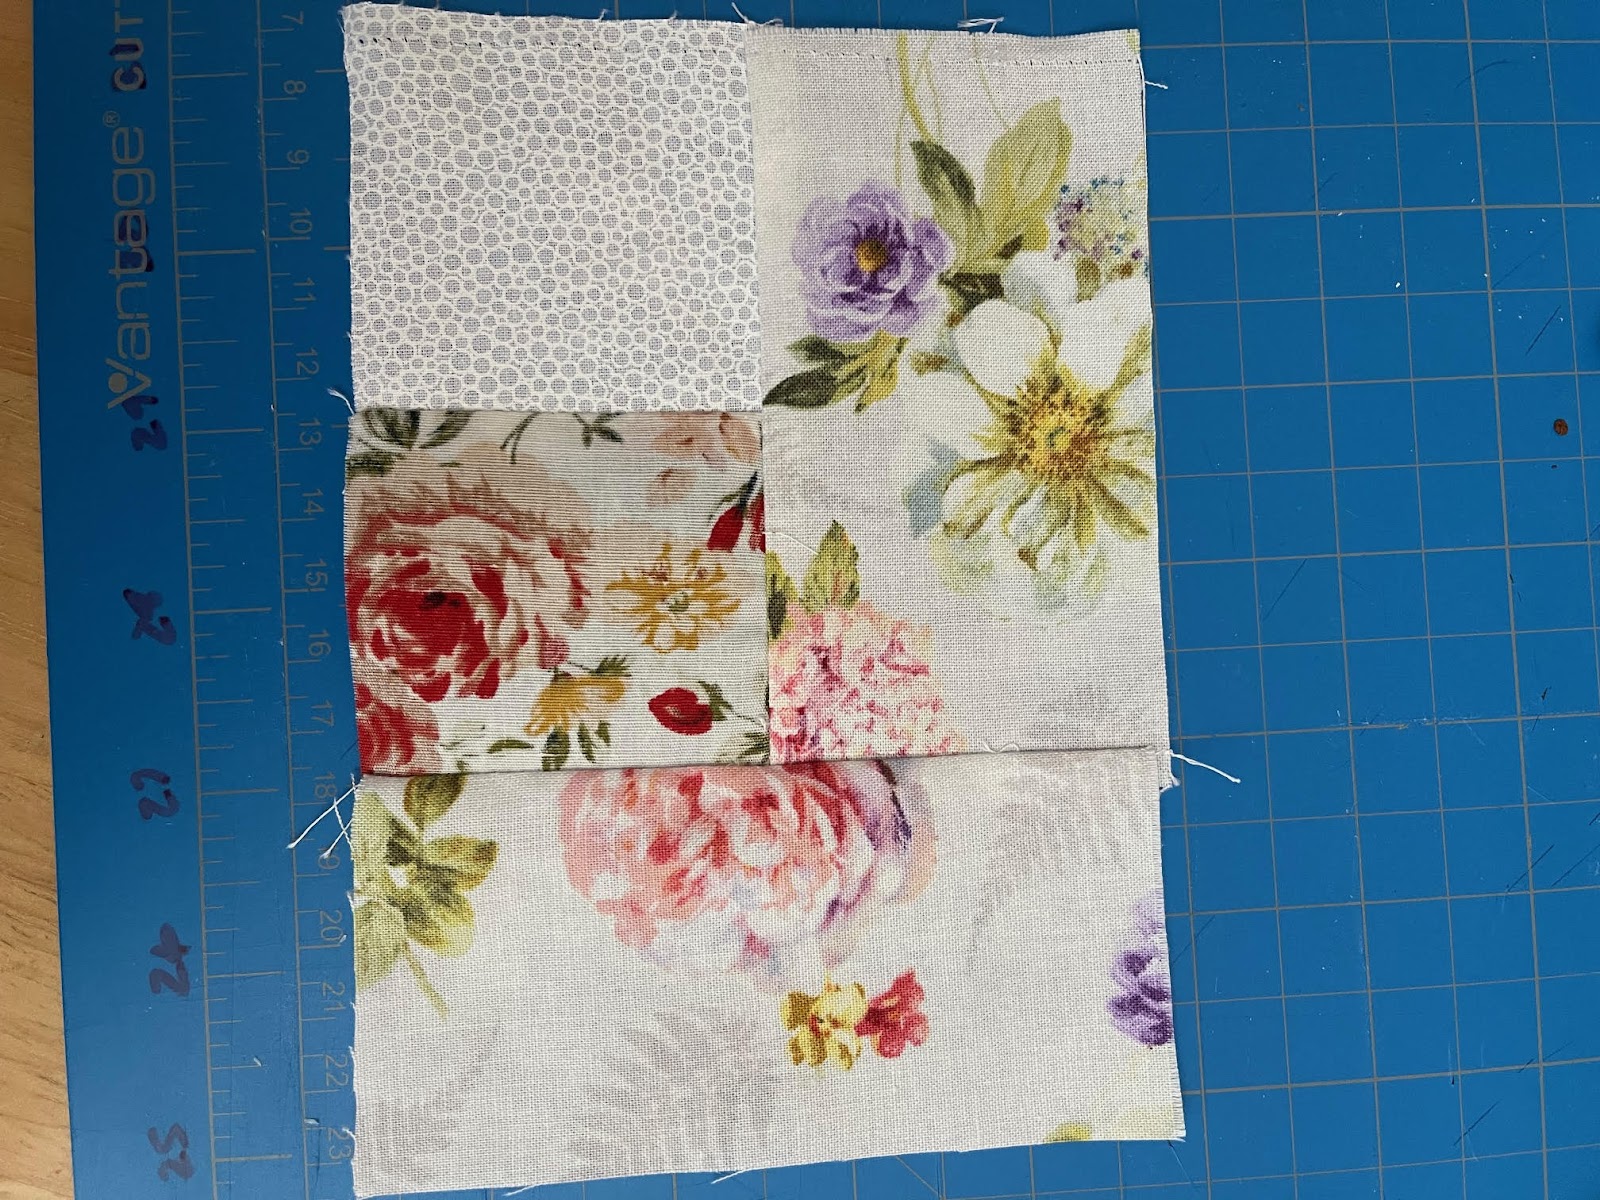
3.     Sew one 2 ½” x 4 ½” rectangle to the right of Step 2 keeping the white in the corner.

4.     Sew one 2 ½” x 6 ½” rectangle to the bottom of Step 3 keeping the white in the corner.

5.     Sew one 2 ½” x 6 ½” rectangle to the right of Step 4 keeping the white in the corner.

6.     Sew one 2 ½” x 8 ½” rectangle to the bottom of Step 5 keeping the white in the corner.

7.     Sew one 2 ½” x 8 ½” rectangle to the right of Step 6 keeping the white in the corner.

8.     Sew one 2 ½” x 10 ½” rectangle to the bottom of Step 7 keeping the white in the corner.

9.     Sew one 2 ½” x 10 ½” rectangle to the right of Step 8 keeping the white in the corner.

10. Sew one 2 ½” x 12 ½” rectangle to the bottom of Step 9 keeping the white in the corner.

11. Sew one 2 ½” x 12 ½” rectangle to the right of Step 10 keeping the white in the corner.

12. Sew one 2 ½” x 14 ½” rectangle to the bottom of Step 11 keeping the white in the corner.

13. Sew one 2 ½” x 14 ½” rectangle to the right of Step 12 keeping the white in the corner.

14. Sew one 2 ½” x 16 ½” rectangle to the bottom of Step 13 keeping the white in the corner.


Thursday, May 2, 2024

Hive 1 May Rainbow Stained Glass for Molli

I left this bigger for you to cut as you like. It was fun!


Hive 1 April Stacked Improv Curves for Rita

 These are on their way tomorrow, Rita. Sorry for the delay! The colors aren't true to this photo, one is a deep red, so I hope they play nicely with your other blocks!


Wednesday, May 1, 2024

Sorry

  I am sorry, I have not been able to keep up with my commitments to this group due to some family issues that are requiring more than normal attention.  I have enjoyed being here but… I really am sorry.

 I am sorry, I have not been able to keep up with my commitments to this group due to some family issues that are requiring more than normal attention.  I have enjoyed being here but… I really am sorry.

Hive 1 - May Tutorial - Rainbow Stained Glass for Molli, Redux! 🌈🌈

🌈 Rainbow Stained Glass 🌈


Contents

Hello, Hive 1! HERE WE ARE AGAIN! 😅 For those Hive 1 folks who were also here in 2023, this will be very familiar—but hopefully not too boring!

I am asking for the same block as last year. Bigger quilt, right?? All instructions are below, but here is a random sampling of the lovely blocks I received last year. 🩷

🌈

The instructions below are for a basic block, but there's room for creativity, so please feel free to adjust the number of panes or whatever you'd like, as in some of the blocks above! Or make it strictly to specification—the world is your oyster.

I'm pretty sure it's going to take you longer to read this post than it will to assemble the block. So here we go!

🌈

For those who suffered through dutifully read this entire post last year, while I made some extremely minor changes here and there, nothing fundamental has changed. You can skip right to the instructions

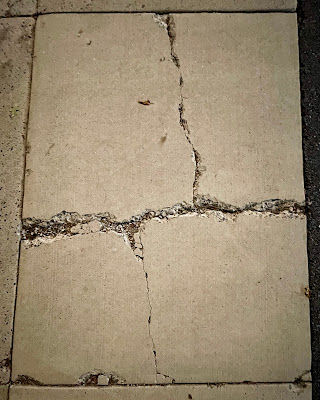
For my block I’ve chosen a stained-glass design. There’s a sidewalk paver near my office that I see when I take my work walks, and every time I walk over it, I think about what a cool quilt block it would make.

Sidewalk paver with stained-glass-like cracks.

So, here we are!

Here is an inspiration quilt I found online, just for a sort-of idea about what was in my brain.


While I based my block on the general idea of the above quilt, I’ve kept the construction as simple as possible by keeping all of the “cames” at 90-degree angles. (From Wikipedia, in stained glass, a came “is a divider bar used between small pieces of glass to make a larger glazing panel.” Sashing for stained glass!)


🌈

Fabric

I am requesting that the for the “glass” you use any of the colors from Gilbert Baker’s original eight-color pride flag, which includes not just the ROYGBV we see in standard (and progressive) pride flags today, but also pink and teal.

Gilbert Baker's original pride flag
 

I’m fine with solids, blenders, or anything with a relatively small print that reads as mostly the intended color. Although, as you can see in a couple of the sample blocks I did—well, okay, all of them—I didn’t hold myself too closely to those parameters. I’m going more for the spirit of the law, rather than the letter.

Batiks are fine! As are “accent” fabrics that are rainbow-themed, such as the “heat map” fabric in my second sample block, or the rose in my third sample block. I’d ask that you don’t do a whole block with that sort of fabric, but one pane of glass would be fine! Also, the wee birds in the fourth sample block are maybe a bit bigger than what I’d aim for, for a blender, but they’re just so cute! I figure when it’s spread out over the whole quilt, it’ll look cool.


Solids, blenders, and small prints


An idea of rainbow-type fabrics that would be fine!

If you can, please use at least two different fabrics for the glass, for at least a little variety within each block.

Also don’t worry TOO much about making your block too…cohesive or attractive within itself. If your block ends up looking weird like this…

…I won’t be upset. :) I figure once it’s all put together, it’s all going to balance itself out anyway. Or maybe not, and the whole thing will look weird!! Either way, I’m going to love it.

For the cames / sashing, I’m asking for a dark gray / charcoal, or something in that ballpark. The color I used in my samples is very close to Michael Miller Color Couture Metal (SC5333-META-D). Solid, blender, or something with a very small print that reads solid from 10 feet away—those are all fine.

My grays were not interested in looking good alone in a photo, so here they are mixed with some colorful fabrics to give you an idea. They still don’t look quite the same as they do to the naked eye. The leftmost is maybe a bit lighter (in real life) than I’m going for but would be okay. Second gray from the left is the one from my samples. Rightmost has tiny bats and is a good example of a tone-on-tone sort of print that would be fine.


Left to right: 1) Kona Solid Coal; 2) the one used in my samples (unnamed solid FQ!);
3) Michael Miller Color Couture, Metal; 4) Riley Blake Seasonal Basics, Bat Black (C651-BLACK)

🌈

The Block

The block I am requesting is about 11” x 11”. Don’t worry about trimming it when you’re done—I’ll do that as I assemble the quilt quilt.

This is a very whim-friendly block. My instructions are for a “starter block.” You can follow them to a T, or you can make modifications along the way as you see fit. Please feel free to be as creative as you like—or not! We've had some high precision blocks so far this year—this is not one of those blocks!

🌈

Cutting instructions


Notes & Tips:

  • Read all instructions before you begin cutting and assembling.
  • While all the sashing should be 1” (.5” finished), the below cutting instructions for the glass panes are just guidelines—if you’d like to use different dimensions, please feel free!
    • For example, if a scrap you want to use for unit B is 3.5” x 4.25” (rather than 4.25” x 4.25”), then you could cut the following to compensate for the difference: C: 7.5” x 6.75”, D: 3.5” x 6.75”, E: 7.5” x 4.25”.
    • If you don’t have any scraps you want to use that are as big as 6.75” x 6.75”, consider my rose sample above, which creates the C/E side with three panes rather than two. For that example, you would need additional sashing.
  • If you don’t want to worry about the sashing being exactly the right length after you’ve sewn it, cut your A units a bit longer than 11”.

PIECES TO CUT
Cames / sashing from charcoal fabric Glass panes from rainbow fabrics
(2, 3, or 4 different fabrics)
A: (2) 1” x 11” B: (1) 4.25” x 4.25”
C: (1) 6.75” x 6.75”
D: (1) 4.25” x 6.75”
E: (1) 6.75” x 4.25”

🌈

Assembly


Notes & Tips:

  • All seams are ¼”.
  • To chain piece, cut one A unit into two pieces first (4.25” and 6.75”), and then Steps 1 and 5 can be done consecutively; then Steps 2 and 6; then Steps 3 and 7.
  • The finished block should be about 11” x 11”. Don’t worry if it’s a little smaller.
  • Again, don’t worry about trimming the edges!

Here we go!

  1. Sew one A unit to an edge of the B unit.
  2. Sew a short edge of the D unit to the remaining long edge of A from Step 1.
  3. Press seams open.
  4. Trim the excess A unit (carefully; you need the rest in the next step).
  5. Sew the excess of the A unit from Step 4 to an edge of the C unit.
  6. Sew a long edge of the E unit to the remaining long edge of A from Step 5.
  7. Press seams open.
  8. If you haven’t already, decide now how you want the finished block to lay out—you have multiple options, depending on which way you turn the units from Steps 4 and 7, particularly if any of your fabrics are directional, patterned, or ombre.


  9. Keeping your Step 4 unit oriented the way you decided in Step 8, sew the remaining A unit to a long edge of Step 4.
  10. Keeping your Step 7 unit oriented the way you decided in Step 8, sew a long edge of the Step 7 unit to the remaining long edge of A from Step 9.
  11. Press seams open.
  12. Celebrate!

I hope this was a low-stress block as we head into what will hopefully be a lovely summer!!

Thank you for sewing for—and with!—me!

Molli B.


Hive 7 - May Tutorial - Your Choice Black & White Block for Beth


It's a May Block for Beth!

This is my second time participating in the Stash Bee exchange.  I loved last year and am currently loving everything so far.  For this month, I am working on a table runner for my mother's dining room table.  It is a beautiful raw edge wood table so we don't want to cover too much of it but it needs something during meals.  I am going to put something like Insul-Bright as the batting so that she can use it to protect the table from hot things.  I might also make placemats, but I am not sure on that.

So, for this project, I really want a mixture of blocks.  I am less concerned with the exact pattern of the block and more concerned with the colors.  I am looking for a block of medium complexity that is either a traditional or modern block but one that could stand alone and in black and white only.  The white should be a true white and the black can go from black to medium gray but not blue gray.  I want this to be stark though patterns are fine.  And any additional colors should be avoided though I am fine with metallic gold accents. 

Here are some examples:


Solids would also blend in really nicely with some blocks.  

I really like the patterns by 627handworks.  (They were examples from last month and I loved them - thank you Bonnie!)  You can find them here:

https://www.etsy.com/listing/661382412/entire-series-read-description-block

These are just paper piecing patterns without the instructions.  So, if you are comfortable with these, any of them would be nice.  I can share the patterns if anyone doesn't already have them.  The listing explicitly allows sharing with a sewing bee.  

But you aren't required to choose one of these blocks.  I am excited to see what blocks everyone really likes to put together.  

I am hoping they will be about 12 x 12 but I can put sashing on blocks to get everything the same size if needed.

My main goal is receiving blocks that I wouldn't think to put together or with fabrics that I don't have.  Please let me know if you have any questions!

Thanks and happy quilting!

Hive 3 - May Tutorial- Improv block

 Hello Hive 3.  For May I am asking for a (hopefully) easy improv block.  Please pardon the lighting in my pictures - we've had a string of cloudy grey days here in Dallas, and the lighting isn't great!


This block will have background squares of dark blues, greys, and black fabrics.  Solids highly preferred.  The backgrounds can be as many or as few different fabrics as you would like.  You will also need a selection of orange, yellow, gold, pink, and red scraps - again solids preferred, and this can be as scrappy or monochrome as you'd like and your fabric scraps allow.  


Cutting instructions:  from your dark background fabrics, please cut 9 5x5 squares.  

From the bright scraps you will need a total of 18 pieces that you can cover one of the corners.  These can be as large or small as you'd like.  I found it easiest to use scraps that were at least 1 inch wide, and 1-3 inches long.


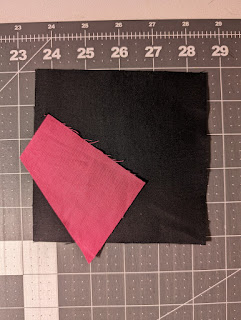
Take a scrap and place it so that when stitched and flipped, it covers one corner:

Trim 1/4" away from your stitch line, and press towards the bright corner:


Repeat this process with the opposite corner:


Once both corners are covered, trim the square to 4.5"


When you have 9 squares trimmed to 4.5" each, arrange in a nine patch, alternating whether the color triangles are in the bottom or top left hand corner:


Combine the squares, pressing seams  however is easiest for you.  And you're done!