Hello All,
This is my first bee and I am so excited to be here!
I would love some Present Blocks for this month. I don’t have a plan yet for the quilt, but I have always wanted a Christmas quilt and thought this would be a good place to get my creative juices going and I will use the present blocks mixed in with other blocks to make a big family Christmas quilt.
FABRIC PARAMETERS: Please make your blocks in a mix of red, green and white. I am open to you using solids or pattern fabrics.
For patterns I prefer a more
modern fabric; nothing too traditional please.
They can be christmassy or not. I trust you, if you think that the
fabric could live in a modern christmassy’ish quilt, then go ahead. The only
ask is that if it’s a pattern, it sticks to the colours; red, green or white or
any combo of those. No other colours, please.
For this block there will be a
“ribbon” fabric, a “gift wrap” fabric and a background fabric. Please feel free to make the ribbon and the
gift wrap fabric either red or green, but the background fabric needs to be
white.
Reds: I like more richer reds like a
cherry, cardinal, crimson or scarlet red rather than something more on the
coral or light red side.
Greens: I am more flexible in my green
preferences, anything from a minty green to a forest great would be great.
Whites: For the whites I would prefer a
true white, not cream or beige. If you are going to use a pattern for the
white, can I ask that it please be white on white?
These are some of the fabrics
that I feel fit the look that I had in my stash. None of them are “Christmassy” but they could
all be used as Christmas wrapping paper and look cool under a tree.
Cutting:
“Ribbon” Fabric:
● 2 - 3" squares
● 2 - 2" x 4.25" strips
●
1
- 2" x 7" strip
“Gift Wrap” Fabric:
● 4 - 3” x 4.25"
○
If
you are using a directional fabric, the piece is 4.25” wide, 3” tall
Background Fabric - White:
● 2 - 2.5" x 3" strips
● 1 - 5.5" x 3" strip
● 2 - 2.5" x 9 strip (border)*
● 2 - 2.5 x 12.5 strip (border)*
○
*For these
four pieces I have .25” for wiggle room.
Step 1: Cut out all your pieces
Step 4: Next we make the bow. Take the 3" x 5.5" background
strip, place one of the 3” x 3” ribbon fabric, right sides together, along the
right edge of the background fabric.
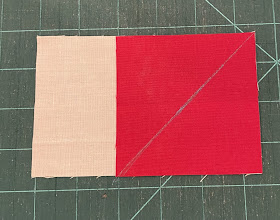
Mark a diagonal line from top right corner to bottom left corner of the
wrong side of the ribbon fabric square. Sew on that line. Trim off a 1/4" from the seam, and iron
open.
Step 5: Take the other 3” x 3” ribbon fabric square and place it on the left side of the background fabric and mark a line from the top left corner to the bottom right corner. Sew down that line. Trim off excess a 1/4" from the seam, and iron open. This creates the bow of the gift
Step 7: Next sew your bow pieces to the top of the gift piece to make your present.
**Everytime I made this block, the bow piece was either too long or two
short. I have given you extra fabric allowance so you can line up the middle of
the bow with the centre of the ribbon stripe and sew together; then once you
have a finished bow piece, trim it down to 9” wide.
The block should now be 9” wide
and 9.5” tall.
Step 8: Next add the 2.25" x 9” border pieces to the
top and bottom of the block. Then add the 2.5” x 12.5” strip border pieces to the left and right sides of the block.
The block should be 12.5” x 12.5”
Thank you so much!!


No comments:
Post a Comment
Thank you for your comments!
Note: Only a member of this blog may post a comment.