Hi Ladies!
The color palette I’ve chosen is Pink Lemonade. So
think Pink! And Lemon! But also: Bubblegum, Melon, Coral, Blush, Peony,
Fuchsia, and Butter, Mustard, Yellow, Honey, Candlelight, and so on. I
love pops of green in the fabrics you choose, but not fabrics that read as
“green”. The Cotton and Steel / Rifle Paper co. Menagerie print
“Jardin de Paris” in Peony, and Bari' J's Yuma Lemons in Glare (the two fabric pictured in the center below) are a great example - Bright
green leaves on the pink background! White-based Low volumes for the background/center
cross. The geese and the center cross do not have to match. I did a fabric pull that should give you some ideas.
When I made my block, I changed up the cutting instructions
to make no-waste flying geese. (I loathe wasting precious fabric, and I
never seem to make them straight enough constructing them one at a time!)
But please make your block however you are most
comfortable.
Here are the different cutting directions, if you are so
inclined!
Background (Body of the Geese)
Cut 1 – 7.25” square low volume
Sky - This will be the points of the star shape
Cut 4 – 3.875” squares print. (3 and 7/8ths)
The remaining cutting instructions are the same as the
tutorial:
Center Cross
Cut 2 – 2.5” squares low volume
Cut 1 – 2.5” x 6.5” low volume
HST’s
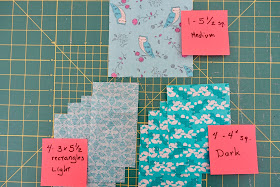
Of FOUR prints (Dark, Medium, Light, Lightest):
Cut 1 – 4” square from each print (4 total)
Cut 1 – 3” square from each print (4 total)
Construction
Make the geese using the no-waste method.
Draw a diagonal line on the back of all four sky squares. You will be sewing a 1/4" away from that center line on either side. I like to draw those lines in, and stitch right on them. Like so:
Cut between your two sewn lines.
Press this seam open.
Now place the remaining two sky squares on like so. Stitch on those lines, (1/4" away from the center diagonal)
Cut again, down the center of your two stitched lines, above right. Press the seams open. You should end up with 4 almost perfect flying geese! With no waste!! Trim to 3.5' x 6.5".
Follow the remaining the construction instructions per the tutorial on SewMamaSew.
Next up - HST! Pair your fabrics like so, and stitch on the lines drawn.
( I've offset the fabric underneath just to show the pairings. I lined them up when sewing.)
Cut between your sewn lines, press your seams open, and trim your HST's to 2.5" for the smaller, and 3.5" for the larger. You will end up with 8 total HST units.
Then arrange your block following the color placement and orientation shown below. Pay attention that your HST units alternate in color and light/dark.
Stitch together the CENTER first. Press every seam in this portion towards the LOW VOLUME.
Then sew the units together like a 9 patch block.
Press your seams OPEN.
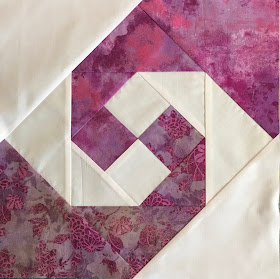
Ta Da! Finished Block!
Thank you all so very much in advance for making my first
bee an absolute blast. I cannot wait to see which fabrics you chose to
make this fun block!


