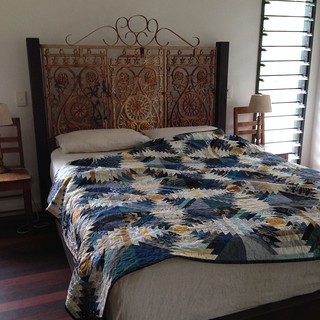
Hi it's Grace here, greetings from New Zealand! I am excited about it being my turn... however I had the hardest time settling on a block. After dithering over several options I finally decided to ask you all for help with a quilt my husband likes so we can finally have one for our bed. I was randomly showing him some photos of a quilt that an instagram friend Melissa had made. He surprised me by saying I should make one just like it. Secretly I was quite pleased by the idea because I also really love it.
The fun thing about instagram is being able to watch everyones progress on their projects and I had been following this one from the start. I mentioned to Melissa that one day I would like to make one in the same colour scheme and she told me I could have her scraps when she was done!! Anyway her fabrics were a great guide for me pulling fabrics from my own stash.
 |
| Scraps from Melissa |
 |
| Fabric pull |


As you can see I would like a mustardy citrony yellow for the centre, grey, black, navy blue and touches of teal for the dark parts of the block and low volume fabrics that don't have too much colour in them for the light parts of the block. An occasional mustard or light blue colour is fine for the light fabrics too. Please use modern fabrics, and avoid batiks ;)
I followed this tutorial for the blocks which is a really great picture tutorial showing all the steps. I used the same measurements given in the tutorial.
Edited to add: a few of you have noticed there is a typo in step 7 of the instructions. The measurements should be a 3 1/4" by 3 1/4" square for the centre and 1 1/2" strips for the rest of the block. So sorry about this!
 |
| I mostly didn't trim my strips to the length needed till after I had sewn them on, that way I could maximise the use of the strips without too much wastage. |
I won't add too much more, as the tutorial explains really clearly in my opinion, but if you have any questions or problems let me know! Finished blocks should be 16.5 inches as per the tutorial, however if yours is slightly too big or small don't stress too much I'm sure I can make it work. With all the rounds a slight difference in seam allowances can make quite a difference, so pay attention when trimming as well as sewing the seams and it should be fine. You do not need to trim down the block, I'll do that as I put them together :) also please press seams to one side rather than open.
Now for my question (not so much a question as a request), I would love it if you could share a photo of your sewing space or some tips for what helps with organisation of your space! We are renovating our house room by room and I'm itching to set up and move into my sewing room, I haven't had a dedicated space for sewing before. Are there any must have features in a sewing room? I'm definitely planning on a design wall.
Looking forward to seeing what you come up with and thank you all so much for your help!
xo
Grace


Hey Grace! Just so you know their is a typo in the tutorial. It says 1 1/4" for the strips in the 7th step. It makes a 13.5 inch block. 😖
ReplyDelete