Pages

Thursday, August 28, 2014

Hive 10 - September Block Tutorial


Hello ladies of Hive 10!  

I've been looking forward to my month as Queen for what seems like ages!  But let's break the ice . . .build the block anticipation. . . and start with those interview questions, eh?

My name is Caroline and I live in sunny San Diego with my handsome husband, our two gorgeous children and our noisy four legged first born Zapka the Wonder Dog.  


When I was about 5 months pregnant with our first I got it into my head to make her a quilt.  To my knowledge, no one in our family had ever created a quilt - but by this point I had already knitted more hats and sockies then our daughter would ever be able to wear, I wasn't working full time and I needed a new challenge.  Armed with a book, rotary cutter and rough idea I started cutting fabric.  I had no clue.  So it got pushed aside and instead I finished a number of maternity shirts, and some bedding for our little girl.


Fast forward 3 years and two children, I started again and I've now been serious about strengthening my sewing and quilting skills for a year and a half.

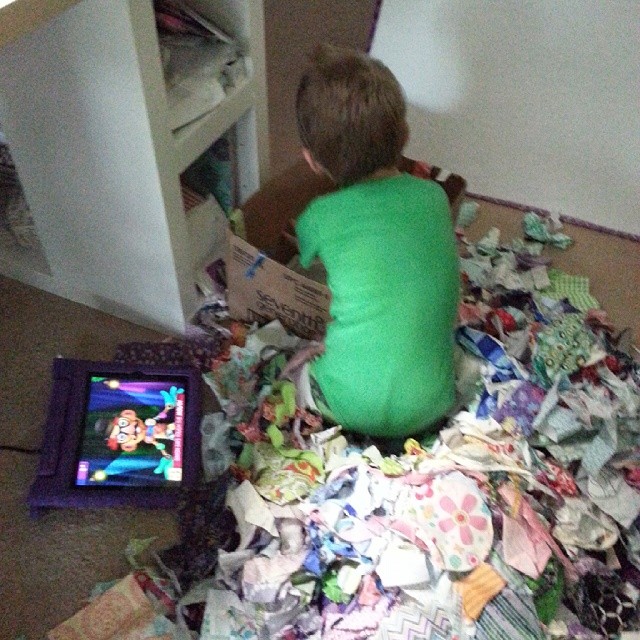
I really do wish there was some rhyme or reason to my fabric stash storage. . .except for the cubbies devoted to Keiko Goke, Tula Pink, AMH and Sarah Fielke. . .I try to go by colour.  As you can see below I get a lot of help:


I do have some blocks from the first projects I had started, I dug them out recently and I can really see how far I've come in a year and half.  Even though the importance of an accurate quarter inch seam is stressed, I see it took me a while to achieve that.  Now with my new machine, I see I need to adjust my style again, but what took me a year and half to achieve the first time, I'm glad to report that I managed to get back into the groove by my 3rd block ;)

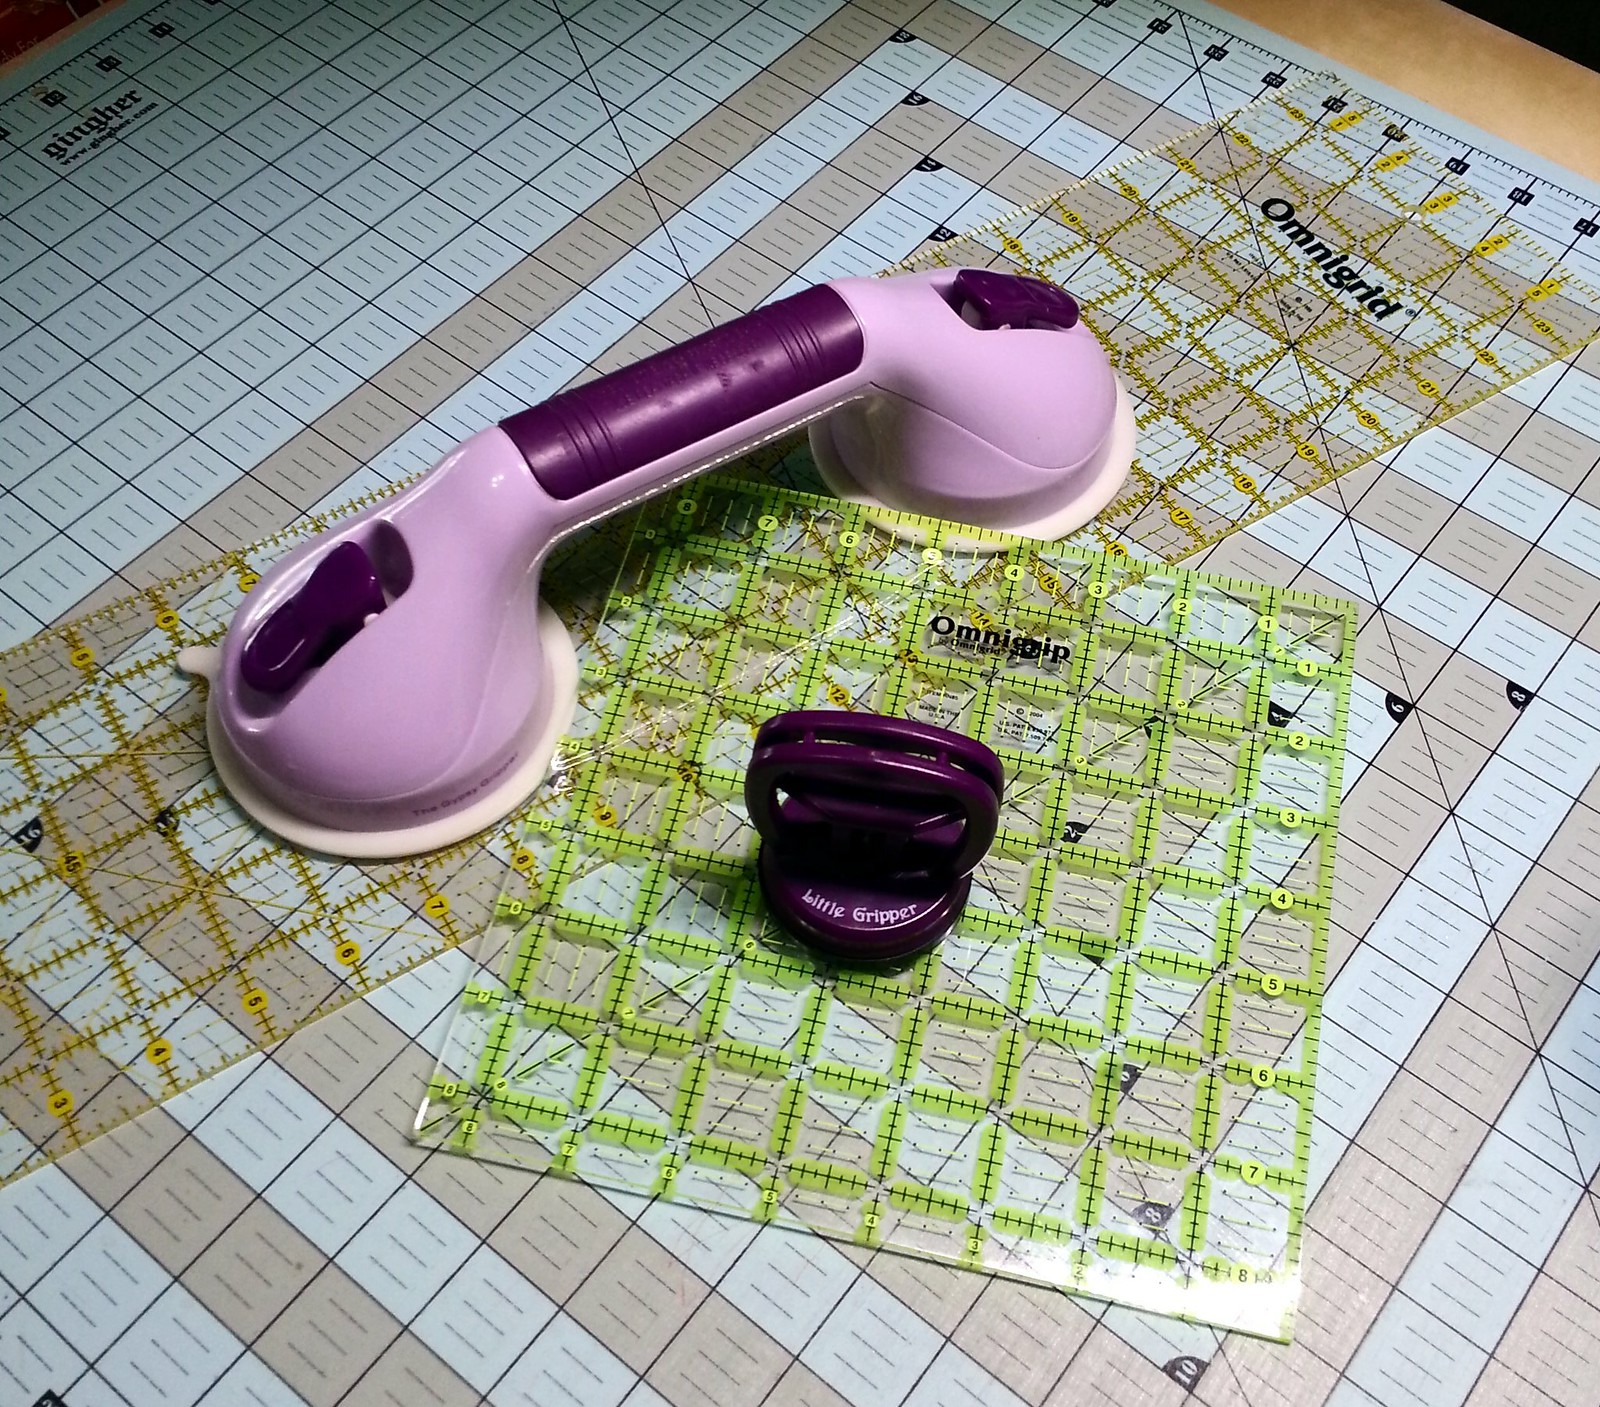
I'm sitting here trying to decide what my favorite quilting tool is and I can't pick just one, but I know which tool I won't work without, The Gypsy Gripper. . .


I'm horrified each and every time I see a cutting injury on IG or Flickr.  I cringe just thinking about it and quickly look away even when it's just a bandaged finger.  I took a large chunk out of my thumb a number of years ago and I refuse to do anything like that again and I find the ruler grippers keep my left hand safely out of the way.

Because unlike Superman, if you cut me I not only bleed, I squeal, whimper and once the blood starts flowing - faint. . .not worth the drama  :)

So now, the moment you have been waiting for:

September Bee Block:


To prepare for this block, please pick your colour, any colour.  It can be your favorite colour or a colour that you have 16 different fabric scraps in.  You will also need to pull 16 different low volume fabric scraps.  All fabric scraps will need to be 2" wide and from 2" to 6.5" long.

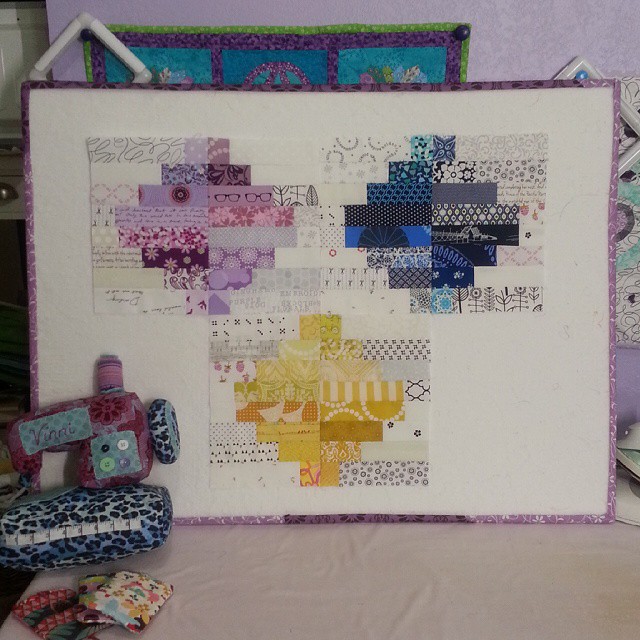
I love purple and was able to make this first block entirely from my scrap bin.  This was also the first sewing I did with my new machine and you can see I had some issues with that 1/4" seam:


As I had just finished making a few little things for a friend of mine in yellow, the yellow block was put together half from my scrap bin and the other from FQs in my stash.


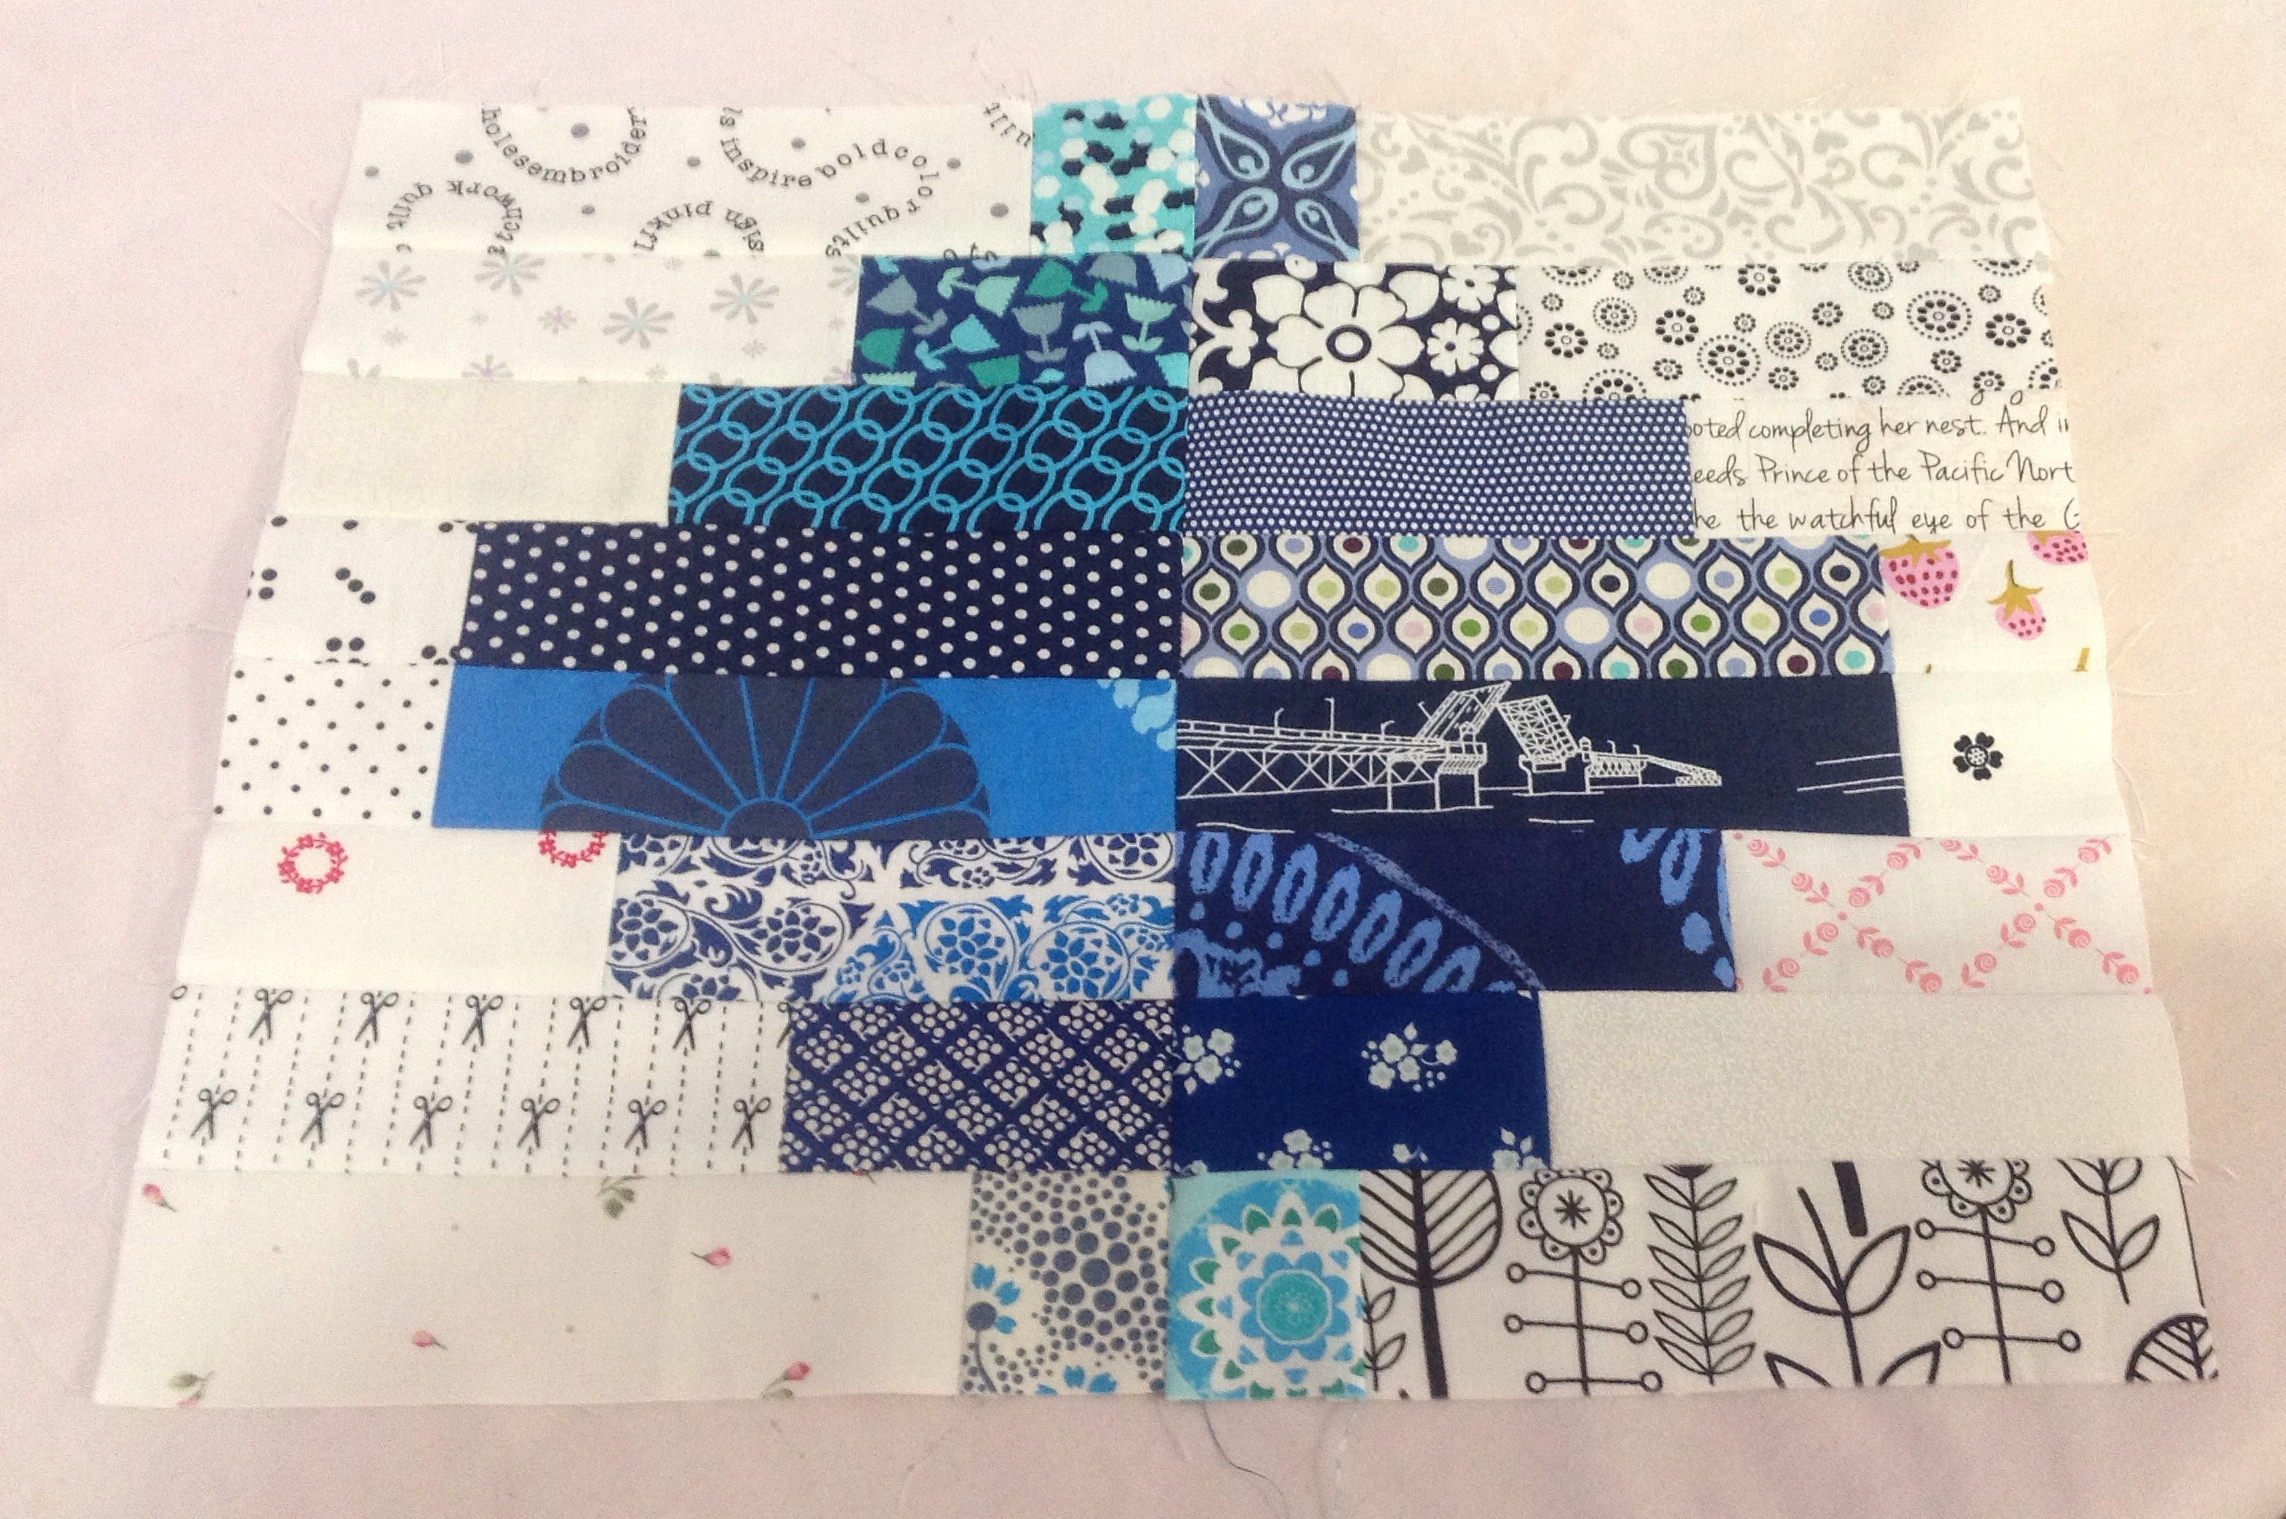
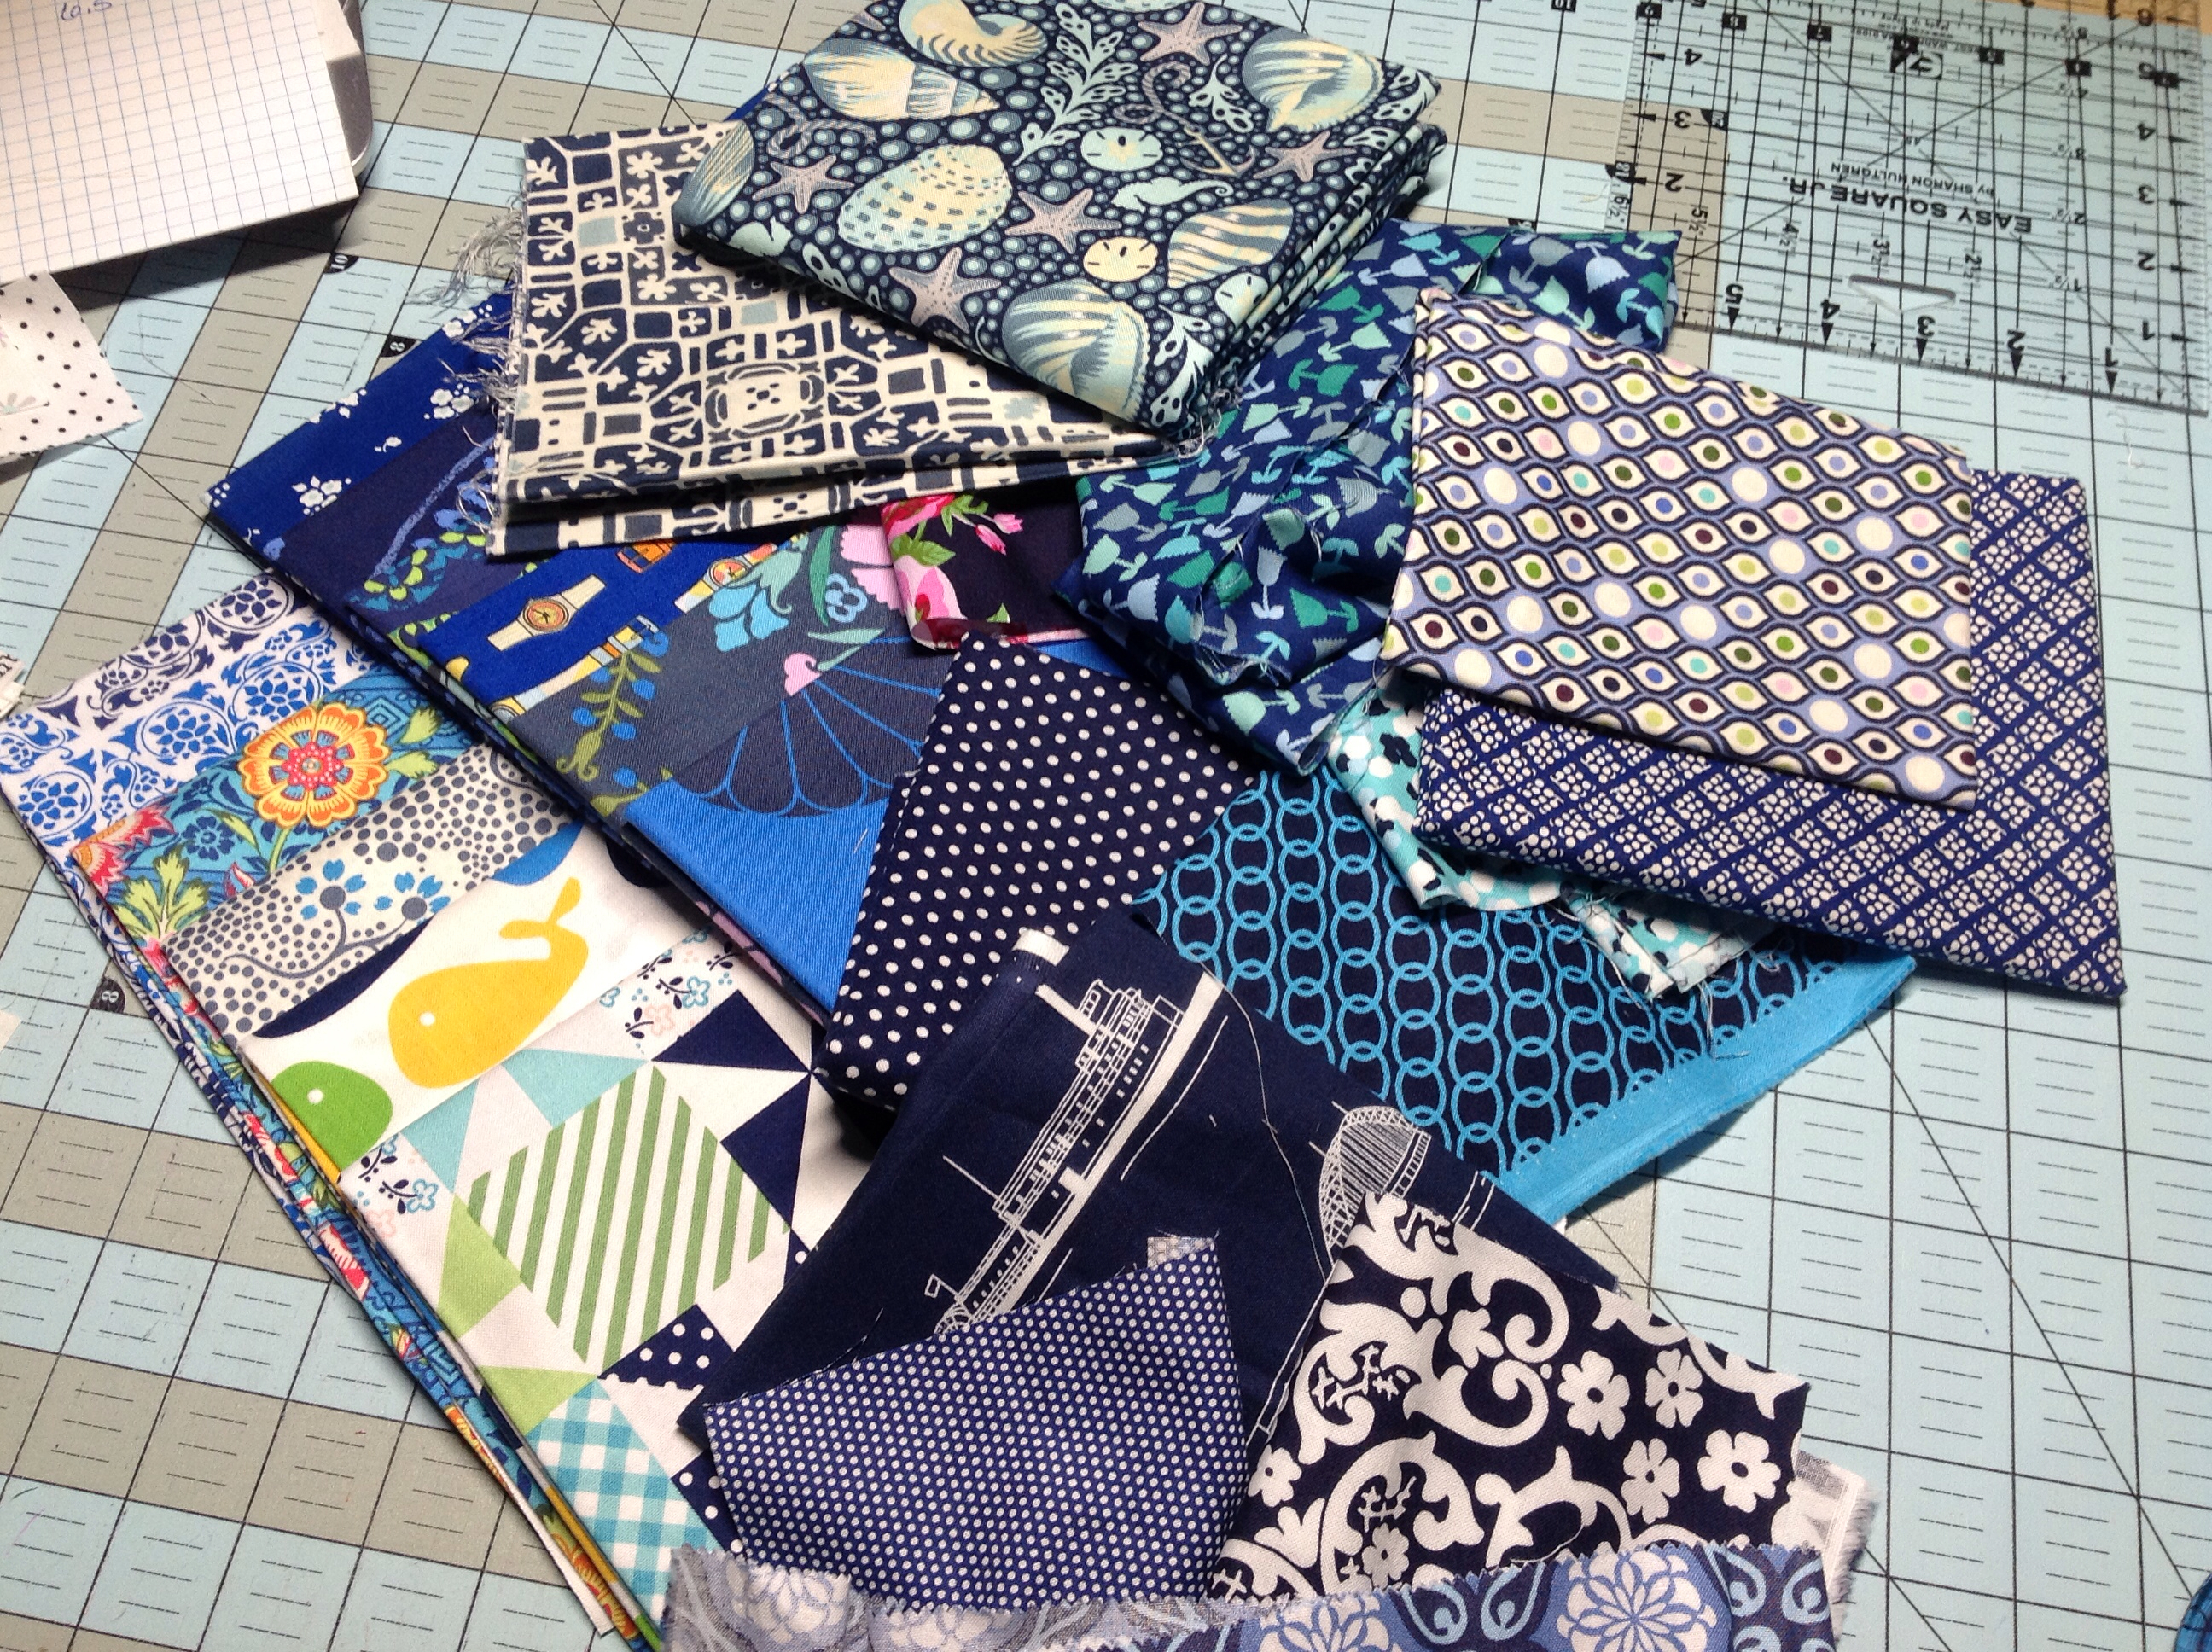
The navy block, used for this tutorial, was mainly pulled from stashed fabric FQs.


Block cutting requirements for your favorite colour fabrics, using 16 different fabrics in your chosen colour please cut the following:
             4 different fabrics at 2"x 2"
             4 different fabrics at 2" x 3.5
             4 different fabrics at 2" x 5
             4 different fabrics at 2" x 6.5

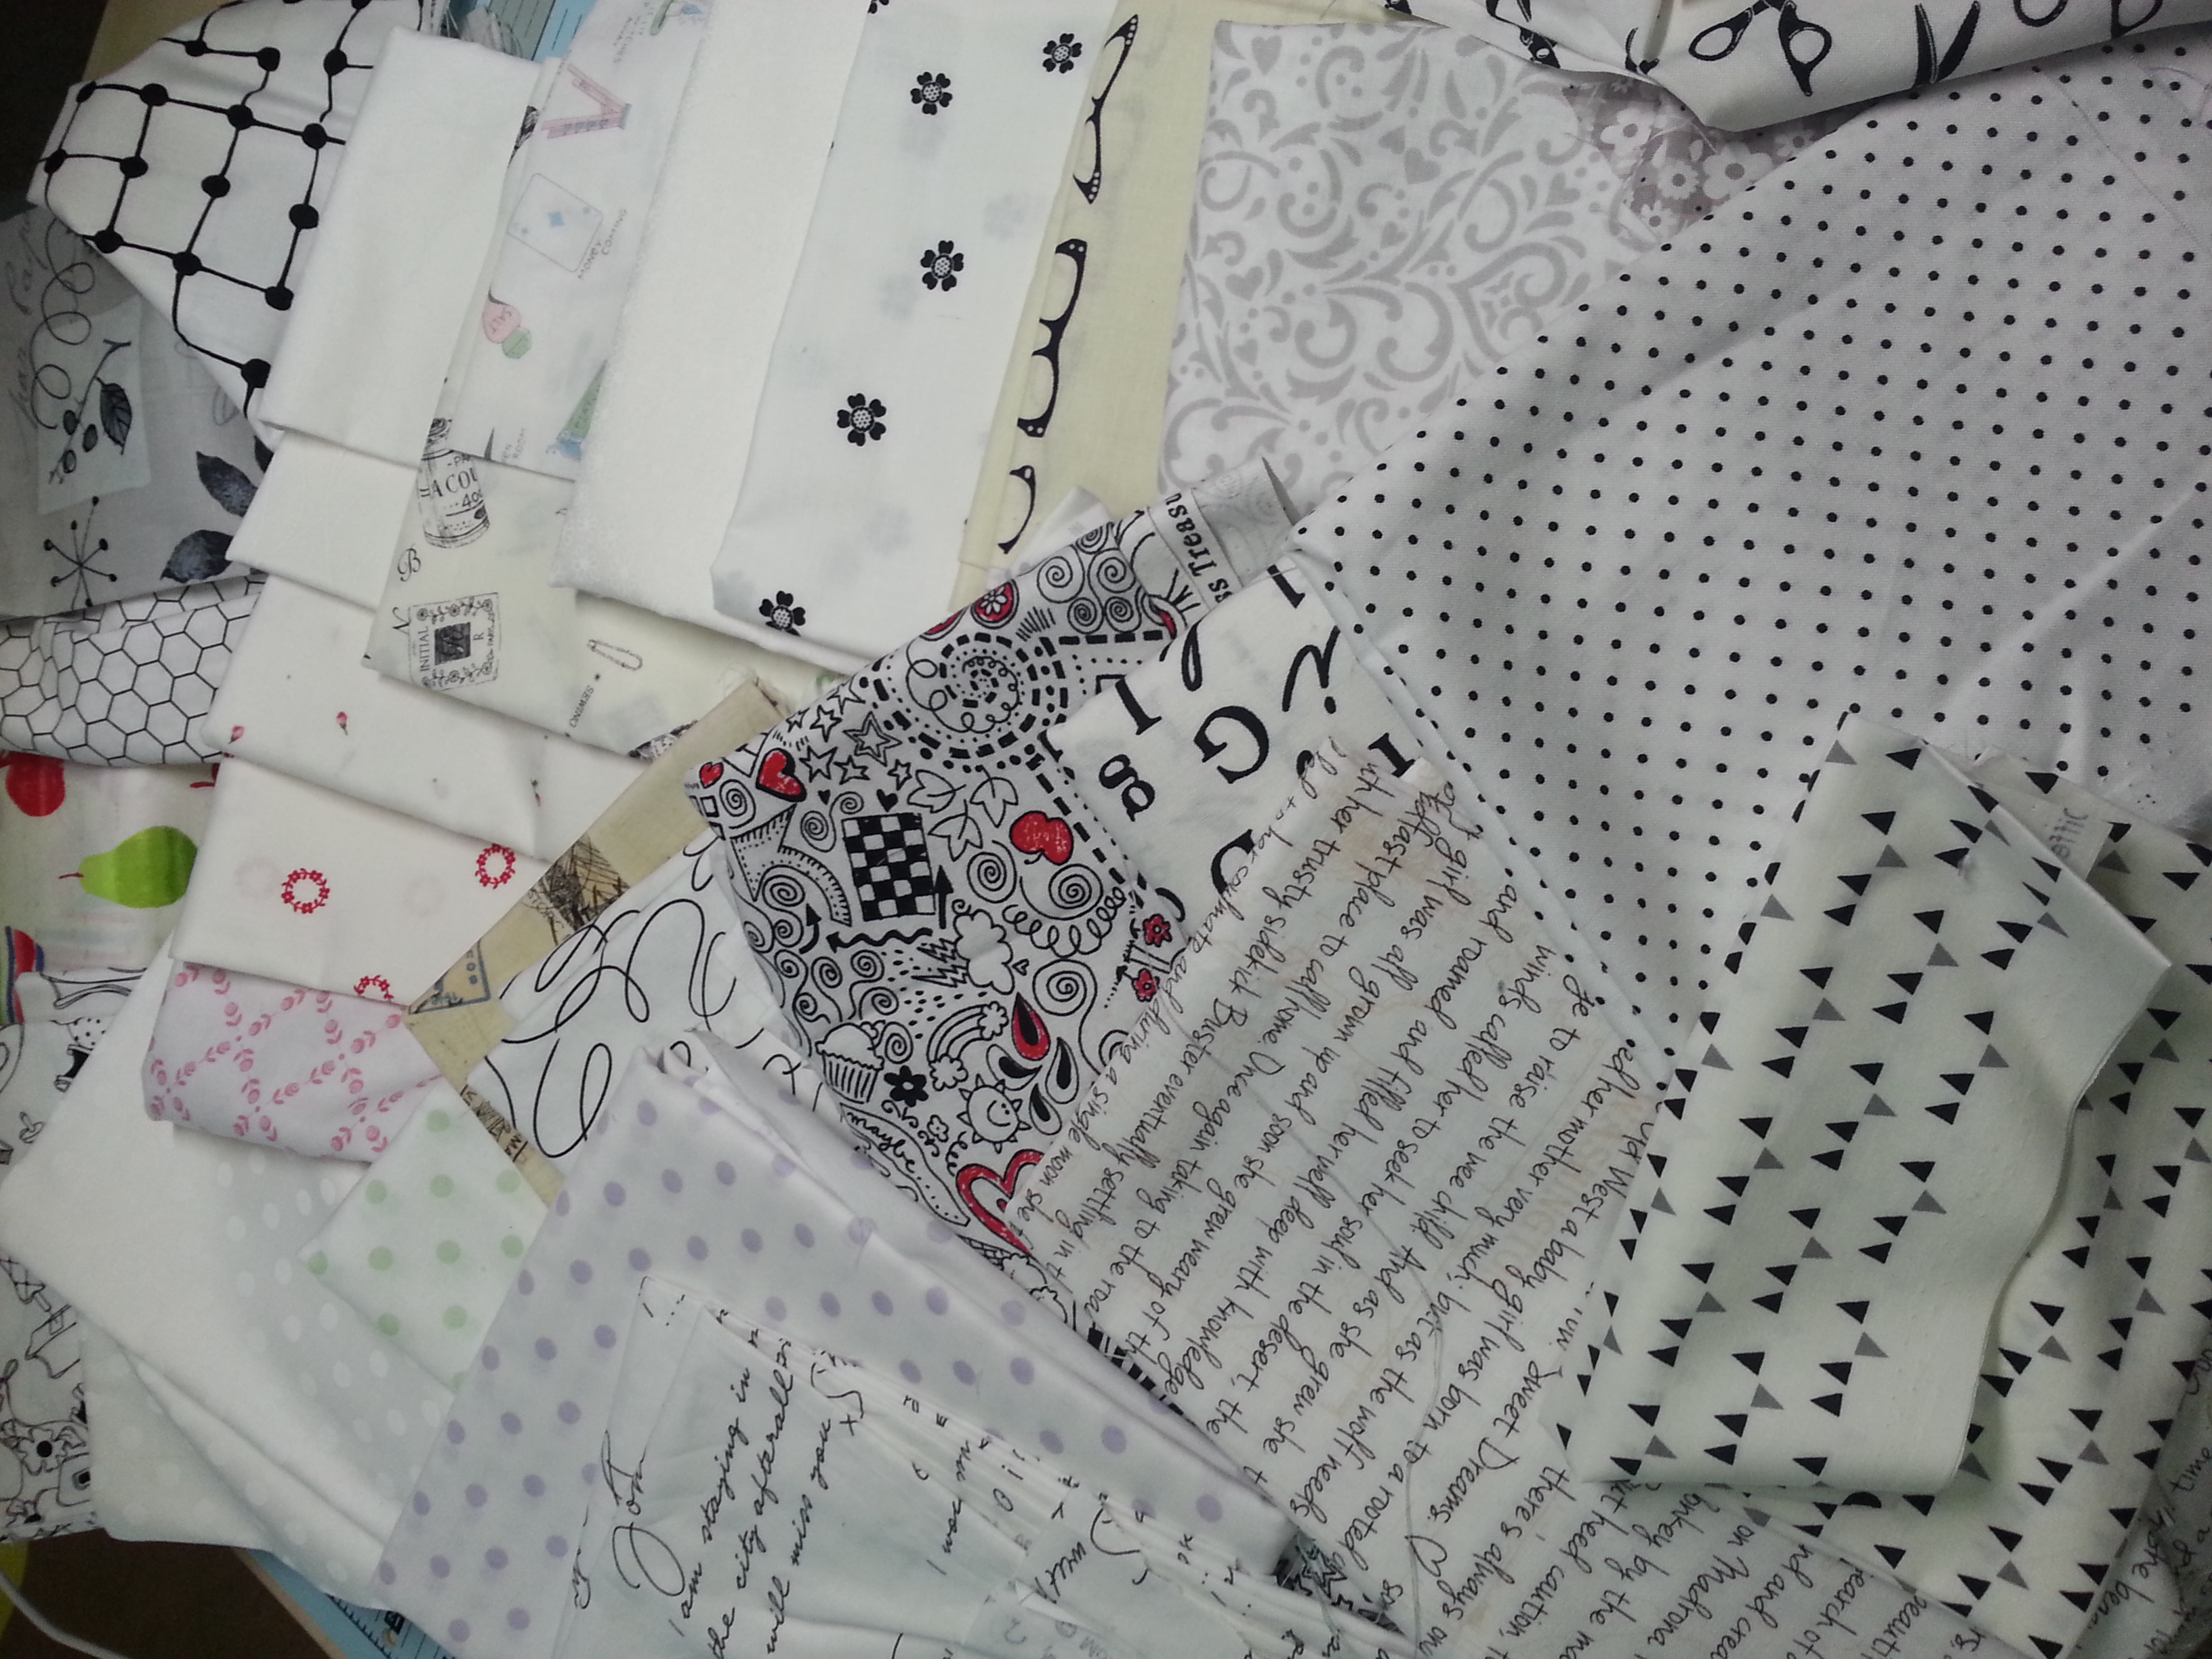
Block cutting requirements for your 16 different low volume  fabrics are the same as above, please cut the following:
             4 different fabrics at 2"x 2"
             4 different fabrics at 2" x 3.5
             4 different fabrics at 2" x 5
             4 different fabrics at 2" x 6.5

We will be using a quarter inch seam and when making the 4 strips for each quadrant (16 strips), you can press your seams open or to the dark side - please finish reading this entire post for the quadrant seaming directions and you can decide which you would prefer.

Pull your fabrics, narrow down to 16 different fabrics in your chosen colour and 16 different low volume prints.


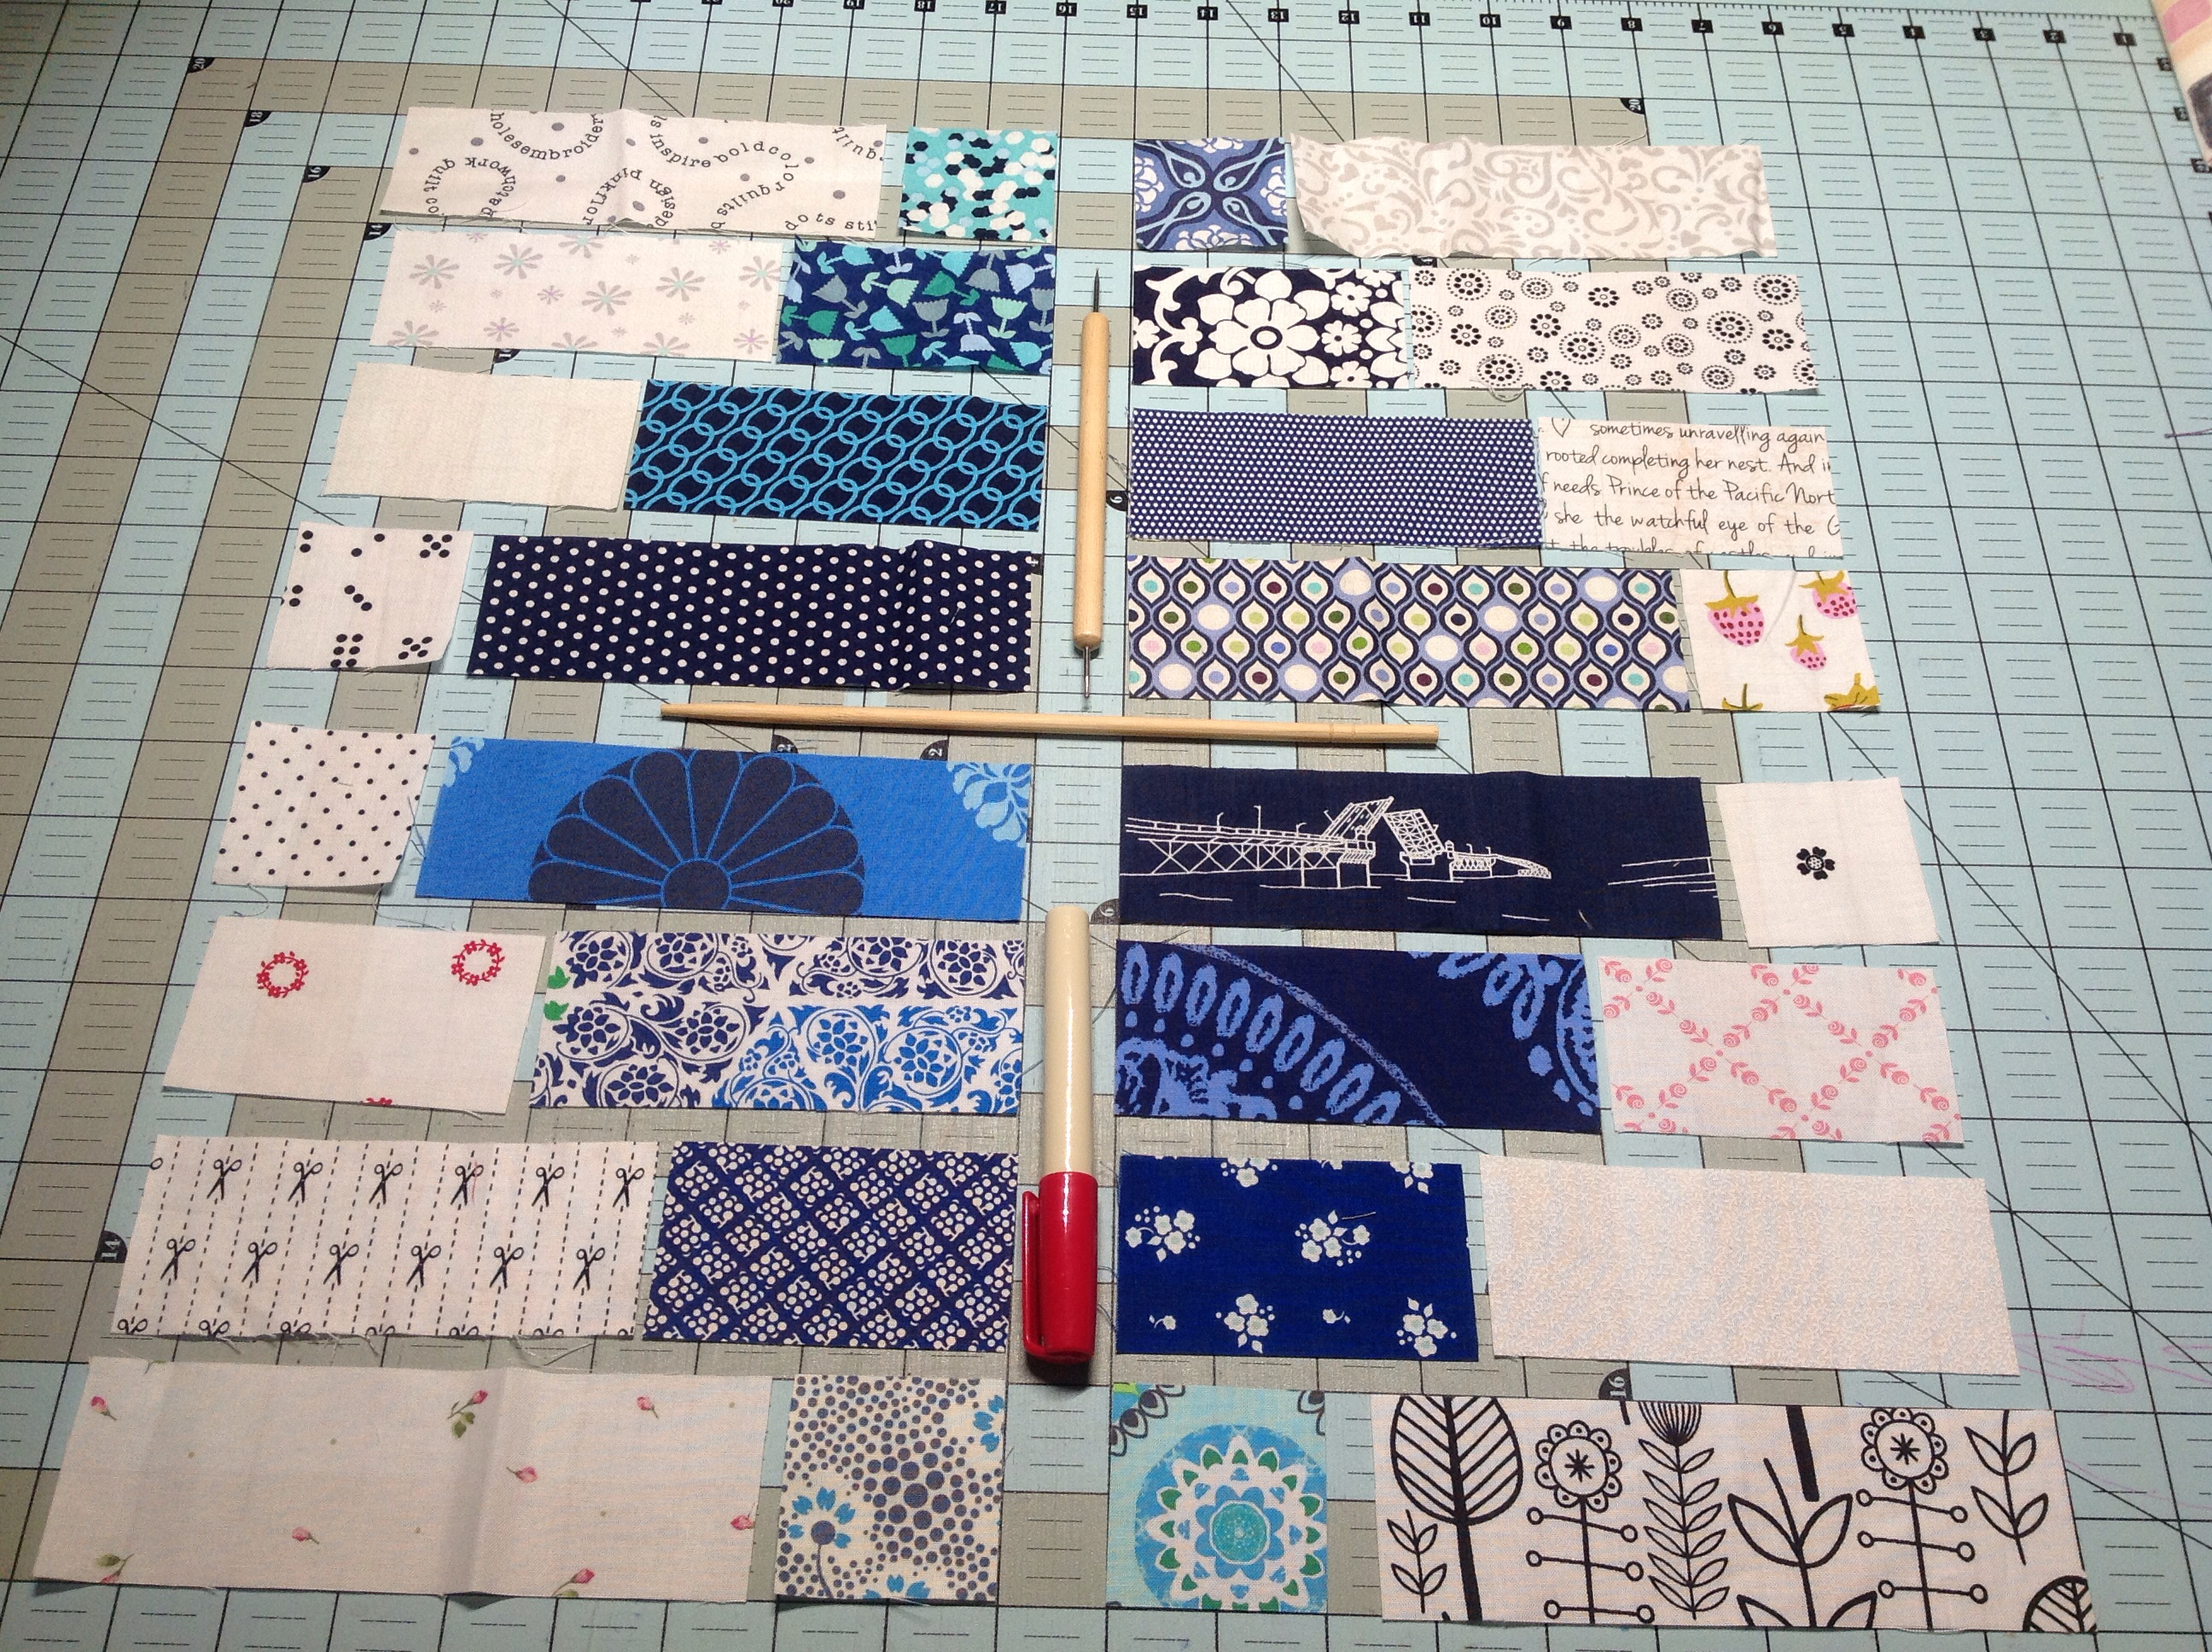
Once cut, I like to arrange into 4 quadrants as pictured below:


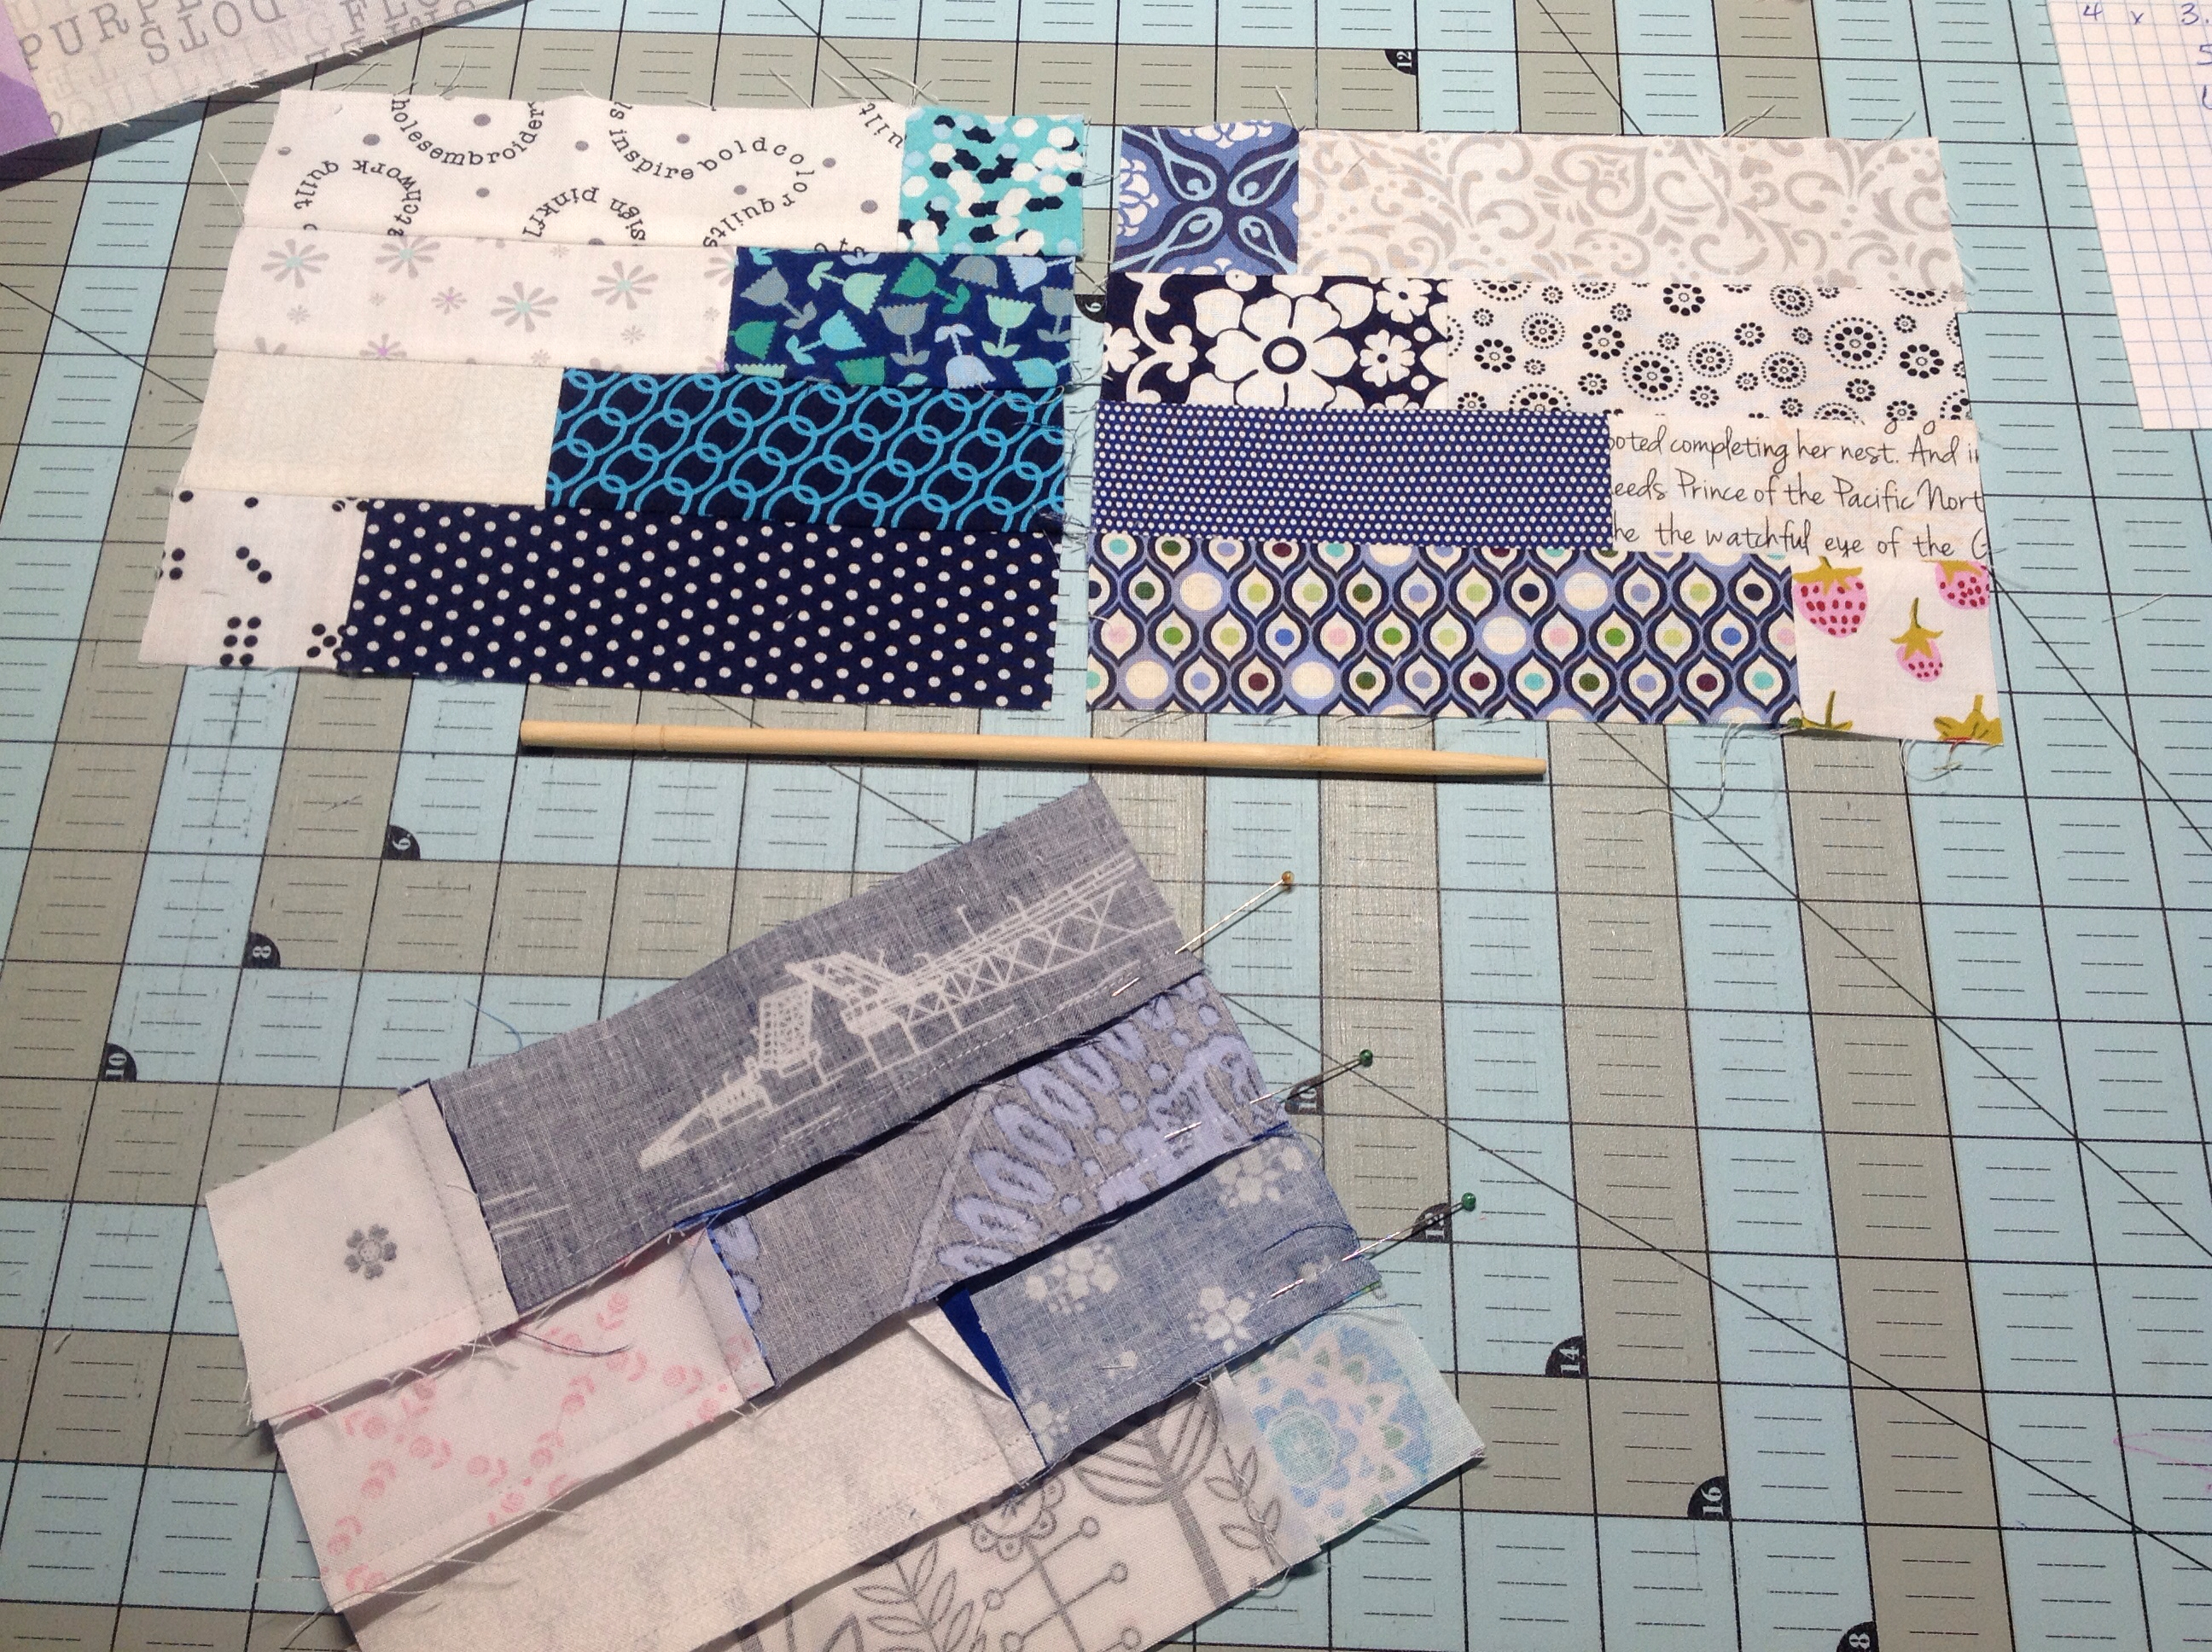
I like to sew one quadrant at a time and press the seams of the left side quadrants down and the right side quadrant seams up.  This allows me to nest my seams when pinning, and the seam will feed into the machine flat also allowing the machine's feed dogs to pull and lock the bottom seam into the top.


I now have my four quadrants sewn and am ready to sew the top left side to the top right side and the bottom left side to the bottom right.  Each quadrant should measure 8 x 6 1/4 (6.25).


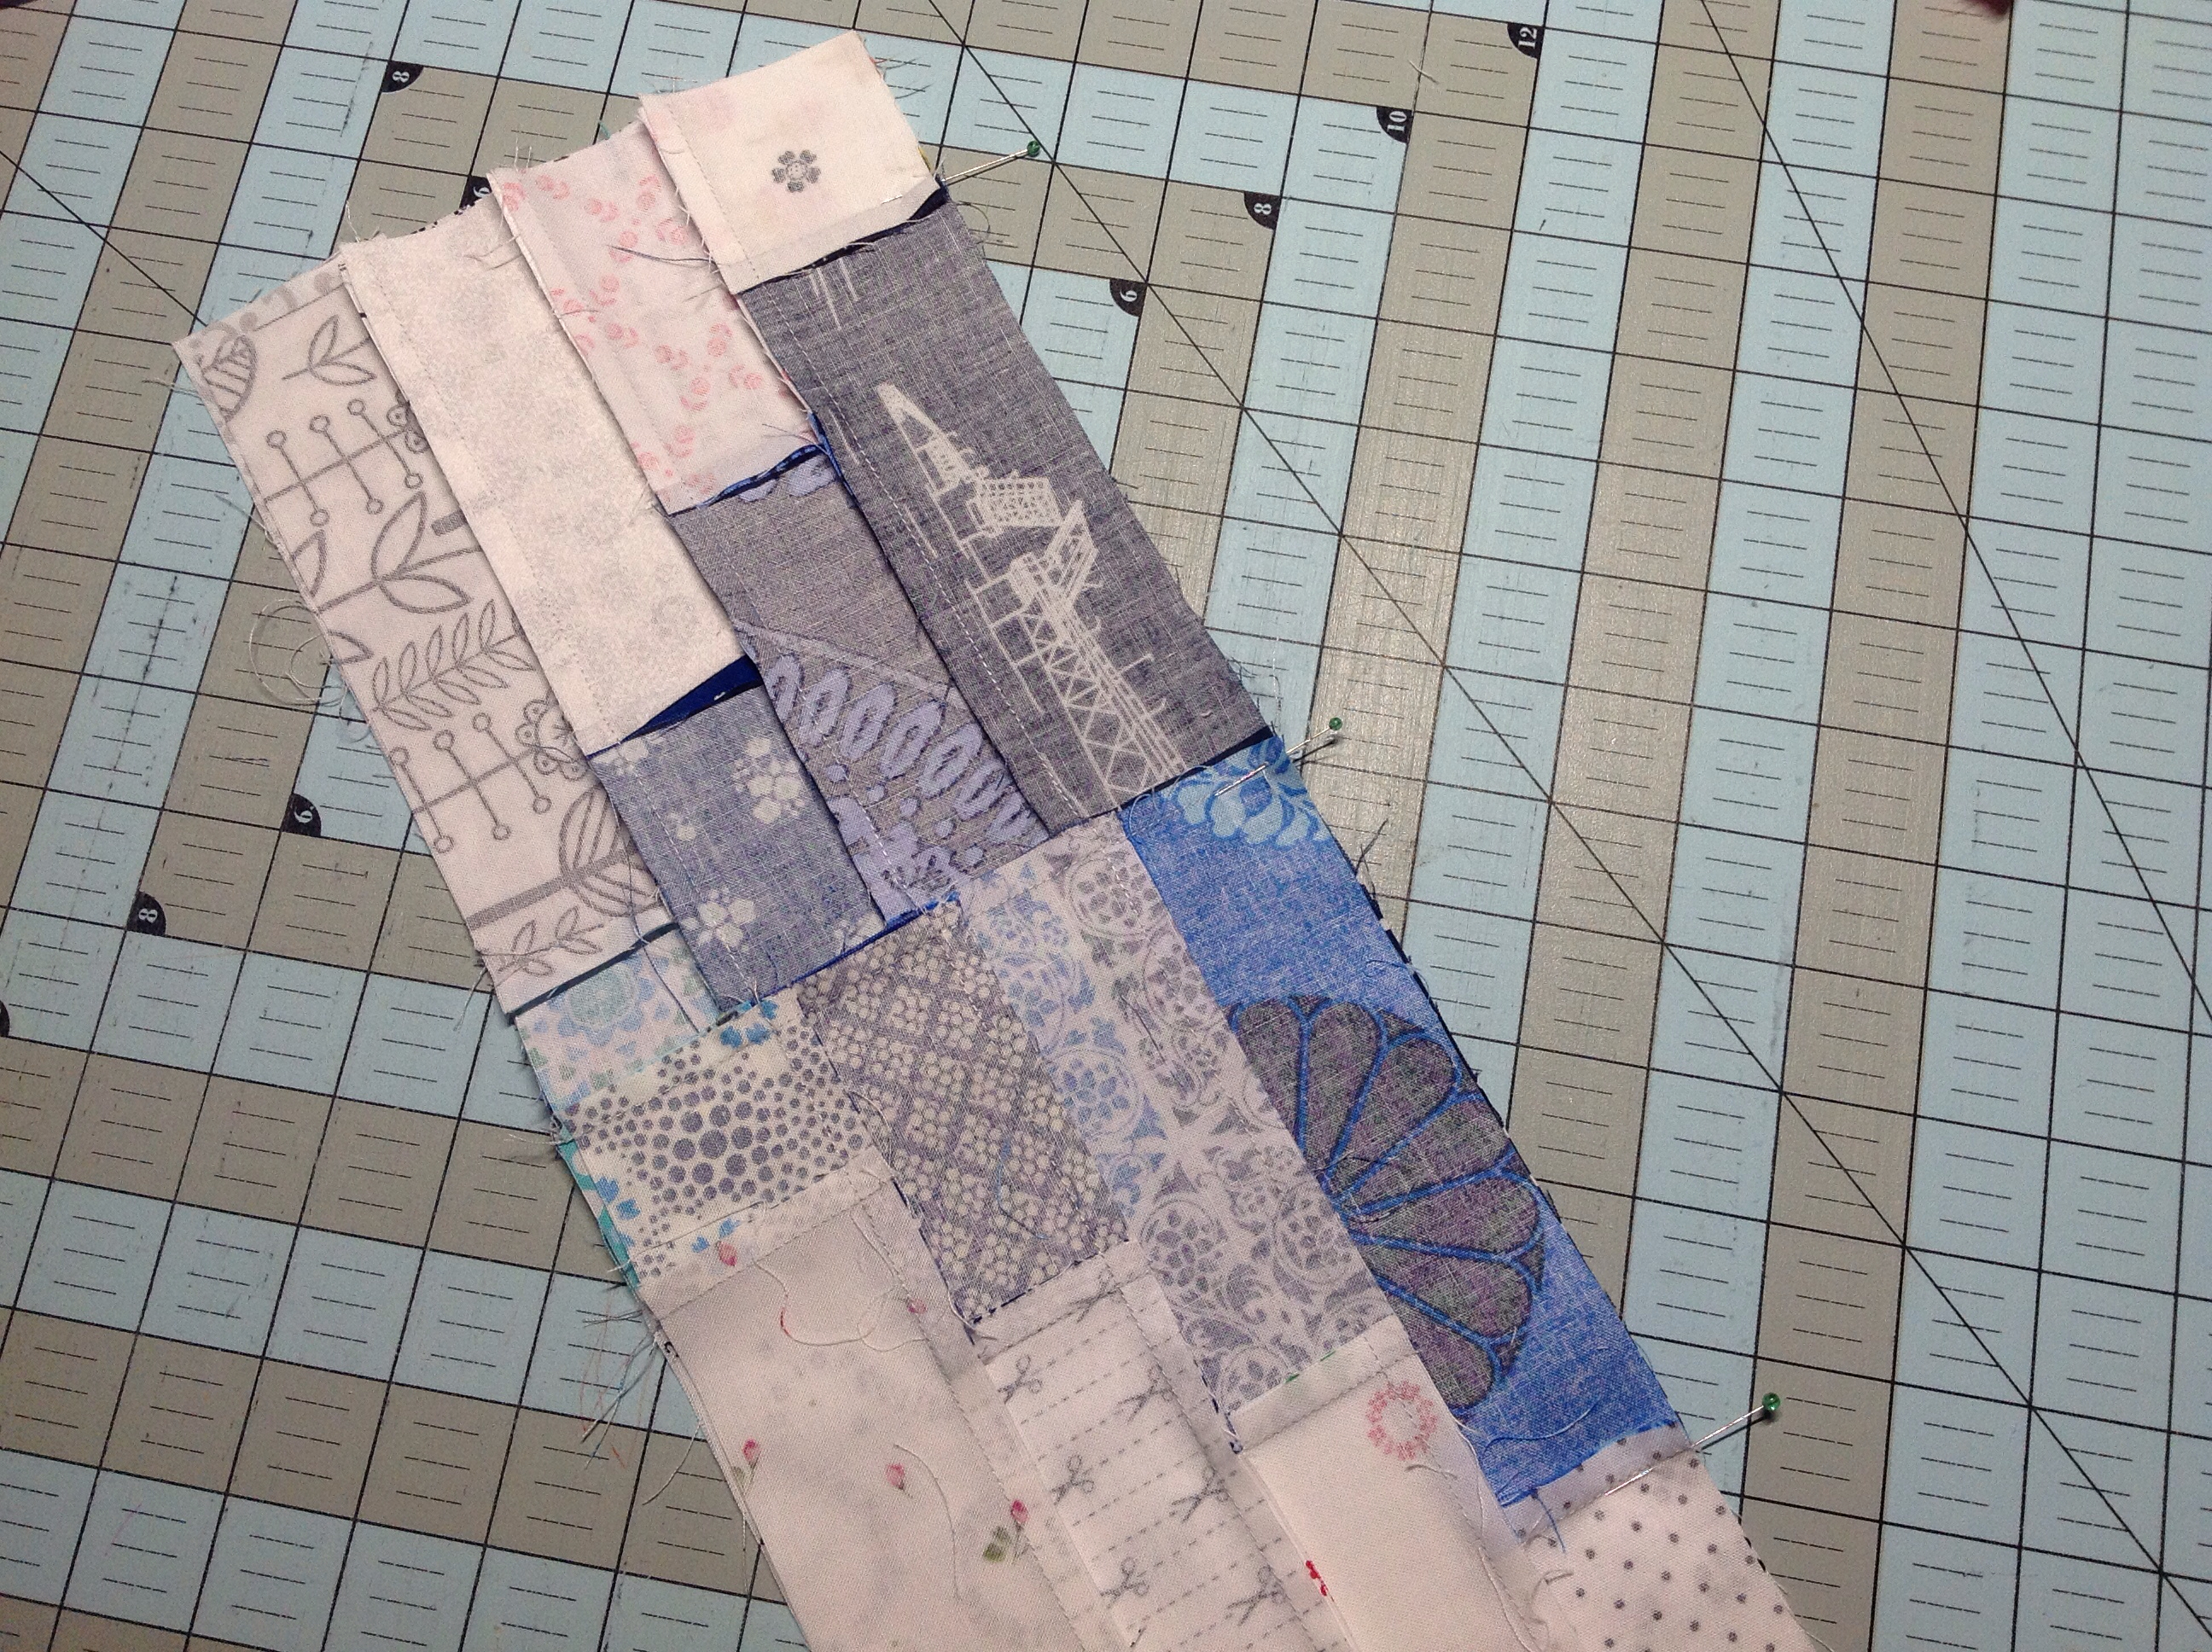
My top half seam I like to press to the left and the bottom half to the right following the reasoning expressed above.


Please line up the center, pin and sew.  This final seam I press open to avoid any 'smiling'.  Because of the scrappiness of this quilt, I am less concerned that the 6.5" coloured strip top/bottom line up - like my purple block above.  I would rather your block complete at 15.5 x 12 or larger.  Please don't worry about trimming your block, I would like to in case I need to accommodate some of the other seams.


A few little notes:

1)  I've been collecting low volume fabrics for ages!  If you do not have enough (or any), please do not hesitate to contact me and I can send you as many as you need - honest, not an issue.

2) After an afternoon talking fabrics with a quilty girlfriend, I now know how subjective the classification of low volume can be.  You'll notice I've used coloured low volume prints as well as black on white and white on white and grey fabrics.  Variety really is the spice of life, but if you are unsure please contact me.  I believe the collaboration is half the fun.

3) I love open dialogue, any questions about what I've put together can be answered through email, IG, Flickr or phone.

Ladies I can not thank you enough for taking the time to complete this block for me - I am so excited, it is really quite embarrassing xx

Caroline aka lalinsocal

Sunday, August 17, 2014

Hive #12 July Blocks

Here are the blocks we made for Laura last month in Hive 12:

Stash Bee Hive 12 July Blocks

Saturday, August 16, 2014

HIVE 6-AUGUST BLOCK TUTORIAL

What is your name? Melanie Bendorf. I've been a Deputy District Attorney in a small northern California county for about 15 years. I still love it. It's challenging, but we are tasked with seeing justice done, so we have a lot of leeway with how we handle cases. Every one is different.

Where do you live?  Rocklin, CA.  It's about 20 minutes northeast of Sacramento. We're basically 1.5 hours away from everything--San Francisco, Tahoe, etc. It's a great place for families.

Tell us about your family: I have a husband, Robert, and two grown stepkids, Robbie and Samantha. Robbie is out of college, employed, and engaged to be married next year to a lovely girl he met online, of all places! Sammy is the slow starter-she's working full time and still living with us trying to figure out what she wants to do. She makes an excellent roommate :)

And I almost forgot the most important member of the household!
We love Boston Terriers :)

The most recent addition to my family is my stepfather Ernie! As most of you noticed, this month's block post is very, very late. My mom and now-stepfather decided to get married and gave us all about two weeks' notice. As Ernie put it "At out age, not much point in waiting"---tough to argue with, really :)


They are why this month's post is soooo late, and I can't thank you ladies enough for your patience and consideration. It was tough to throw together a proper wedding with such short notice and the bride KEPT CHANGING HER MIND, lol. One day it was a simple ice cream social afterward. The next day, when she was supposed to leave me a message about what ice cream flavors to get it became a tray of deviled eggs, a tray of sandwiches, chips and salsa...you get the drill :)


How I got interested in quilting: My aunt lives pretty close by and was always wanting to spend time together and tbh pestering me to try quilting. I finally gave in and agreed to do a local quilt shop's block of the month SOLELY to make my aunt happy. Ten years and a whole lot of money later, I'm more of a fanatic than she is :)

How I organize my stash: Eh, it's *sort* of organized. I have a hall closet to myself and it's stuffed to the gills with yardage, precuts, and stuff I haven't got around to cutting up yet.
Example:


I also have some things organized in plastic drawers and tubs, scraps, fat quarters, random 3" squares,
stuff like that. My ideal is to get the spare bedroom closet cleared out and take it over!


Favorite fabric designers:  gosh, I'm not super picky. I like Tula Pink, Art Gallery, and Bonnie and Camille. Pretty eclectic taste.

The one thing I wish I'd known when I started quilting: thread size vs. needle size. Would have saved myself so much frustration with skipped stitches, etc if I'd known about it. The Schmetz website has a great needle chart available.


My favorite quilting tool:  probably the Quilter's Block Tool. It has tons of blocks with multiple sizes, so you can basically look at any quilt and reconstruct it yourself.


My favorite fictional character: I can't pick one! This is waaayy too hard a question!

AND NOW THE BLOCK!


I decided on an X-Plus block in bright colors with a grey solid background. I used Kona Shadow and Kona Ash. Anything in a light grey solid or something that reads as solid is fine. For the prints--go colorful, go wild. This quilt is going to be for my mom and Ernie's bed, and they love 60's and brights. May have something to do with aging eyesight, too, lol.

You will need:

Eight 2.5" grey squares
Four 2.5" printed squares
Four 4.5" printed squares
One 2.5"x 6.5" bright solid rectangle and TWO matching bright solid 2.5" squares.

First, draw a diagonal line from corner to corner on each of the grey squares:

 
Then, get out your four 4.5" print squares:


Take the grey squares and place them right sides together on two opposite corners of the 4.5" print squares:


Trim 1/4" away from the seam toward the corner. Press seam open. You will then have:


Take your bright rectangle and matching squares and place them in a cross position:


Lay out your corner units around the cross and place the print 2.5" squares as shown below:
 
 
Sew one print square to either end of the rectangle. Sew the other print squares to their corresponding bright solid square.  Sew a corner square to each side of the short arm of the cross:
 
 
Sew the three sections together. You will end up with:
 
 
The block should end up approximately 10", but don't worry about exact sizing. Use a scant quarter-inch seam and press seams open. I can make just about anything fit!
 
Please take whatever time you need to get this block made. I know this post is very late and you all have other obligations.
Melanie

Monday, August 4, 2014

Hive 1 - August Block Tutorial

What is your name? My name is Kathy, (iamacraftykat  on IG, craftykat on flickr and sporadic blogger at http://squishedfairy.blogspot.com.au/)

Where do you live? I live in Sydney Australia. Let me tempt you with a picture of the Sydney Opera House during Vivid : festival of the lights.They project images onto various buildings around the harbour and I thought this one was great quiltspiration!


Tell us about your family. I am married with two cheeky kids and two cheeky dogs. My husband is fairly tolerant of my love of sewing only because he is equally obsessed with woodwork, building, electrical stuff and collecting random pieces of junk. I compare my sewing room to his garage so there is no complaining there! I also have a rule that what he spends in the hardware store I can spend an equal amount on fabric - fair right? My little kidlets are Miss Elsie who is turning 4 soon and Mr Clyde is 18 months. And my original fur kids Nala and Sierra who are sisters, rescue dogs, staffy-crosses, wannabe lap dogs (24kg!) and love nothing more than to lie on quilt blocks I am trying to lay out.


Tell us how you got interested in quilting. I have pretty much always been a sewer but starting quilting after visiting a friend about 8 years ago who quilts and thought - that looks easy, maybe I will just make one quilt. Oh an what hideous fabrics I used! but you know what - we still have it on our lounge and use it all the time! I then discovered Amy Butler - it was around the Charm and Belle era and fell in love with modern quilting fabrics! I probably became more obsessed with quilting after having babies who thankfully liked sleeping for long periods at a time. Housework seemed boring so what else was there to do but quilt!
I am now part of the Greater Western Sydney Modern Quilt Guild and it is great to connect with other inspirational quilters in Sydney!


How do you organise your fabric stash? If you would have asked me this at the start of the year I would have said wherever it lands! But since realising I have to answer this question my fabrics are now sorted by colour in boxes. I have even started sorting scraps by colour into little boxes. Within the boxes themselves - whether they land!


Who is/are your favourite designers? My favourites would have to Rashinda Coleman-Hale, Heather Ross, Allison Glass, Amy Butler am loving Katarina Roccella at the moment as well. The list could go on and on...


What is the one thing you have learned that you wish you knew when you first started quilting? Scant 1/4" seam!!! So important!


What is your favourite sewing/quilting tool and why should we all go out a buy it?
My Hera marker is my most favourite tool. Seriously, everyone needs it! If you don't know what it is it marks your fabric by creasing it - no chalk, no fading pen - just a crease! I find it particularly useful for marking half square triangles and lines for quilting.


Who is your favourite fictional character and why? Ohhh hard question!  I could give such a great literary characters such as Eowyn from the Lord of the Rings Trilogy, or Pip from Great Expectations, or Holden from Catcher in the Rye, Scout from To Kill a Mockingbird who are some of my all time favourites ... but instead I am going to say Tinkerbell! My daughter loves Tinkerbell and I actually sat down the other day to watch. She is awesome - she sews her own outfits, she fixes things and "tinkers" like all good tinker fairies do.

Tutorial
OK onto the tutorial!
Firstly let me start by saying how much Stash Bee has inspired me to try out improv! So in that spirit I would love a somewhat inspired improv scrappy  bookshelf block! It will be a quilt for my daughter who is turning 4 this month and she is a bit of a book crazy girl (can you guess her mother is a librarian!).


I have been thinking about this block for months and am so excited by it! I may already have the backing and border fabrics. It contains one of my most favourite things - scraps!

Colour Palette
Scrappy is great! As this is for a little girl probably more fun colours (her favourite colour is purple!) but just like any bookshelf - a nice mix of colours!

Supplies
+ low volume backgound (text if you have it - otherwise any low volume or even white will do!)
+ handful of scrappy strips (bits of excess binding work well)
+ not necessary- but if you have any selvedges that make good book titles that would be cool
+ again not necessary - but some fusible web to applique the selvedges on. If you don't have any but would still like to include some selvedges I can applique them on at my end.


Block Size
Your blocks can be any width as I think that would make an interesting bookshelf. The height should be 10.5" unfinished (so 10" finished)

Construction
As the blocks are improv I will just show you some general instructions on how I constructed mine. If you wanted to do just vertical or horizontal, or even books on a slant I don't mind. I don't even mind if you wanted to put something besides a book on the bookshelf either! The block I have made has both vertical and horizontal books.
First cut all your scraps to different lengths. I then arranged them on the background fabric until I found a layout I liked.

For the Vertical Books - you will need to cut strips of background fabric the same width as your book. The length will depend on the height of your book but it end up at 10.5". I tend to make them a little longer and then trim to size at the end. Sew your background fabric to the top of your book and press seams open. Then sew your books together starting at the base of your books. Please press seams open.


Horizontal blocks - You first need to decide how wide you want to make this section of the block. My longest book is 9.5" so I am going to add another 4" which will make the block when sewn together 13" wide. Again, cut your fabric the width of the book and make up the length to be a couple of inches longer than your overall width for this section. This will give you a bit more leeway when positioning the blocks later. Continue for all strips and sew the background fabric to one end of your book.

Layout your books how you want them arranged, then use your ruler to find the end of your block.


Using your rotary cutter, cut of the remainder of the background fabric then swap it over to the other side of the book.

Sew these on and then sew your books together and then trim. You will then need to cut another piece for the top of your block the correct width to make it 10.5"

Assemble your book block together! (and yes, in true form my neatly stacked books are now out of order but that totally resembles my bookshelf anyway!)


Selvedges  - now this bit is completely optional! I always keep my selvedges and found a few that could be used as cute book titles. We are going to applique them onto some of the books using a fusible web. I am using a product called Heat and Bond as it is easily available in Australia, but use whatever you have. If you don't have any fusible web but would like to include some "book titles" I can easily applique them on at my end (please don't feel you need to go out an buy any!)


Press your selvedges nice and flat and bond them to your fusible web with your iron according to the manufacturers instructions. Trim them down to size.


Lay your block out and place the titles where you want. Bond them to the block using according to the manufacturers instructions

 Now with applique I like to do a small zigzag stitch around the area. For example on my Janome I put the zigzag stitch at W 2.5 L 0.9 but this might be different on your machine - Just as long as it is not a giant stitch but also captures the layers all is good!


And there you have it - a bookshelf block! Of course mix it up to make it improv and your own. I hope it is a fun block to make and thankyou for taking time to make it!

If you have any questions please let me know!

xx
kathy


Sunday, August 3, 2014

Hive 4 - August Block Tutorial

Hi everyone! My name's Alissa and I live in beautiful Denver, Colorado. My husband and I moved here in January and we love it!

My husband, Graham, and I were married in April. Here's a couple pictures of us.


I don't blog, but you can catch the few pictures I take at Instagram; I'm hoping4flowers.

We also have two fur babies, Julian the cat (11 years old) and Regina the dog (7 months old).


My mom taught me to sew when I was very young, although she was a garment sewer, and I didn't begin quilting until I was in college. And I've been quilting ever since (about 10 years!).

Unfortunately, my sewing room is not put together right now; we just bought our house a month ago, and I'm still trying to figure out how everything will work in our new space. My stash is all in boxes, but normally it would be neatly folded in stacks by color. Scraps are in clear plastic bins.

My favorite fabrics come from Carolyn Friedlander, Anna Maria Horner and Lizzie House, but what I really really love are Halloween and Christmas fabrics. I've really steered away from prints in the past few years, and I've bulked up my solids since I tend to use solids the most.

One thing I learned that I wish I knew when I started is... some rules are meant to be followed and some rules are meant to be broken. Knowing which rules fall into what category is the tricky thing that comes with practice. I personally like to bend most of the rules, and sew things my own way, but sometimes a pattern suggests something for a reason. Maybe it gives great results, or maybe its a shortcut that wasn't obvious. But you'll never know unless you try it their way AND your way.

My favorite quilting tool is my Mini Jambox! I listen to podcasts while sewing, and I would be so lonely without it! Also, I looove my magnetic pin cushion by Grabbit. I've heard they are no longer making them, so I would definitely go out and pick one up if it interests you.

Who is my favorite fictional character? I'd have to say The Lorax.

Ok, on to the block.

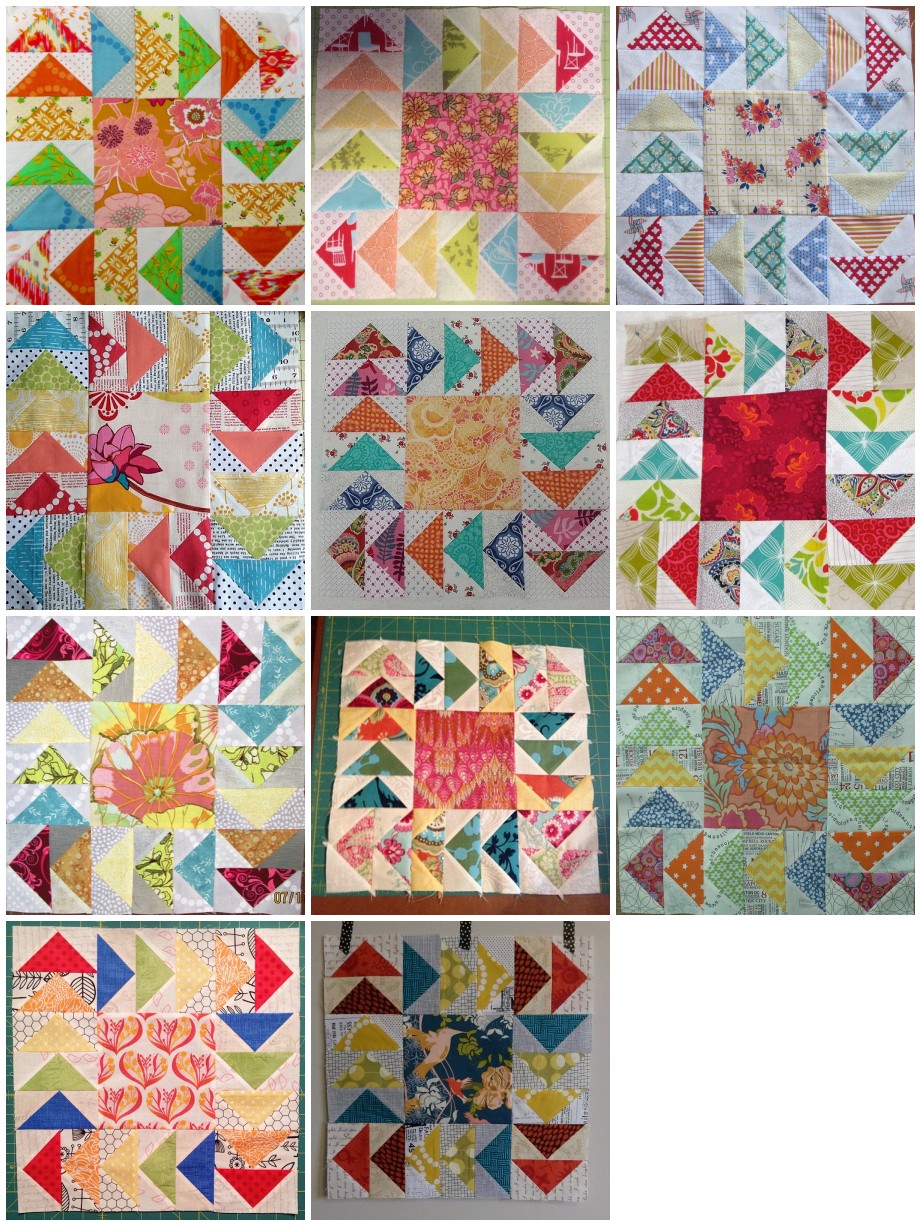
This month, I'm asking you to please make a flying geese block made with only white and cream or beige. The block can be any size, any layout, precise or wonky, and any level of creativity (although I would urge you to make something that you would love)! You can use prints or solids, as long as they are white and cream. I'd like to use as few other colors as possible, so solids or tone-on-tone would work best. I'm thinking that when I put it all together I will add in a few little shots of neon pink :)

Shimmery fabrics are always welcome (as long as they are white or cream/beige).

A word of wisdom, if you haven't already converted to the STARCH train, I would highly recommend it. Starch is so so helpful when sewing on the bias. I use Faultless Premium Starch, which I buy at Target for about $1.99.

Here's a few tutorials I find helpful. I love making four at a time (no waste!).

http://www.patchpieces.com/files/flyinggeese.pdf (PDF, this is the tutorial I always go back to)
http://www.houseonhillroad.com/my_weblog/2013/09/make-flying-geese-fast-a-tutorial.html - this one has a snippet on how big to cut each piece for the desired size of geese
http://chasingcottons.blogspot.com/2011/10/circle-of-geese-block-tutorial.html
http://www.generations-quilt-patterns.com/support-files/flying-geese-3-no-waste.pdf (PDF chart for cutting sizes, using 4 at a time method)

Have fun, and thank you, ladies!!